
Gettin
g
Started Guide
Océ Client Tools
™
Version 1.6
Overview
Océ Client Tools software is a free collection of batch file processing and printing utilities for architects, engineers,
and designers. The tools create high-quality, print-ready files from AutoCAD
®
DWG
®
, DWF
®
, and other file
formats and make digital print job submission fast, easy, reliable, and secure.
These tools are designed to be used with the Océ Repro Desk
®
Server 1.6 and the Océ Plan Center digital plan
room system. This Getting Started Guide explains when and how to use each tool, and describes the destinations to
which you can submit digital print jobs.
Getting Started
Océ Client Tools can be installed from a CD or from a Web download. The installer detects whether AutoCAD
software is present and installs the appropriate tools. You can launch the primary application, Océ Publisher, from a
desktop icon, from the Windows Start menu, or from the Océ Publisher toolbar button in AutoCAD. You can also
initiate printing and publishing by selecting PDF or LDF files in a directory and clicking Océ Print on the right-click
menu.
Technical Support
If you need assistance, contact the individual or organization that provided you with Océ Client Tools, or visit the
online support page at www.oceplancenter.com/support.asp.
Description of Océ Client Tools
Océ Client Tools consist of four utilities:
• Océ Publisher – This utility enables you to convert files of various types* into a print-ready format known
as LDF and preview them in a WYSIWYP (What You See Is What You Print) state. You can then submit
the files to any available destination.
• Océ LDF Driver for AutoCAD – This printer driver enables you to convert a DWG file (2000 – 2006)
into LDF and preview it in a WYSIWYP state. You can then submit the file to any available destination.
• Océ LDF Driver for Windows – This printer driver enables you to convert a file from within any
Windows application into LDF and preview it in a WYSIWYP state. You can then submit the file to any
available destination.
• Océ Document Viewer – This utility enables you to preview LDF files in a WYSIWYP state from within
Windows Explorer. You can view thumbnail images in Explorer or preview and manipulate images in a full-
screen viewer.
* Supported file formats: AutoCAD DWG and DWF; HPGL and HPGL2; CALS; TIFF; CalComp; VIC; PostScript and
PDF (with optional converter).
Océ Client Tools 1 Getting Started Guide
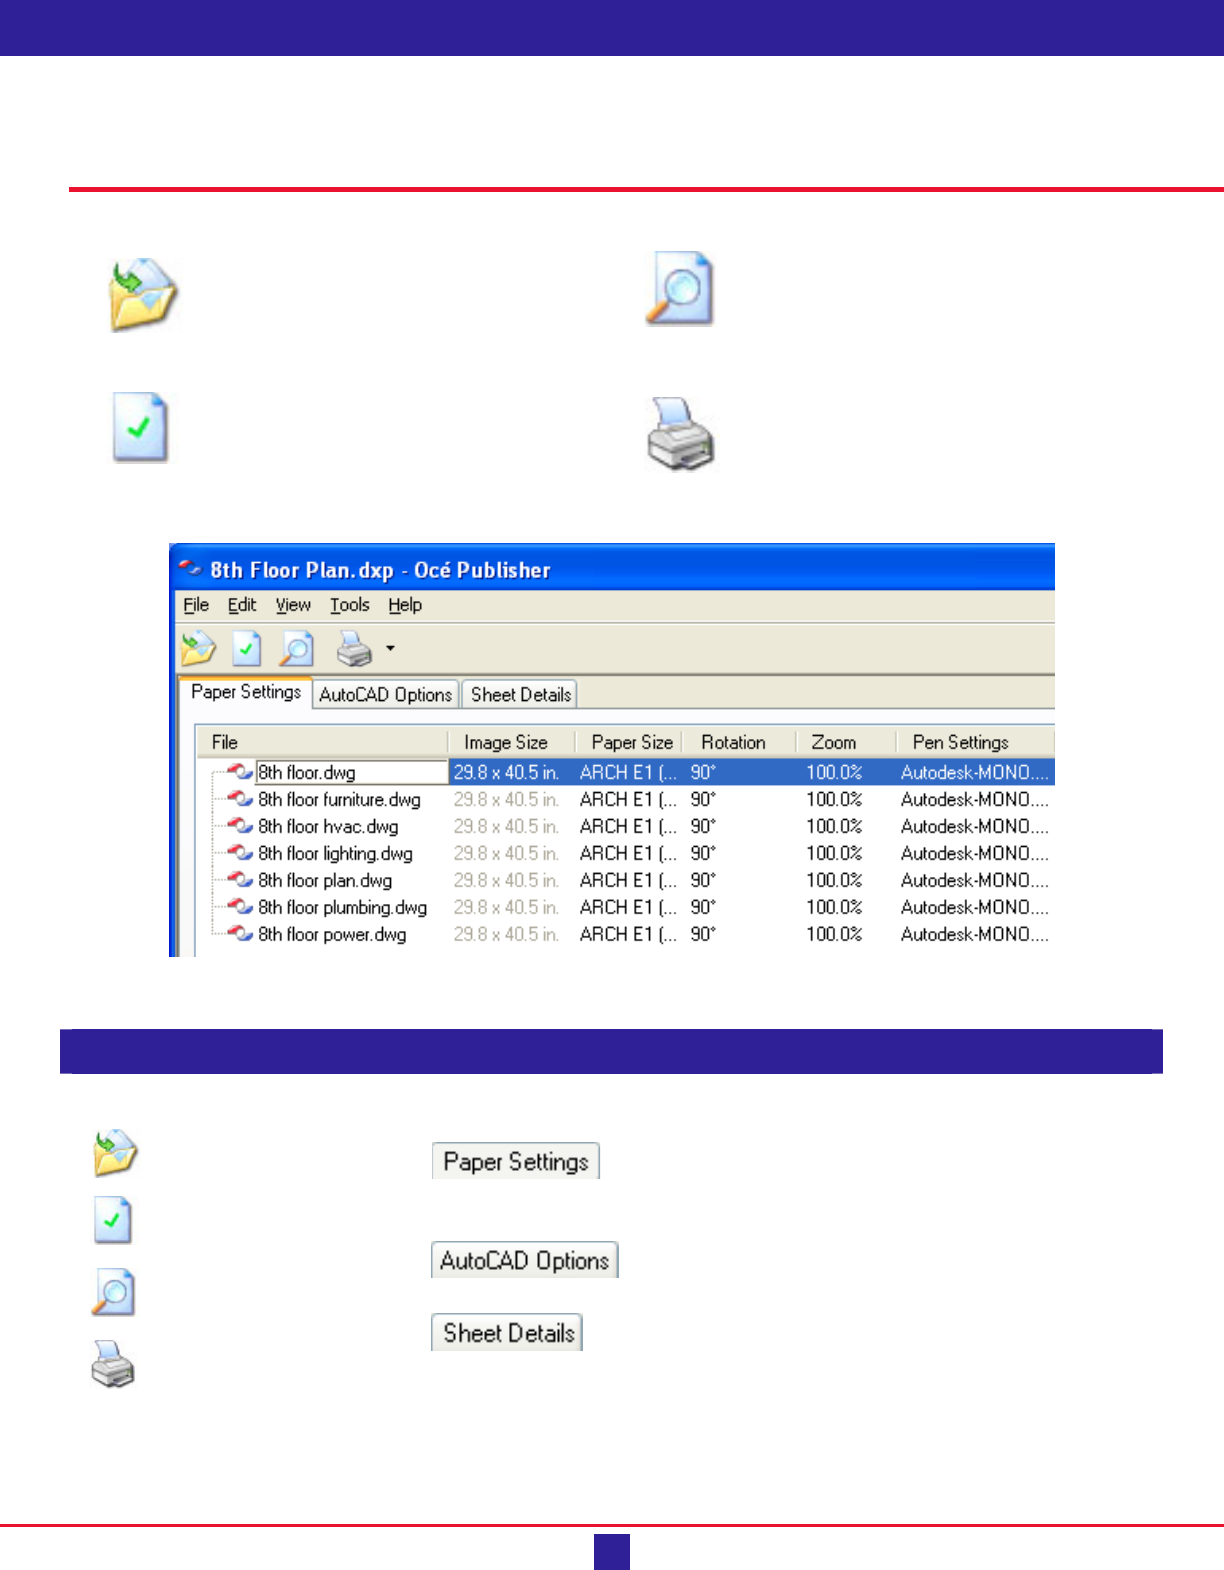
Using Océ Publisher
To use Publisher to prepare and submit files, follow the toolbar buttons from left to right.
1. Add files: Select the files you wish to
print or publish and click Open. Change
properties on the Paper Settings,
AutoCAD Options, and Sheet Details
tabs as necessary.
3. Preview files: Preview files in a
WYSIWYP (What You See Is What You
Print) viewer. Use the viewer toolbar
buttons to Fit Window, Zoom, Move or
Pan.
2. Process files: Process files into a
print-ready format (LDF). Respond to
any prompts to adjust files. Processed
files display Océ LDF icons.
4. Submit files: Submit files to any
supported destination. (See page 5 for
instructions to print, publish or archive
files.)
Key
Toolbar Buttons
Add Files
Process All
View
Océ Print All
Properties Tabs
View and edit (depending on file type) Image Size,
Paper Size, Alignment, Rotation, Zoom, and Pen
Settings.
View and edit Layout, Plot By, Plot Scale,
Orientation, and Units.
View and edit Sheet Name, Description, Revision,
and Author.
Océ Client Tools
2 Getting Started Guide
Using other Océ Client Tools
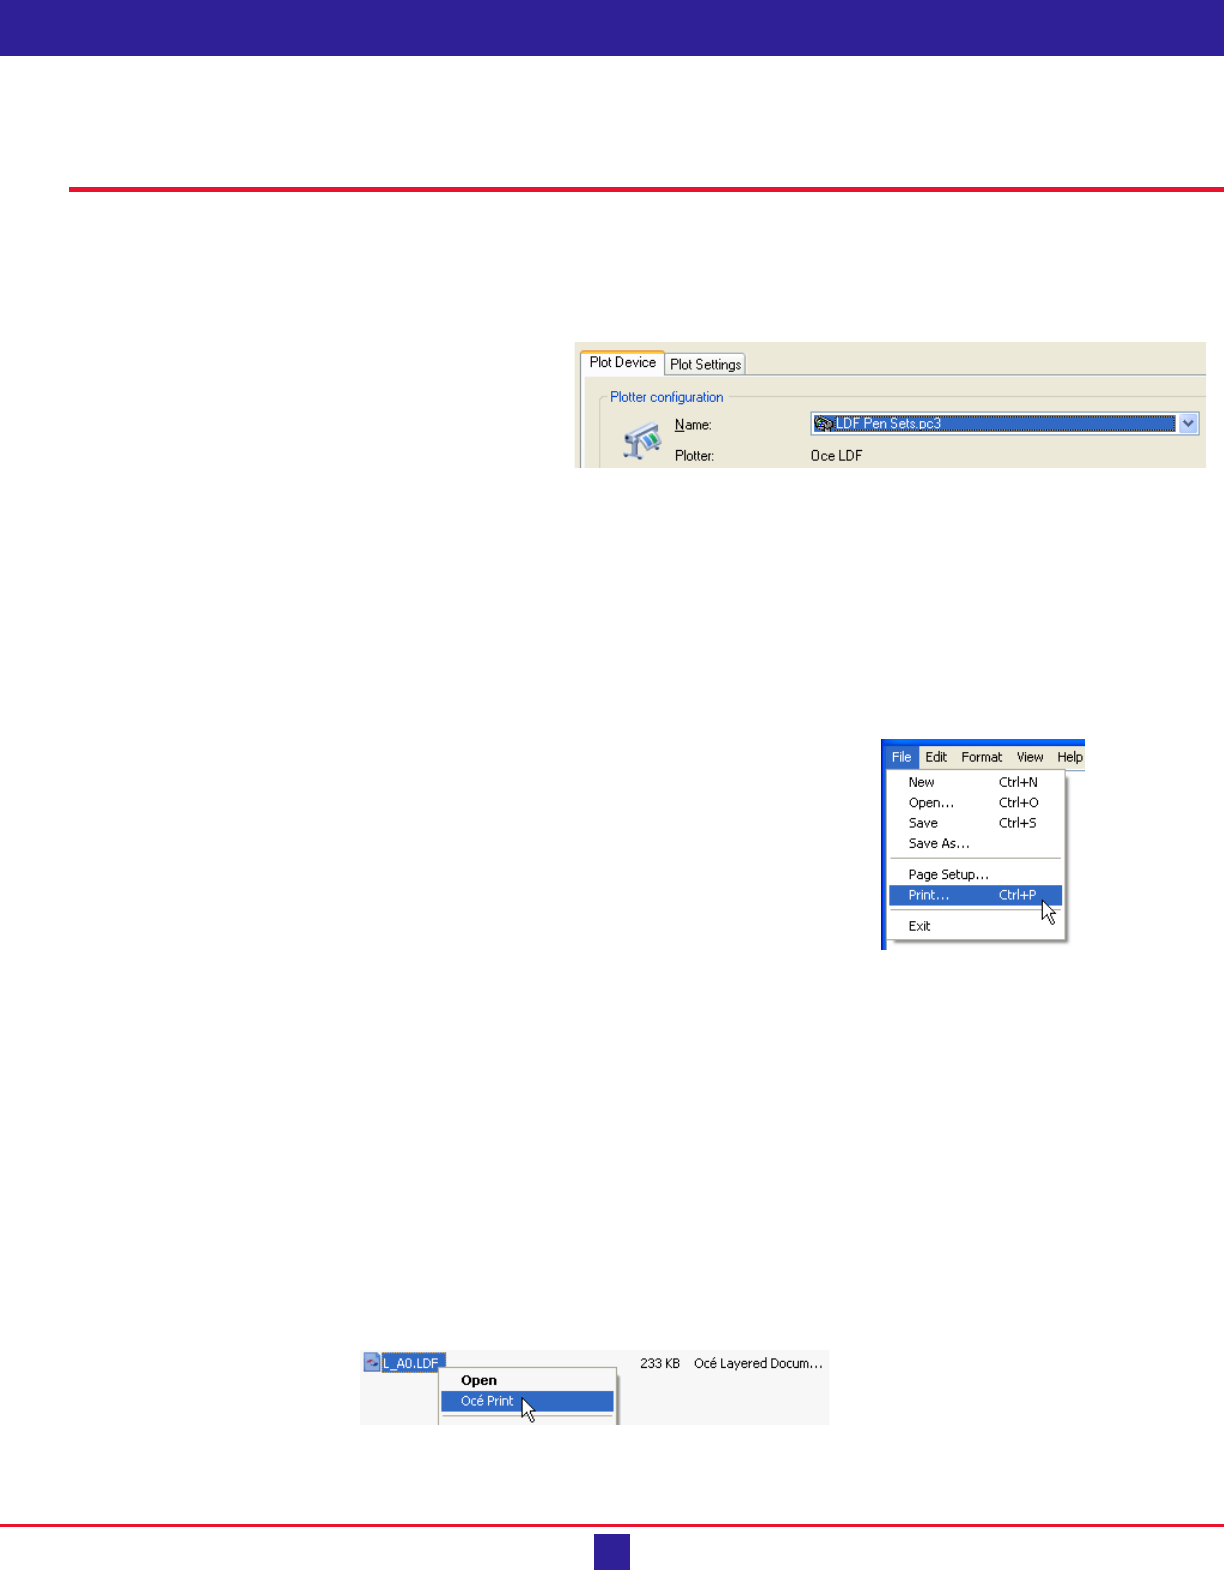
Océ LDF Driver for AutoCAD
1. In AutoCAD, on the File menu, click Plot.
2. In the Plot Device list, click the appropriate LDF driver (‘LDF Pen Sets.pc3’ for pen sets or
‘LDF Plot Styles.pc3’ for plot styles).
3. In the Plot to File box, browse to or enter
the path to your preferred directory.
4. On the Plot Settings tab, choose your
desired settings.
5. Click the Full Preview button to view the drawing.
6. Close the preview window, click OK, and select a destination (see next page).
Note: To configure custom properties for the Océ LDF Driver for AutoCAD: After step 2 above, click the
Properties button. On the Device and Document Settings tab, click Custom Properties, and under Access
Custom Dialog, click the Custom Properties button. Make changes on the Plot Options tab and the
Information tab.
Océ LDF Driver for Windows
You can publish LDF documents and multi-page small-format PDF specification
documents to Océ Plan Center using Océ LDF Driver for Windows.
1. In a Windows application, on the File menu, click Print.
2. In the Printer list, click Océ LDF Driver for Windows.
3. Click OK.
4. Choose a document format, log in to Océ Plan Center, and publish the
documents.
Océ Document Viewer
You can open the Océ Document Viewer by double-clicking an LDF file in Windows Explorer. Or, on the Start
menu, point to Programs or All Programs, then Océ, and then Océ Repro Desk Client Tools, and click Océ
Document Viewer.
To adjust the view (image size, zoom), use toolbar buttons.
To submit the file, on the File menu, click Océ Print, and select a destination (see next page).
Windows Explorer extensions
You can see thumbnails of LDF files by clicking Thumbnails on the View menu in Windows Explorer.
To submit an LDF or PDF files to an available destination, you can right-click the file, click Océ Print, and select a
destination (see next page).
Océ Client Tools
3 Getting Started Guide
Selecting a destination
You can use Océ Client Tools to submit files to several destinations. The availability of various destinations
depends on your needs, the capabilities of the reprographer, and the version of Océ Client Tools that you are using.
Supported destinations include:
• Océ Repro Desk Server Queue – Submit files to a local Océ Repro Desk Server 1.6. To set up Repro
Desk Server to accept submissions from Client Tools, you need the Client Tools Configuration utility that
comes on the Repro Desk Server CD.
• Océ Plan Center Online Service – Publish files to an Océ Plan Center online digital plan room. You
must first have accepted an email invitation from an Océ Plan Center “Authorized Host” reprographer and
completed the online registration. The online service is for viewing and managing files and for ordering
prints.
• Print to File – Save files to a local network directory. You can then do any of the following: View the
images using the Océ Document Viewer; submit the files to an available destination by right-clicking them
in Microsoft Windows Explorer and clicking Océ Print; submit them to a reprographer by another
mechanism, such as email, FTP, or CD.
• Océ Shop Manager Archive – Publish files to a local archive that is organized like a Plan Center online
plan room.
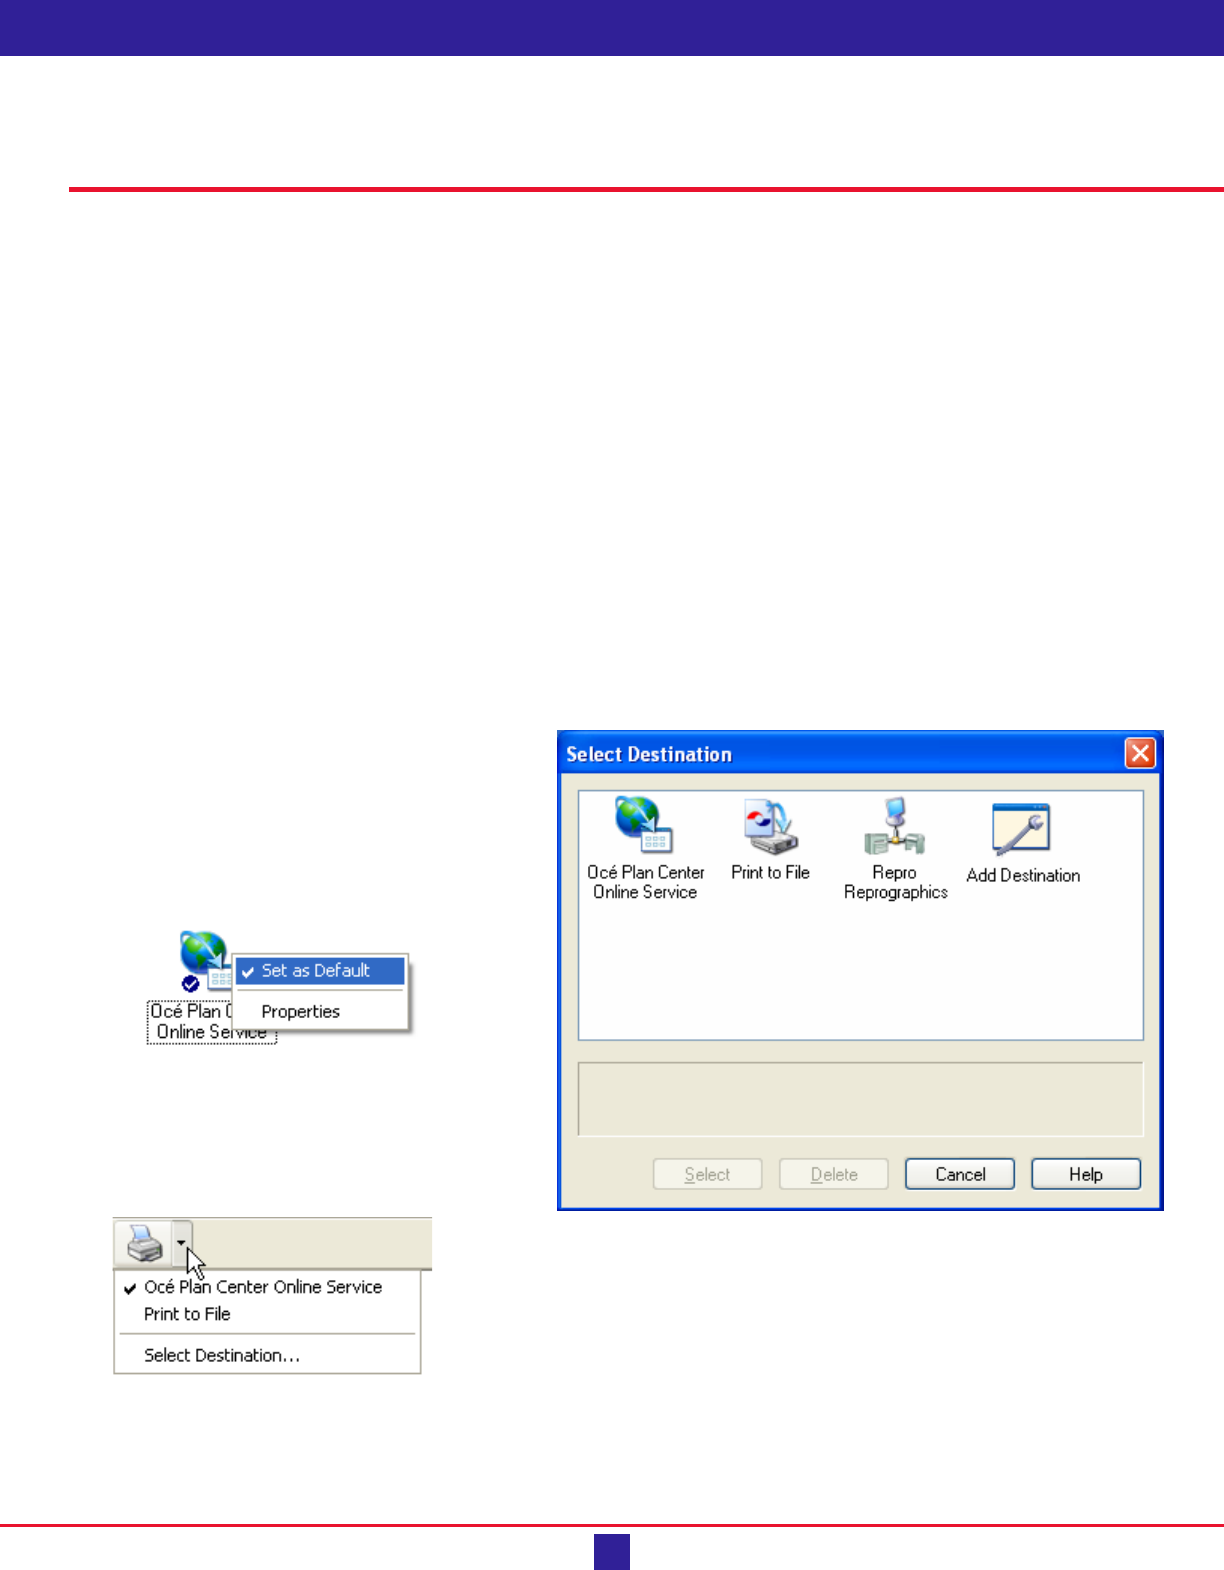
When you choose to “Océ Print” from Publisher, Document Viewer, AutoCAD, or another Windows application,
the Select Destination dialog box appears.
Default Destination
If you have selected a default destination, a check-
mark appears on that destination icon. To select a
default destination, right-click the appropriate
icon and click Set as Default.
Once you set a default destination, the Select
Destination dialog box no longer appears when
you click the printer on the Océ Print All button.
To open the Select Destination dialog box, click
the arrow next to the Océ Print All button.
Add Destination
You can add a new destination icon to the Select
Destination dialog box by double-clicking the Add
Destination icon, selecting the destination type, and
configuring the new destination.
Océ Client Tools
4 Getting Started Guide
Submitting files
Below are instructions for submitting files to some Océ Client Tools destinations.
Océ Repro Desk Server Queue
1. In the Select Destination dialog box, double-
click the Océ Repro Desk Server Queue icon.
The local server queue must already have
been configured using the Océ Client Tools
Configuration utility from the Océ Repro
Desk Server CD. This requires a license of
Océ Repro Desk Server.
2. Complete the work order form.
Some fields might be pre-filled with
information from the server.
Your contact information is saved for future
work orders.
3. Click OK.
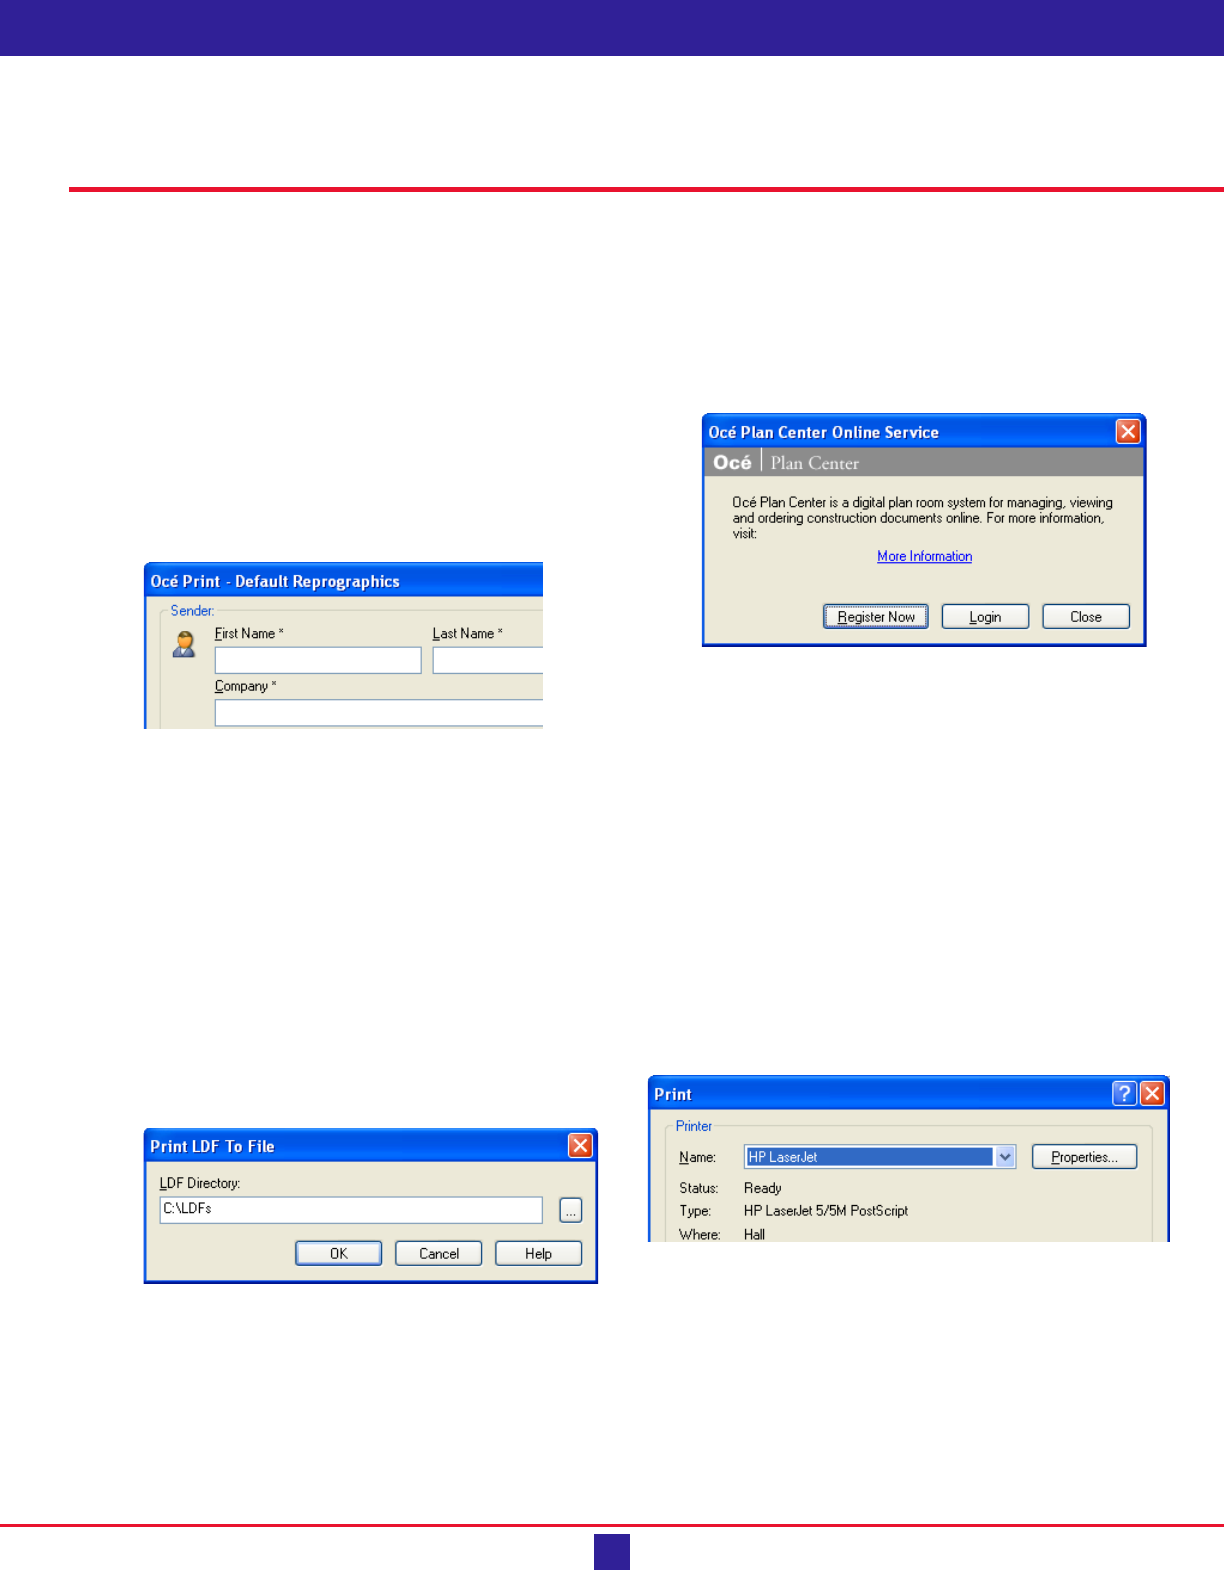
Print to File
1. In the Select Destination dialog box, double-
click the Print to File icon.
2. In the Print LDF to File dialog box box,
browse to or enter the path to the directory
where you store LDF files.
3. Click OK.
Océ Plan Center Online Service
1. In the Select Destination dialog box, double-
click the Océ Plan Center Online Service icon.
2. Log in to Océ Plan Center.
3. In the Select a Target Issue dialog box,
navigate to the issue to which you want to add
files.
4. Select New File Before, New File After, or
Republish to add the files to the desired
positions in the issue.
5. Click Publish.
Windows Printer
1. In Océ Publisher, on the File menu, point to
Windows Print and click Print.
2. Select a local Windows system printer for a
check print, maximum 11” by 17”.
3. Click OK.
Océ Client Tools
5 Getting Started Guide
Tips & Tricks
• If you are re-publishing files to Océ Plan
Center, you can retrieve the latest sheet
name, description, and discipline
information. Click the Retrieve Details
button that appears on the Océ Plan Center
dialog box during publishing.
• You can print LDF files up to 11” by 17” on
Windows printers using Océ Publisher and
in wide format using Océ Repro Desk
Server.
• Océ Publisher supports external PostScript
and PDF processing software. Select Tools
| Options | File Processing |
PostScript/PDF to specify a third-party
converter.
• Océ Publisher can automatically audit all
AutoCAD drawings before plotting. Select
Tools | Options | File Processing |
AutoCAD and select the Audit Drawings
Before Plotting check box.
• Océ Publisher can automatically add all
AutoCAD drawing layouts when a file is
added. Select Tools | Options | File
Processing | AutoCAD and select the Add
All Layouts check box.
• Océ Publisher can extract the Sheet Name,
Description, Revision, and Author from
source files. Select Tools | Options | Sheet
Details and a file format to specify where
Océ Publisher should get this information.
• Océ Publisher supports drag-and-drop to
change the positions of files in the print
sequence.
• Océ Publisher supports Shift-click and Ctrl-
click for multi-selection of files for viewing,
processing, or printing.
• You can create and apply custom digital
stamps and apply them to LDF files with
the Stamp Editor tool in Océ Publisher.
Océ Wide Format Printing Systems
5450 North Cumberland Avenue
Chicago, Illinois 60656
1-800-714-4427
1-773-714-4076
Fax 1-773-714-4056
http://www.oceusa.com
e-mail [email protected]
Océ-Canada Inc.
4711 Yonge Street, Suite 1100
Toronto, Ontario M2N6K8
1-800-668-1945
1-416-224-5600
e-mail [email protected]
© 2004–2006 Océ
Océ is a registered trademark of Océ-Technologies B.V. All other products and trademarks or registered trademarks are the property
of their owners and are respectfully acknowledged.
Océ reserves the right to revise this publication and to make changes from time to time in the content hereof without obligation to
notify any person of such revision or changes.
Océ Client Tools
6 Getting Started Guide
