
Coherent PDF
Command Line Tools
User Manual
Version 2.7 (February 2024)
Coherent Graphics Ltd
For bug reports, feature requests and comments, email
© Coherent Graphics Limited. All rights reserved. ISBN 978-0957671140
Adobe, Acrobat, and Adobe PDF are registered trademarks of Adobe Systems Incorporated.
Windows, Powerpoint and Excel are registered trademarks of Microsoft Corporation.
Quickstart Examples
These examples demonstrate just a few of the facilities provided by the Coherent PDF Command
Line Tools. See each chapter for more commands and full details.
Chapter 1: Basic Usage
cpdf in.pdf 1-3,6 -o out.pdf
Read in.pdf, select pages 1, 2, 3 and 6, and write those pages to out.pdf.
cpdf in.pdf even -o out.pdf
Select the even pages (2, 4, 6...) from in.pdf and write those pages to out.pdf.
cpdf -merge in.pdf in2.pdf AND -add-text "Copyright 2024"
-o out.pdf
Using
AND
to perform several operations in order, here merging two files together and adding a
copyright stamp to every page.
cpdf -args args.txt
Read args.txt and use its contents as the command line arguments for cpdf.
Chapter 2: Merging and Splitting
cpdf -merge in.pdf in2.pdf -o out.pdf
Merge in.pdf and in2.pdf into one document, writing to out.pdf.
iii
cpdf -split in.pdf -o Chunk%%%.pdf -chunk 10
Split in.pdf into ten-page chunks, writing them to Chunk001.pdf, Chunk002.pdf etc.
cpdf -split-bookmarks 0 in.pdf -utf8 -o @B.pdf
Split
in.pdf
on bookmark boundaries, writing each to a file whose name is the bookmark
label.
cpdf -split-max 1Mb in.pdf -o %%%.pdf
Split in.pdf into files of 1Mb or less
cpdf -spray in.pdf -o a.pdf -o b.pdf -o c.pdf
Split in.pdf, writing pages 1,4,7... to a.pdf, 2,5,8... to b.pdf and 3,6,9... to c.pdf.
Chapter 3: Pages
cpdf -scale-page "2 2" in.pdf -o out.pdf
Scale both the dimensions and contents of in.pdf by a factor of two in x and y directions.
cpdf -scale-to-fit usletterportrait in.pdf -o out.pdf
Scale the pages in in.pdf to fit the US Letter page size, writing to out.pdf
cpdf -shift "26pt 18mm" in.pdf -o out.pdf
Shift the contents of the page by 26 pts in the x direction, and 18 millimetres in the y direction,
writing to out.pdf
cpdf -rotate-contents 90 in.pdf -o out.pdf
Rotate the contents of the pages in in.pdf by ninety degrees and write to out.pdf.
iv

cpdf -cropbox "0 0 600pt 400pt" in.pdf -o out.pdf
Crop the pages in in.pdf to a 600 pts by 400 pts rectangle.
Chapter 4: Encryption and Decryption
cpdf -encrypt 128bit fred joe in.pdf -o out.pdf
Encrypt
in.pdf
using 128bit PDF encryption using the owner password
fred
and the user
password joe and writing the encrypted file to out.pdf
cpdf -decrypt in.pdf owner=fred -o out.pdf
Decrypt in.pdf using the owner password, writing to out.pdf.
Chapter 5: Compression
cpdf -compress in.pdf -o out.pdf
Compress the data streams in in.pdf, writing the result to out.pdf.
cpdf -decompress in.pdf -o out.pdf
Decompress the data streams in in.pdf, writing to out.pdf.
cpdf -squeeze in.pdf -o out.pdf
Squeeze
in.pdf
, writing to
out.pdf
. Squeezing rearranges the structure of the PDF file to
save space.
Chapter 6: Bookmarks
cpdf -list-bookmarks -utf8 in.pdf
List the bookmarks in in.pdf.
v

cpdf -add-bookmarks bookmarks.txt in.pdf -o out.pdf
Add bookmarks in the same form from a prepared file
bookmarks.txt
to
in.pdf
, writing to
out.pdf. JSON alternatives are also available.
cpdf -table-of-contents in.pdf -o out.pdf
Typeset a table of contents from existing bookmarks and prepend to the document.
Chapter 7: Presentations
cpdf -presentation in.pdf 2-end -trans Split -duration 10
-o out.pdf
Use the Split style to build a presentation from the PDF
in.pdf
, each slide staying 10 seconds on
screen unless manually advanced. The first page, being a title does not move on automatically,
and has no transition effect.
Chapter 8: Logos, Watermarks and Stamps
cpdf -stamp-on watermark.pdf in.pdf -o out.pdf
Stamp the file watermark.pdf on to each page of in.pdf, writing the result to out.pdf.
cpdf -topleft 10 -font Courier
-add-text "Page %Page\nDate %d-%m-%Y" in.pdf -o out.pdf
Add a page number and date to all the pages in
in.pdf
using the Courier font, writing to
out.pdf.
Chapter 9: Multipage Facilities
cpdf -impose-xy "2 1" in.pdf -o out.pdf
Two up impose the file in.pdf, writing to out.pdf.
vi
cpdf -pad-after in.pdf 1,3,4 -o out.pdf
Add extra blank pages after pages one, three and four of a document.
cpdf -chop "2 2" in.pdf -o out.pdf
Chop each page into four quarters, including each in the output.
Chapter 10: Annotations
cpdf -list-annotations-json in.pdf > out.json
List the annotations in a file in.pdf to standard output, redirecting to file out.json.
cpdf -set-annotations-json out.json in.pdf -o out.pdf
Add the annotations from a JSON annotations file to in.pdf, writing to out.pdf.
cpdf -remove-annotations in.pdf -o out.pdf
Remove the annotations from in.pdf, writing to out.pdf.
Chapter 11: Document Information and Metadata
cpdf -info -utf8 in.pdf
List document metadata for in.pdf.
cpdf -set-title "The New Title" -also-set-xmp in.pdf -o out.pdf
Set the document title of in.pdf, writing to out.pdf.
cpdf -hide-toolbar true in.pdf -o out.pdf
Set the document
in.pdf
to open with the PDF Viewer’s toolbar hidden, writing to
out.pdf
.
vii

cpdf -set-metadata metadata.xml in.pdf -o out.pdf
Set the metadata in a PDF
in.pdf
to the contents of the file
metadata.xml
, and write the
output to out.pdf.
cpdf -set-page-layout TwoColumnRight in.pdf -o out.pdf
Set the document
in.pdf
to open in PDF Viewer showing two columns of pages, starting on
the right, putting the result in out.pdf.
cpdf -set-page-mode FullScreen in.pdf -o out.pdf
Set the document
in.pdf
to open in PDF Viewer in full screen mode, putting the result in
out.pdf.
cpdf -print-page-labels-json in.pdf
Show, in JSON format, the page labels in in.pdf.
cpdf -composition in.pdf
Show how much data in in.pdf is used for images, fonts etc.
Chapter 12: File Attachments
cpdf -attach-file sheet.xls in.pdf -o out.pdf
Attach the file sheet.xls to in.pdf, writing to out.pdf.
cpdf -remove-files in.pdf -o out.pdf
Remove any attachments from in.pdf, writing to out.pdf.
cpdf -dump-attachments in.pdf -o /home/fred/attachments
Dump attachments to file, given the directory to put them in.
viii
Chapter 13: Images
cpdf -image-resolution 600 in.pdf
Identify and list any image used at less than 600dpi.
cpdf -extract-images in.pdf -im /usr/bin/magick -o output/%%%
Extract images from in.pdf to directory output (with the help of imagemagick).
cpdf -process-images -jpeg-to-jpeg 65 in.pdf -o out.pdf
Process JPEG images in in.pdf to 65% quality, writing the output to out.pdf.
Chapter 14: Fonts
cpdf -list-fonts in.pdf
List the fonts in use, and what pages they are used on.
cpdf -missing-fonts in.pdf
List missing fonts.
Chapter 15: PDF and JSON
cpdf in.pdf -output-json -utf8 -output-json-parse-content-streams
-o out.json
Write the PDF in JSON format to the given file, parsing its content streams into individual JSON
objects too.
cpdf -j in.json -o out.pdf
Load a PDF in JSON format, writing to an output PDF.
ix
Chapter 16: Optional Content Groups
cpdf -ocg-list in.pdf
List the optional content groups by name.
cpdf -ocg-coalesce-on-name in.pdf -o out.pdf
Coalesce optional content groups after merging or stamping two files with OCGs with like
names.
Chapter 17: Creating New PDFs
cpdf -create-pdf -create-pdf-pages 20
-create-pdf-papersize usletterportrait -o out.pdf
Create a US Letter PDF of twenty pages.
cpdf -typeset file.txt -create-pdf-papersize a3portrait
-font Courier -font-size 10 -o out.pdf
Typeset a text file as PDF on A3 paper with Courier 10 point font.
cpdf -jpeg pic.jpeg -png pic.png -o out.pdf
Make a two-page PDF, the first from a JPEG and the second from a PNG.
Chapter 18: Drawing on PDFs
cpdf -create-pdf AND -draw -to "100 100" -line "400 400"
-line "400 100" -close -fill
-o out.pdf
Create a new PDF and draw a filled triangle on it.
cpdf -create-pdf AND -draw -mtrans "100 200" -font-size 50
-leading 55 -bt -text "This is" -nl -text "on multiple"
-nl -text "lines" -et -o out.pdf
x

Create a new PDF and draw three lines of text on it.
cpdf -create-pdf AND -draw -bt -text "Page 1" -et -newpage
-bt -text "Page 2" -et -o out.pdf
Create a new PDF and draw text on one page and then the next.
Chapter 19: Miscellaneous
cpdf -blacktext in.pdf -o out.pdf
Blacken all the text in in.pdf, writing to out.pdf.
cpdf -thinlines 2pt in.pdf -o out.pdf
Make sure all lines in in.pdf are at least 2pts wide, writing to out.pdf.
cpdf -print-dict-entry /URI in.pdf
List all URLs in annotation hyperlinks in in.pdf.
xi
Contents
1 Basic Usage 1
1.1 Documentation . . . . . . . . . . . . . . . . . . . . . . . . . . . . . . . . . . . . . . 1
1.2 Input and Output Files . . . . . . . . . . . . . . . . . . . . . . . . . . . . . . . . . . 1
1.3 Input Ranges . . . . . . . . . . . . . . . . . . . . . . . . . . . . . . . . . . . . . . . . 2
1.4 Working with Encrypted Documents . . . . . . . . . . . . . . . . . . . . . . . . . . 3
1.5 Standard Input and Standard Output . . . . . . . . . . . . . . . . . . . . . . . . . 4
1.6 Doing Several Things at Once with AND . . . . . . . . . . . . . . . . . . . . . . . 5
1.7 Units . . . . . . . . . . . . . . . . . . . . . . . . . . . . . . . . . . . . . . . . . . . . 5
1.8 Setting the Producer and Creator . . . . . . . . . . . . . . . . . . . . . . . . . . . . 6
1.9 PDF Version Numbers . . . . . . . . . . . . . . . . . . . . . . . . . . . . . . . . . . 6
1.10 File IDs . . . . . . . . . . . . . . . . . . . . . . . . . . . . . . . . . . . . . . . . . . . 6
1.11 Linearization . . . . . . . . . . . . . . . . . . . . . . . . . . . . . . . . . . . . . . . . 7
1.12 Object Streams . . . . . . . . . . . . . . . . . . . . . . . . . . . . . . . . . . . . . . . 7
1.13 Malformed Files . . . . . . . . . . . . . . . . . . . . . . . . . . . . . . . . . . . . . . 8
1.14 Error Handling . . . . . . . . . . . . . . . . . . . . . . . . . . . . . . . . . . . . . . 9
1.15 Control Files . . . . . . . . . . . . . . . . . . . . . . . . . . . . . . . . . . . . . . . . 9
1.16 String Arguments . . . . . . . . . . . . . . . . . . . . . . . . . . . . . . . . . . . . . 10
1.17 Text Encodings . . . . . . . . . . . . . . . . . . . . . . . . . . . . . . . . . . . . . . 10
2 Merging and Splitting 11
2.1 Merging . . . . . . . . . . . . . . . . . . . . . . . . . . . . . . . . . . . . . . . . . . 11
2.2 Splitting . . . . . . . . . . . . . . . . . . . . . . . . . . . . . . . . . . . . . . . . . . 12
2.3 Splitting on Bookmarks . . . . . . . . . . . . . . . . . . . . . . . . . . . . . . . . . . 13
2.4 Splitting to Maximum Size . . . . . . . . . . . . . . . . . . . . . . . . . . . . . . . . 13
2.5 Spraying . . . . . . . . . . . . . . . . . . . . . . . . . . . . . . . . . . . . . . . . . . 14
2.6 Encrypting with Split operations . . . . . . . . . . . . . . . . . . . . . . . . . . . . 14
2.7 Splitting and structure trees . . . . . . . . . . . . . . . . . . . . . . . . . . . . . . . 14
3 Pages 15
3.1 Page Sizes . . . . . . . . . . . . . . . . . . . . . . . . . . . . . . . . . . . . . . . . . 16
3.2 Scale Pages . . . . . . . . . . . . . . . . . . . . . . . . . . . . . . . . . . . . . . . . . 16
3.3 Shift Page Contents . . . . . . . . . . . . . . . . . . . . . . . . . . . . . . . . . . . . 17
3.4 Rotating Pages . . . . . . . . . . . . . . . . . . . . . . . . . . . . . . . . . . . . . . . 17
3.5 Flipping Pages . . . . . . . . . . . . . . . . . . . . . . . . . . . . . . . . . . . . . . . 18
3.6 Boxes and Cropping . . . . . . . . . . . . . . . . . . . . . . . . . . . . . . . . . . . 19
xiii
3.7 Showing Boxes and Printer’s Marks . . . . . . . . . . . . . . . . . . . . . . . . . . 20
4 Encryption and Decryption 21
4.1 Introduction . . . . . . . . . . . . . . . . . . . . . . . . . . . . . . . . . . . . . . . . 21
4.2 Encrypting a Document . . . . . . . . . . . . . . . . . . . . . . . . . . . . . . . . . 22
4.3 Decrypting a Document . . . . . . . . . . . . . . . . . . . . . . . . . . . . . . . . . 22
5 Compression 23
5.1 Decompressing a Document . . . . . . . . . . . . . . . . . . . . . . . . . . . . . . . 23
5.2 Compressing a Document . . . . . . . . . . . . . . . . . . . . . . . . . . . . . . . . 23
5.3 Squeezing a Document . . . . . . . . . . . . . . . . . . . . . . . . . . . . . . . . . . 24
6 Bookmarks 25
6.1 List Bookmarks . . . . . . . . . . . . . . . . . . . . . . . . . . . . . . . . . . . . . . 25
6.1.1 Destinations . . . . . . . . . . . . . . . . . . . . . . . . . . . . . . . . . . . . 26
6.2 Remove Bookmarks . . . . . . . . . . . . . . . . . . . . . . . . . . . . . . . . . . . . 27
6.3 Add Bookmarks . . . . . . . . . . . . . . . . . . . . . . . . . . . . . . . . . . . . . . 27
6.4 Opening bookmarks . . . . . . . . . . . . . . . . . . . . . . . . . . . . . . . . . . . 28
6.5 Making a Table of Contents . . . . . . . . . . . . . . . . . . . . . . . . . . . . . . . 28
7 Presentations 31
8 Watermarks and Stamps 33
8.1 Add a Watermark or Logo . . . . . . . . . . . . . . . . . . . . . . . . . . . . . . . . 34
8.2 Stamp Text, Dates and Times. . . . . . . . . . . . . . . . . . . . . . . . . . . . . . . 34
8.2.1 Page Numbers and other Special Codes . . . . . . . . . . . . . . . . . . . . 35
8.2.2 Date and Time Formats . . . . . . . . . . . . . . . . . . . . . . . . . . . . . 35
8.2.3 Bates Numbers . . . . . . . . . . . . . . . . . . . . . . . . . . . . . . . . . . 35
8.2.4 Position . . . . . . . . . . . . . . . . . . . . . . . . . . . . . . . . . . . . . . 36
8.2.5 Font and Size . . . . . . . . . . . . . . . . . . . . . . . . . . . . . . . . . . . 37
8.2.6 Colors . . . . . . . . . . . . . . . . . . . . . . . . . . . . . . . . . . . . . . . 38
8.2.7 Outline Text . . . . . . . . . . . . . . . . . . . . . . . . . . . . . . . . . . . . 38
8.2.8 Multi-line Text . . . . . . . . . . . . . . . . . . . . . . . . . . . . . . . . . . 38
8.2.9 Special Characters . . . . . . . . . . . . . . . . . . . . . . . . . . . . . . . . 39
8.3 Stamping Rectangles . . . . . . . . . . . . . . . . . . . . . . . . . . . . . . . . . . . 39
8.4 Low-level facilities . . . . . . . . . . . . . . . . . . . . . . . . . . . . . . . . . . . . 40
9 Multipage Facilities 41
9.1 Inserting Blank Pages . . . . . . . . . . . . . . . . . . . . . . . . . . . . . . . . . . . 41
9.2 Imposition . . . . . . . . . . . . . . . . . . . . . . . . . . . . . . . . . . . . . . . . . 42
9.3 Chopping up pages . . . . . . . . . . . . . . . . . . . . . . . . . . . . . . . . . . . . 43
10 Annotations 45
10.1 Listing Annotations . . . . . . . . . . . . . . . . . . . . . . . . . . . . . . . . . . . . 45
10.2 Setting annotations . . . . . . . . . . . . . . . . . . . . . . . . . . . . . . . . . . . . 46
10.3 Copying Annotations . . . . . . . . . . . . . . . . . . . . . . . . . . . . . . . . . . . 46
10.4 Removing Annotations . . . . . . . . . . . . . . . . . . . . . . . . . . . . . . . . . . 47
xiv
11 Document Information and Metadata 49
11.1 Reading Document Information . . . . . . . . . . . . . . . . . . . . . . . . . . . . . 50
11.2 Setting Document Information . . . . . . . . . . . . . . . . . . . . . . . . . . . . . 53
11.3 XMP Metadata . . . . . . . . . . . . . . . . . . . . . . . . . . . . . . . . . . . . . . . 53
11.4 Upon Opening a Document . . . . . . . . . . . . . . . . . . . . . . . . . . . . . . . 54
11.4.1 Page Layout . . . . . . . . . . . . . . . . . . . . . . . . . . . . . . . . . . . . 54
11.4.2 Page Mode . . . . . . . . . . . . . . . . . . . . . . . . . . . . . . . . . . . . . 55
11.4.3 Display Options . . . . . . . . . . . . . . . . . . . . . . . . . . . . . . . . . . 55
11.5 Page Labels . . . . . . . . . . . . . . . . . . . . . . . . . . . . . . . . . . . . . . . . 56
11.6 Composition of a PDF . . . . . . . . . . . . . . . . . . . . . . . . . . . . . . . . . . 58
12 File Attachments 59
12.1 Adding Attachments . . . . . . . . . . . . . . . . . . . . . . . . . . . . . . . . . . . 59
12.2 Listing Attachments . . . . . . . . . . . . . . . . . . . . . . . . . . . . . . . . . . . 59
12.3 Removing Attachments . . . . . . . . . . . . . . . . . . . . . . . . . . . . . . . . . 60
12.4 Dumping Attachments to File . . . . . . . . . . . . . . . . . . . . . . . . . . . . . . 60
13 Working with Images 61
13.1 Extracting images . . . . . . . . . . . . . . . . . . . . . . . . . . . . . . . . . . . . . 61
13.2 Listing images . . . . . . . . . . . . . . . . . . . . . . . . . . . . . . . . . . . . . . . 62
13.3 Listing images at point of use . . . . . . . . . . . . . . . . . . . . . . . . . . . . . . 63
13.4 Removing an Image . . . . . . . . . . . . . . . . . . . . . . . . . . . . . . . . . . . . 64
13.5 Processing Images . . . . . . . . . . . . . . . . . . . . . . . . . . . . . . . . . . . . . 64
14 Fonts 67
14.1 Listing Fonts . . . . . . . . . . . . . . . . . . . . . . . . . . . . . . . . . . . . . . . . 67
14.2 Listing characters in a font . . . . . . . . . . . . . . . . . . . . . . . . . . . . . . . . 68
14.3 Copying Fonts . . . . . . . . . . . . . . . . . . . . . . . . . . . . . . . . . . . . . . . 69
14.4 Removing Fonts . . . . . . . . . . . . . . . . . . . . . . . . . . . . . . . . . . . . . . 70
14.5 Missing Fonts . . . . . . . . . . . . . . . . . . . . . . . . . . . . . . . . . . . . . . . 70
14.6 Extracting Fonts . . . . . . . . . . . . . . . . . . . . . . . . . . . . . . . . . . . . . . 70
15 PDF and JSON 71
15.1 Converting PDF to JSON . . . . . . . . . . . . . . . . . . . . . . . . . . . . . . . . . 71
15.2 Converting JSON to PDF . . . . . . . . . . . . . . . . . . . . . . . . . . . . . . . . . 73
16 Optional Content Groups 75
17 Creating New PDFs 77
17.1 A new blank PDF . . . . . . . . . . . . . . . . . . . . . . . . . . . . . . . . . . . . . 77
17.2 Convert a text file to PDF . . . . . . . . . . . . . . . . . . . . . . . . . . . . . . . . . 77
17.3 Make a PDF from a PNG or JPEG image . . . . . . . . . . . . . . . . . . . . . . . . 78
17.4 Make a PDF from one or more JBIG2 images . . . . . . . . . . . . . . . . . . . . . 78
xv
18 Drawing on PDFs 79
18.1 Basics . . . . . . . . . . . . . . . . . . . . . . . . . . . . . . . . . . . . . . . . . . . . 80
18.2 Building and showing paths . . . . . . . . . . . . . . . . . . . . . . . . . . . . . . . 81
18.3 Clipping with paths . . . . . . . . . . . . . . . . . . . . . . . . . . . . . . . . . . . . 84
18.4 Path parameters . . . . . . . . . . . . . . . . . . . . . . . . . . . . . . . . . . . . . . 84
18.5 The graphics stack and matrices . . . . . . . . . . . . . . . . . . . . . . . . . . . . . 86
18.6 Re-use with XObjects . . . . . . . . . . . . . . . . . . . . . . . . . . . . . . . . . . . 88
18.7 Images . . . . . . . . . . . . . . . . . . . . . . . . . . . . . . . . . . . . . . . . . . . 89
18.8 Transparency . . . . . . . . . . . . . . . . . . . . . . . . . . . . . . . . . . . . . . . . 90
18.9 Text . . . . . . . . . . . . . . . . . . . . . . . . . . . . . . . . . . . . . . . . . . . . . 91
18.10The next page . . . . . . . . . . . . . . . . . . . . . . . . . . . . . . . . . . . . . . . 95
19 Miscellaneous 97
19.1 Draft Documents . . . . . . . . . . . . . . . . . . . . . . . . . . . . . . . . . . . . . 97
19.2 Blackening Text, Lines and Fills . . . . . . . . . . . . . . . . . . . . . . . . . . . . . 98
19.3 Hairline Removal . . . . . . . . . . . . . . . . . . . . . . . . . . . . . . . . . . . . . 98
19.4 Garbage Collection . . . . . . . . . . . . . . . . . . . . . . . . . . . . . . . . . . . . 99
19.5 Change PDF Version Number . . . . . . . . . . . . . . . . . . . . . . . . . . . . . . 99
19.6 Copy ID . . . . . . . . . . . . . . . . . . . . . . . . . . . . . . . . . . . . . . . . . . 99
19.7 Remove ID . . . . . . . . . . . . . . . . . . . . . . . . . . . . . . . . . . . . . . . . . 100
19.8 List Spot Colours . . . . . . . . . . . . . . . . . . . . . . . . . . . . . . . . . . . . . 100
19.9 PDF Dictionary Entries . . . . . . . . . . . . . . . . . . . . . . . . . . . . . . . . . . 100
19.10Removing Clipping . . . . . . . . . . . . . . . . . . . . . . . . . . . . . . . . . . . . 101
19.11Exploring PDFs . . . . . . . . . . . . . . . . . . . . . . . . . . . . . . . . . . . . . . 101
A Dates 103
A.1 PDF Date Format . . . . . . . . . . . . . . . . . . . . . . . . . . . . . . . . . . . . . 103
A.2 XMP Metadata Date Format . . . . . . . . . . . . . . . . . . . . . . . . . . . . . . . 104
B Change logs 105
B.1 CPDF Change Log . . . . . . . . . . . . . . . . . . . . . . . . . . . . . . . . . . . . 105
B.2 CamlPDF Change Log . . . . . . . . . . . . . . . . . . . . . . . . . . . . . . . . . . 109
xvi

Typographical Conventions
Command lines to be typed are shown in typewriter font in a box. For example:
cpdf in.pdf -o out.pdf
When describing the general form of a command, rather than a particular example, square brack-
ets
[]
are used to enclose optional parts, and angled braces
<>
to enclose general descriptions
which may be substituted for particular instances. For example,
cpdf <operation> in.pdf [<range>] -o out.pdf
describes a command line which requires an operation and, optionally, a range. An exception is
that we use
in.pdf
and
out.pdf
instead of
<input file>
and
<output file>
to reduce
verbosity.
Under Microsoft Windows, type cpdf.exe instead of cpdf.
xvii

Chapter 1
Basic Usage
-help --help -version
-o -i -idir <directory>
-recrypt -decrypt-force -stdout
-stdin -stdin-user <password> -stdin-owner <password>
-producer <text> -creator <text> -change-id
-l -cpdflin <filename> -keep-l
-no-preserve-objstm -create-objstm -control <filename>
-args <filename> -utf8 -stripped
-raw -gs -gs-malformed
-gs-malformed-force -gs-quiet -error-on-malformed
The Coherent PDF tools provide a wide range of facilities for modifying PDF files created
by other means. There is a single command-line program
cpdf
(
cpdf.exe
under Microsoft
Windows). The rest of this manual describes the options that may be given to this program.
1.1 Documentation
The operation
-help / --help
prints each operation and option together with a short de-
scription. The operation -version prints the cpdf version string.
1.2 Input and Output Files
The typical pattern for usage is
cpdf [<operation>] <input file(s)> -o <output file>
and the simplest concrete example, assuming the existence of a file in.pdf is:
1
2 Chapter 1. Basic Usage
cpdf in.pdf -o out.pdf
This copies
in.pdf
to
out.pdf
. Of course, we should like to do more interesting things to the
PDF file than that!
Files on the command line are distinguished from other input by their containing a period.
If an input file does not contain a period, it should be preceded by -i. For example:
cpdf -i in -o out.pdf
A whole directory of files may be added (where a command supports multiple files) by using
the -idir option:
cpdf -merge -idir myfiles -o out.pdf
The files in the directory
myfiles
are considered in alphabetical order. They must all be PDF
files. If the names of the files are numeric, leading zeroes will be required for the order to be
correct (e.g 001.pdf, 002.pdf etc).
To restrict cpdf to files ending in
.pdf
(in upper or lower or mixed case) add the option
-idir-only-pdfs before -idir:
cpdf -merge -idir-only-pdfs -idir myfiles -o out.pdf
1.3 Input Ranges
An input range may be specified after each input file. This is treated differently by each operation.
For instance
cpdf in.pdf 2-5 -o out.pdf
extracts pages two, three, four and five from
in.pdf
, writing the result to
out.pdf
, assuming
that in.pdf contains at least five pages. Here are the rules for building input ranges:
• A number represents a page number
•
A page label may be used in place of a number e.g
[iii]
represents the first page found
which is labelled iii.
•
A tilde (
˜
) defines a page number counting from the end of the document rather than the
beginning. Page ˜1 is the last page, ˜2 the penultimate page etc.
• A dash (-) defines ranges, e.g. 1-5 or 6-3.

Chapter 1. Basic Usage 3
• A comma (,) allows one to specify several ranges, e.g. 1-2,4-5.
• The word end represents the last page.
•
The words
odd
and
even
can be used in place of or at the end of a page range to restrict
to just the odd or even pages.
•
The words
portrait
and
landscape
can be used in place of or at the end of a page
range to restrict to just those pages which are portrait or landscape. Note that the meaning
of “portrait” and “landscape” does not take account of any viewing rotation in place
(use
-upright
from chapter 3 first, if required). A page with equal width and height is
considered neither portrait nor landscape.
• The word reverse is the same as end-1.
• The word all is the same as 1-end.
• A range must contain no spaces.
• Prepending NOT to a whole page range inverts it.
• Prepending <n>DUP to a whole page range duplicates each page of the range <n> times.
For example:
cpdf in.pdf 1,2,7-end -o out.pdf
Remove pages three, four, five and six from a document.
cpdf in.pdf 1-16odd -o out.pdf
Extract the odd pages 1,3,...,13,15.
cpdf in.pdf landscape -rotate 90 -o out.pdf
Rotate all landscape pages by ninety degrees.
cpdf in.pdf 1,all -o out.pdf
Duplicate the front page of a document, perhaps as a fax cover sheet.
cpdf in.pdf ˜3-˜1 -o out.pdf
Extract the last three pages of a document, in order.
cpdf in.pdf 2DUP1-10 -o out.pdf
Produce the pages 1,1,2,2,....10,10.
1.4 Working with Encrypted Documents
In order to perform many operations, encrypted input PDF files must be decrypted. Some
require the owner password, some either the user or owner passwords. Either password is
4 Chapter 1. Basic Usage
supplied by writing
user=<password>
or
owner=<password>
following each input file
requiring it (before or after any range). The document will not be re-encrypted upon writing.
For example:
cpdf in.pdf user=charles -info
cpdf in.pdf owner=fred reverse -o out.pdf
To re-encrypt the file with its existing encryption upon writing, which is required if only the
user password was supplied, but allowed in any case, add the -recrypt option:
cpdf in.pdf user=charles reverse -recrypt -o out.pdf
The password required (owner or user) depends upon the operation being performed. Separate
facilities are provided to decrypt and encrypt files (See Section 4).
When appropriate passwords are not available, the option
-decrypt-force
may be added
to the command line to process the file regardless.
For decryption with AES256, passwords may be Unicode. However the password, should it
contain non-ASCII characters, must be normalized by applying the SASLPrep profile (RFC 4013)
of the stringprep algorithm (RFC 3454) using the Normalize and BiDi options. It must then be
converted to UTF8 and truncated to 127 bytes. Cpdf does not perform this pre-processing – it
takes its passwords from the command line without processing.
1.5 Standard Input and Standard Output
Thus far, we have assumed that the input PDF will be read from a file on disk, and the output
written similarly. Often it’s useful to be able to read input from
stdin
(Standard Input) or
write output to
stdout
(Standard Output) instead. The typical use is to join several programs
together into a pipe, passing data from one to the next without the use of intermediate files. Use
-stdin
to read from standard input, and
-stdout
to write to standard input, either to pipe
data between multiple programs, or multiple invocations of the same program. For example,
this sequence of commands (all typed on one line)
cpdf in.pdf reverse -stdout |
cpdf -stdin 1-5 -stdout |
cpdf -stdin reverse -o out.pdf
extracts the last five pages of
in.pdf
in the correct order, writing them to
out.pdf
. It does
this by reversing the input, taking the first five pages and then reversing the result.
To supply passwords for a file from
-stdin
, use
-stdin-owner <password>
and/or
-stdin-user <password>.
Using
-stdout
on the final command in the pipeline to output the PDF to screen is not
recommended, since PDF files often contain compressed sections which are not screen-readable.
Chapter 1. Basic Usage 5
Several
cpdf
operations write to standard output by default (for example, listing fonts). A
useful feature of the command line (not specific to
cpdf
) is the ability to redirect this output to
a file. This is achieved with the > operator:
cpdf -info in.pdf > file.txt
Use the -info operation (See Section 11.1), redirecting the output to file.txt.
1.6 Doing Several Things at Once with AND
The keyword
AND
can be used to string together several commands in one. The advantage
compared with using pipes is that the file need not be repeatedly parsed and written out, saving
time.
To use
AND
, simply leave off the output specifier (e.g
-o
) of one command, and the input
specifier (e.g filename) of the next. For instance:
cpdf -merge in.pdf in2.pdf AND -add-text "Label"
AND -merge in3.pdf -o out.pdf
Merge
in.pdf
and
in2.pdf
together, add text to both pages, append
in3.pdf
and write to
out.pdf.
To specify the range for each section, use -range:
cpdf -merge in.pdf in2.pdf AND -range 2-4 -add-text "Label"
AND -merge in3.pdf -o out.pdf
1.7 Units
When measurements are given to
cpdf
, they are in points (1 point = 1/72 inch). They may
optionally be followed by some letters to change the measurement. The following are supported:
pt Points (72 points per inch). The default.
cm Centimeters
mm Millimeters
in Inches
For example, one may write
14mm
or
21.6in
. In addition, the following letters stand, in some
operations (-scale-page, -scale-to-fit, -scale-contents, -shift, -mediabox,
-cropbox) for various page dimensions:

6 Chapter 1. Basic Usage
PW Page width
PH Page height
PMINX Page minimum x coordinate
PMINY Page minimum y coordinate
PMAXX Page maximum x coordinate
PMAXY Page maximum y coordinate
CW Crop box width
CH Crop box height
CMINX Crop box minimum x coordinate
CMINY Crop box minimum y coordinate
CMAXX Crop box maximum x coordinate
CMAXY Crop box maximum y coordinate
For example, we may write
PMINX PMINY
to stand for the coordinate of the lower left corner of
the page.
Simple arithmetic may be performed using the words
add
,
sub
,
mul
and
div
to stand for
addition, subtraction, multiplication and division. For example, one may write
14in sub 30pt
or PMINX mul 2
1.8 Setting the Producer and Creator
The
-producer
and
-creator
options may be added to any
cpdf
command line to set the
producer and/or creator of the PDF file. If the file was converted from another format, the
creator is the program producing the original, the producer the program converting it to PDF.
cpdf -merge in.pdf in2.pdf -producer MyMerger -o out.pdf
Merge
in.pdf
and
in2.pdf
, setting the producer to
MyMerger
and writing the output to
out.pdf
.
1.9 PDF Version Numbers
When an operation which uses a part of the PDF standard which was introduced in a later
version than that of the input file, the PDF version in the output file is set to the later version
(most PDF viewers will try to load any PDF file, even if it is marked with a later version number).
However, this automatic version changing may be suppressed with the
-keep-version
option.
If you wish to manually alter the PDF version of a file, use the
-set-version
operation
described in Section 19.5.
1.10 File IDs
PDF files contain an ID (consisting of two parts), used by some workflow systems to uniquely
identify a file. To change the ID, behavior, use the
-change-id
operation. This will create a
new ID for the output file.

Chapter 1. Basic Usage 7
cpdf -change-id in.pdf -o out.pdf
Write in.pdf to out.pdf, changing the ID.
1.11 Linearization
Linearized PDF is a version of the PDF format in which the data is held in a special manner to
allow content to be fetched only when needed. This means viewing a multipage PDF over a
slow connection is more responsive. By default,
cpdf
does not linearize output files. To make it
do so, add the
-l
option to the command line, in addition to any other command being used.
For example:
cpdf -l in.pdf -o out.pdf
Linearize the file in.pdf, writing to out.pdf.
This requires the existence of the external program
cpdflin
which is provided with commercial
versions of
cpdf
. This must be installed as described in the installation documentation provided
with your copy of
cpdf
. If you are unable to install
cpdflin
, you must use
-cpdflin
to let
cpdf know where to find it:
cpdf.exe -cpdflin "C:\\cpdflin.exe" -l in.pdf -o out.pdf
Linearize the file in.pdf, writing to out.pdf.
In extremis, you may place
cpdflin
and its resources in the current working directory, though
this is not recommended. For further help, refer to the installation instructions for your copy of
cpdf.
To keep the existing linearization status of a file (produce linearized output if the input is
linearized and the reverse), use -keep-l instead of -l.
1.12 Object Streams
PDF 1.5 introduced a new mechanism for storing objects to save space: object streams. by
default,
cpdf
will preserve object streams in input files, creating no more. To prevent the
retention of existing object streams, use -no-preserve-objstm:
cpdf -no-preserve-objstm in.pdf -o out.pdf
Write the file in.pdf to out.pdf, removing any object streams.
To create new object streams if none exist, or augment the existing ones, use
-create-objstm
:
8 Chapter 1. Basic Usage
cpdf -create-objstm in.pdf -o out.pdf
Write the file
in.pdf
to
out.pdf
, preserving any existing object streams, and creating any new ones
for new objects which have been added.
To create wholly new object streams, use both options together:
cpdf -create-objstm -no-preserve-objstm in.pdf -o out.pdf
Write the file in.pdf to out.pdf with wholly new object streams.
Files written with object streams will be set to PDF 1.5 or higher, unless
-keep-version
is
used (see above).
1.13 Malformed Files
There are many malformed PDF files in existence, including many produced by otherwise-
reputable applications. cpdf attempts to correct these problems silently.
Grossly malformed files will be reconstructed. The reconstruction progress is shown on
stderr (Standard Error):
$cpdf in.pdf -o out.pdf
couldn't lex object number
Attempting to reconstruct the malformed pdf in.pdf...
Read 5530 objects
Malformed PDF reconstruction succeeded!
In the unlikely event that
cpdf
cannot reconstruct a malformed file, it is able to use the
gs
program to try to reconstruct the PDF file, if you have it installed. For example, if
gs
is installed
and in your path, we might try:
cpdf -gs gs -gs-malformed in.pdf -o out.pdf
To suppress the output of
gs
use the
-gs-quiet
option. If the malformity lies inside an
individual page of the PDF, rather than in its gross structure,
cpdf
may appear to succeed in
reconstruction, only to fail when processing a page (e.g when adding text). To force the use of
gs to pre-process such files so cpdf cannot fail on them, use -gs-malformed-force:
cpdf in.pdf -gs gs -gs-malformed-force -o out.pdf [-gs-quiet]
The command line for
-gs-malformed-force
must be of precisely this form. Sometimes, on
the other hand, we might wish
cpdf
to fail immediately on any malformed file, rather than try
its own reconstruction process. The option -error-on-malformed achieves this.

Chapter 1. Basic Usage 9
Note: Use of these commands with
-gs
is a last resort; they may strip some metadata from PDF
files.
Sometimes old, pre-ISO standardisation files can be technically well-formed but use inefficient
PDF constructs. If you are sure the input files you are using are modern ISO-compliant PDFs,
the
-fast
option may be added to the command line (or, if using
AND
, to each section of the
command line). This will use certain shortcuts which speed up processing, but would fail on a
minority of pre-ISO files. The -fast option may be used with:
Chapter 3
-rotate-contents -upright -vflip -hflip
-shift -scale-page -scale-to-fit -scale-contents
-show-boxes -hard-box -trim-marks
Chapter 8
-add-text -add-rectangle
-stamp-on -stamp-under -combine-pages
Chapter 9
-impose -impose-xy -twoup -twoup-stack
If problems occur, refrain from using -fast.
1.14 Error Handling
When
cpdf
encounters an error, it exits with code 2. An error message is displayed on
stderr
(Standard Error). In normal usage, this means it is displayed on the screen. When a bad or
inappropriate password is given, the exit code is 1.
1.15 Control Files
cpdf -control <filename> deprecated
cpdf -args <filename>
Some operating systems have a limit on the length of a command line. To circumvent this, or
simply for reasons of flexibility, a control file may be specified from which arguments are drawn.
This file does not support the full syntax of the command line. Commands are separated by
whitespace, quotation marks may be used if an argument contains a space, and the sequence
\"
may be used to introduce a genuine quotation mark in such an argument.
Several
-control
arguments may be specified, and may be mixed in with conventional
command-line arguments. The commands in each control file are considered in the order in
which they are given, after all conventional arguments have been processed.
10 Chapter 1. Basic Usage
It is recommended to use
-args
in all new applications. However,
-control
will be
supported for legacy applications. Using
-args
in place of
-control
will perform direct
textual substitution of the file into the command line, prior to any other processing.
1.16 String Arguments
Command lines are handled differently on each operating system. Some characters are reserved
with special meanings, even when they occur inside quoted string arguments. To avoid this
problem, cpdf performs processing on string arguments as they are read.
A backslash is used to indicate that a character which would otherwise be treated specially
by the command line interpreter is to be treated literally. For example, Unix-like systems
attribute a special meaning to the exclamation mark, so the command line
cpdf -add-text "Hello!" in.pdf -o out.pdf
would fail. We must escape the exclamation mark with a backslash:
cpdf -add-text "Hello\!" in.pdf -o out.pdf
It follows that backslashes intended to be taken literally must themselves be escaped (i.e. written
\\).
1.17 Text Encodings
Some
cpdf
commands write text to standard output, or read text from the command line or
configuration files. These are:
-info
-list-bookmarks
-set-author et al.
-list-annotations
-dump-attachments
There are three options to control how the text is interpreted:
-utf8
-stripped
-raw
Add
-utf8
to use Unicode UTF8,
-stripped
to convert to 7 bit ASCII by dropping any high
characters, or
-raw
to perform no processing. The default unless specified in the documentation
for an individual operation is -stripped.
In modern usage,
-utf8
is almost always the sensible option. But for historical reasons it
would be the default.

Chapter 2
Merging and Splitting
cpdf -merge in1.pdf [<range>] in2.pdf [<range>] [<more names/ranges>]
[-collate] [-retain-numbering] [-remove-duplicate-fonts]
[-merge-add-bookmarks [-merge-add-bookmarks-use-titles]]
[-no-process-struct-trees]
-o out.pdf
cpdf -split in.pdf -o <format> [-chunk <chunksize>]
cpdf -split-bookmarks <level> in.pdf [-utf8] -o <format>
cpdf -split-max <file size> in.pdf -o <format>
cpdf -spray in.pdf -o a.pdf [-o b.pdf [-o ...]]
2.1 Merging
The
-merge
operation allow the merging of several files into one. Ranges can be used to
select only a subset of pages from each input file in the output. The output file consists of the
concatenation of all the input pages in the order specified on the command line. Actually, the
-merge can be omitted, since this is the default operation of cpdf.
cpdf -merge a.pdf 1 b.pdf 2-end -o out.pdf
Take page one of a.pdf and all but the first page of b.pdf, merge them and produce out.pdf.
cpdf -merge -idir files -o out.pdf
Merge all files from directory files, producing out.pdf.
11

12 Chapter 2. Merging and Splitting
Merge maintains and merges bookmarks, named destinations, annotations, tagged PDF infor-
mation, and so on. PDF features which cannot be merged are retained if they are from the
document which first exhibits that feature.
The
-collate
option collates pages: that is to say, it takes the first page from the first
document and its range, then the first page from the second document and its range and so on.
When all first pages have been taken, it begins on the second from each range, and so on.
The
-retain-numbering
option keeps the PDF page numbering labels of each document
intact, rather than renumbering the output pages from 1.
The
-remove-duplicate-fonts
option ensures that fonts used in more than one of the
inputs only appear once in the output.
The
-merge-add-bookmarks
option adds a top-level bookmark for each file, using the
filename. Any existing bookmarks are retained. The
-merge-add-bookmarks-use-titles
,
when used in conjunction with
-merge-add-bookmarks
, will use the title from each PDF’s
metadata instead of the filename.
The
-no-process-struct-tree
option prevents processing of structure trees. Instead
of merging them, they are simply copied across wholesale. This can be useful with
-collate
which can presently cause an increased size. Or, to simply save time when a merged structure
tree is not required.
2.2 Splitting
The
-split
operation splits a PDF file into a number of parts which are written to file, their
names being generated from a format. The optional
-chunk
option allows the number of pages
written to each output file to be set.
cpdf -split a.pdf -o out%%%.pdf
Split a.pdf to the files out001.pdf, out002.pdf etc.
cpdf a.pdf even AND -split -chunk 10 -o dir/out%%%.pdf
Split the even pages of
a.pdf
to the files
out001.pdf
,
out002.pdf
etc. with at most ten pages in
each file. The directory (folder) dir must exist.
If the output format does not provide enough numbers for the files generated, the result is
unspecified. The following format operators may be used:
%, %%, %%% etc. Sequence number padded to the number of percent signs
@F Original filename without extension
@N Sequence number without padding zeroes
@S Start page of this chunk
@E End page of this chunk
@B Bookmark name at this page
Numbers padded to a fixed width field by zeroes may be obtained for
@S
and
@E
by following
them with more @ signs e.g @E@@@ for a fixed width of three.
Chapter 2. Merging and Splitting 13
2.3 Splitting on Bookmarks
The
-split-bookmarks <level>
operation splits a PDF file into a number of parts, accord-
ing to the page ranges implied by the document’s bookmarks. These parts are then written to
file with names generated from the given format.
Level 0 denotes the top-level bookmarks, level 1 the next level (sub-bookmarks) and so on.
So -split-bookmarks 1 creates breaks on level 0 and level 1 boundaries.
cpdf -split-bookmarks 0 a.pdf -o out%%%.pdf
Split a.pdf to the files out001.pdf, out002.pdf on bookmark boundaries.
There may be many bookmarks on a single page (for instance, if paragraphs are bookmarked or
there are two subsections on one page). The splits calculated by
-split-bookmarks
ensure
that each page appears in only one of the output files. It is possible to use the
@
operators above,
including operator @B which expands to the text of the bookmark:
cpdf -split-bookmarks 0 a.pdf -o @B.pdf
Split a.pdf on bookmark boundaries, using the bookmark text as the filename.
The bookmark text used for a name is converted from unicode to 7 bit ASCII, and the following
characters are removed, in addition to any character with ASCII code less than 32:
/ ? < > \ :
*
| " ˆ + =
To prevent this process, and convert bookmark names to UTF8 instead, add
-utf8
to the
command.
2.4 Splitting to Maximum Size
The -split-max operation splits a file into chunks of no more than the given size, starting at
the beginning. The suffixes kB, KiB, MB, MiB, GB, and GiB may be used to give the size. For
example:
cpdf -split-max 100kB in.pdf -o out%%%.pdf
Split in.pdf into parts of no more than 100kB, if possible.
Should the operation not be possible for the given size, an error message is printed and no
output (not even partial output) is produced.

14 Chapter 2. Merging and Splitting
2.5 Spraying
Spraying is a sort of de-collation. It takes one input file, and writes pages in turn to one or more
outputs:
cpdf -spray in.pdf -o a.pdf -o b.pdf
Place odd pages of the input file in one file, and the even in another.
This is the only time more than one -o is allowed.
2.6 Encrypting with Split operations
The encryption parameters described in Chapter 4 may be added to the command line to
encrypt each split PDF. Similarly, the
-recrypt
switch described in Chapter 1 may by given to
re-encrypt each file with the existing encryption of the source PDF.
2.7 Splitting and structure trees
Presently, cpdf will include the input structure tree in each output PDF. To remove a structure
tree entirely, preprocess the file with
-remove-dict-entry /StructTreeRoot
. If you do
not require structure trees, this will lead to faster splitting, and smaller outputs.

Chapter 3
Pages
cpdf -scale-page "<scale x> <scale y>" [-fast] in.pdf [<range>] -o out.pdf
cpdf -scale-to-fit "<x size> <y size>" [-fast]
[-scale-to-fit-scale <scale>] [-prerotate]
in.pdf [<range>] -o out.pdf
cpdf -scale-contents [<scale>] [<position>] [-fast]
in.pdf [<range>] -o out.pdf
cpdf -shift "<shift x> <shift y>" [-fast] in.pdf [<range>] -o out.pdf
cpdf -shift-boxes "<shift x> <shift y>" in.pdf [<range>] -o out.pdf
cpdf -rotate <angle> in.pdf [<range>] -o out.pdf
cpdf -rotateby <angle> in.pdf [<range>] -o out.pdf
cpdf -upright [-fast] in.pdf [<range>] -o out.pdf
cpdf -rotate-contents <angle> [-fast] in.pdf [<range>] -o out.pdf
cpdf -hflip [-fast] in.pdf [<range>] -o out.pdf
cpdf -vflip [-fast] in.pdf [<range>] -o out.pdf
cpdf -mediabox "<x> <y> <w> <h>" in.pdf [<range>] -o out.pdf
cpdf -cropbox "<x> <y> <w> <h>" in.pdf [<range>] -o out.pdf
cpdf -remove-cropbox in.pdf [<range>] -o out.pdf
(Also
bleed
,
art
, and
trim
versions of these two commands, for example
-artbox
,
-remove-trimbox)
cpdf -frombox <boxname> -tobox <boxname> [-mediabox-if-missing]
in.pdf [<range>] -o out.pdf
cpdf -hard-box <boxname> [-fast] in.pdf [<range>]
[-mediabox-if-missing] -o out.pdf
cpdf -show-boxes [-fast] in.pdf [<range>] -o out.pdf
cpdf -trim-marks [-fast] in.pdf [<range>] -o out.pdf
15

16 Chapter 3. Pages
3.1 Page Sizes
Any time when a page size is required, instead of writing, for instance
"210mm 197mm"
one
can instead write a4portrait. Here is a list of supported page sizes:
a0portrait a1portrait a2portrait
a3portrait a4portrait a5portrait
a6portrait a7portrait a8portrait
a9portrait a10portrait
a0landscape a1landscape a2landscape
a3landscape a4landscape a5landscape
a6landscape a7landscape a8landscape
a9landscape a10landscape
usletterportrait usletterlandscape
uslegalportrait uslegallandscape
Note that this also works when four numbers are required: for example, when setting the
mediabox "0 0 a3landscape" will suffice.
3.2 Scale Pages
The
-scale-page
operation scales each page in the range by the X and Y factors given. This
scales both the page contents, and the page size itself. It also scales any Crop Box and other
boxes (Art Box, Trim Box etc). As with several of these commands, remember to take into
account any page rotation when considering what the X and Y axes relate to.
cpdf -scale-page "2 2" in.pdf -o out.pdf
Convert an A4 page to A2, for instance.
The
-scale-to-fit
operation scales each page in the range to fit a given page size, preserving
aspect ratio and centring the result. If a crop box is present, it is preferred to the media box.
cpdf -scale-to-fit "297mm 210mm" in.pdf -o out.pdf
cpdf -scale-to-fit a4portrait in.pdf -o out.pdf
Scale a file’s pages to fit A4 portrait.
To avoid centring, supply
-top 0
,
-bottom 0
,
-left 0
or
-right 0
as appropriate. The
scale can optionally be set to a percentage of the available area, instead of filling it.
cpdf -scale-to-fit a4portrait -scale-to-fit-scale 0.9 in.pdf -o out.pdf
Scale a file’s pages to fit A4 portrait, scaling the page 90% of its possible size.
Chapter 3. Pages 17
The
-scale-contents
operation scales the contents about the center of the crop box (or, if
absent, the media box), leaving the page dimensions (boxes) unchanged.
cpdf -scale-contents 0.5 in.pdf -o out.pdf
Scale a file’s contents on all pages to 50% of its original dimensions.
To scale about a point other than the center, one can use the positioning commands described in
Section 8.2.4. For example:
cpdf -scale-contents 0.5 -topright 20 in.pdf -o out.pdf
Scale a file’s contents on all pages to 50% of its original dimensions about a point 20pts from its top
right corner.
3.3 Shift Page Contents
The
-shift
operation shifts the contents of each page in the range by X points horizontally
and Y points vertically.
cpdf -shift "50 0" in.pdf even -o out.pdf
Shift pages to the right by 50 points (for instance, to increase the binding margin).
The
-shift-boxes
operation has the same effect, but operates by moving the page boxes only,
avoiding processing the page contents. It is therefore faster. Of course, the numbers must be
inverted, since it is the boxes being moved not the page:
cpdf -shift-boxes "-50 0" in.pdf even -o out.pdf
Shift pages to the right by 50 points (for instance, to increase the binding margin).
3.4 Rotating Pages
There are two ways of rotating pages: (1) setting a value in the PDF file which asks the viewer
(e.g. Acrobat) to rotate the page on-the-fly when viewing it (use
-rotate
or
-rotateby
) and
(2) actually rotating the page contents and/or the page dimensions (use
-upright
(described
elsewhere in this chapter) afterwards or
-rotate-contents
to just rotate the page contents).
The possible values for
-rotate
and
-rotate-by
are 0, 90, 180 and 270, all interpreted as
being clockwise. Any value may be used for -rotate-contents.
The
-rotate
operation sets the viewing rotation of the selected pages to the absolute value
given.

18 Chapter 3. Pages
cpdf -rotate 90 in.pdf -o out.pdf
Set the rotation of all the pages in the input file to ninety degrees clockwise.
The
-rotateby
operation changes the viewing rotation of all the given pages by the relative
value given.
cpdf -rotateby 90 in.pdf -o out.pdf
Rotate all the pages in the input file by ninety degrees clockwise.
The
-rotate-contents
operation rotates the contents and dimensions of the page by the
given relative value.
cpdf -rotate-contents 90 in.pdf -o out.pdf
Rotate all the page contents in the input file by ninety degrees clockwise. Does not change the page
dimensions.
The
-upright
operation does whatever combination of
-rotate
and
-rotate-contents
is required to change the rotation of the document to zero without altering its appearance. In
addition, it makes sure the media box has its origin at (0,0), changing other boxes to compensate.
This is important because some operations in CPDF (such as scale-to-fit), and in other PDF-
processing programs, work properly only when the origin is (0, 0).
cpdf -upright in.pdf -o out.pdf
Make pages upright.
3.5 Flipping Pages
The
-hflip
and
-vflip
operations flip the contents of the chosen pages horizontally or
vertically. No account is taken of the current page rotation when considering what ”horizontally”
and ”vertically” mean, so you may like to use -upright (see above) first.
cpdf -hflip in.pdf even -o out.pdf
Flip the even pages in in.pdf horizontally.
cpdf -vflip in.pdf -o out.pdf
Flip all the pages in in.pdf vertically.
Chapter 3. Pages 19
3.6 Boxes and Cropping
All PDF files contain a media box for each page, giving the dimensions of the paper. To change
these dimensions (without altering the page contents in any way), use the
-mediabox
opera-
tion.
cpdf -mediabox "0pt 0pt 500pt 500pt" in.pdf -o out.pdf
Set the media box to 500 points square.
The four numbers are minimum x, minimum y, width, height. x coordinates increase to the
right, y coordinates increase upwards. PDF file can also optionally contain a crop box for each
page, defining to what extent the page is cropped before being displayed or printed. A crop box
can be set, changed and removed, without affecting the underlying media box. To set or change
the crop box use -cropbox. To remove any existing crop box, use -remove-cropbox.
cpdf -cropbox "0pt 0pt 200mm 200mm" in.pdf -o out.pdf
Crop pages to the bottom left 200-millimeter square of the page.
cpdf -remove-cropbox in.pdf -o out.pdf
Remove cropping.
Note that the crop box is only obeyed in some viewers. Similar operations are available for the
bleed, art, and trim boxes (-art, -remove-bleed etc.)
cpdf -frombox <boxname> -tobox <boxname> [-mediabox-if-missing]
in.pdf [<range>] -o out.pdf
Copy the contents of one box to another.
This operation copies the contents of one box (Media box, Crop box, Trim box etc.) to another. If
-mediabox-if-missing
is added, the media box will be substituted when the ’from’ box is
not set for a given page. For example
cpdf -frombox /TrimBox -tobox /CropBox in.pdf -o out.pdf
copies the Trim Box of each page to the Crop Box of each page. The possible boxes are
/MediaBox, /CropBox, /BleedBox, /TrimBox, /ArtBox.
A hard box (one which clips its contents by inserting a clipping rectangle) may be created
with the -hard-box operation:

20 Chapter 3. Pages
cpdf -hard-box /TrimBox in.pdf -o out.pdf
This means the resultant file may be used as a stamp without contents outside the given box
reappearing. The -mediabox-if-missing option may also be used here.
3.7 Showing Boxes and Printer’s Marks
The
-show-boxes
operation displays the boxes present on each page as method of debugging.
Since boxes may be coincident, they are shown in differing colours and dash patterns so they
may be identified even where they overlap. The colours are:
Media box Red
Crop box Green
Art box Blue
Trim box Orange
Bleed box Pink
The -trim-marks operation adds trim marks to a PDF file. The trim box must be present.

Chapter 4
Encryption and Decryption
cpdf -encrypt <method> [-pw=]<owner> [-pw=]<user>
[-no-encrypt-metadata] <permissions> in.pdf -o out.pdf
cpdf -decrypt [-decrypt-force] in.pdf owner=<owner password> -o out.pdf
4.1 Introduction
PDF files can be encrypted using various types of encryption and attaching various permissions
describing what someone can do with a particular document (for instance, printing it or
extracting content). There are two types of person:
The User can do to the document what is allowed in the permissions.
The Owner can do anything, including altering the permissions or removing encryption
entirely.
There are five kinds of encryption:
• 40-bit encryption (method 40bit) in Acrobat 3 (PDF 1.1) and above
• 128-bit encryption (method 128bit) in Acrobat 5 (PDF 1.4) and above
• 128-bit AES encryption (method AES) in Acrobat 7 (PDF 1.6) and above
•
256-bit AES encryption (method
AES256
) in Acrobat 9 (PDF 1.7) – this is deprecated – do
not use for new documents
• 256-bit AES encryption (method AES256ISO) in PDF 2.0
All encryption supports these kinds of permissions:
-no-edit Cannot change the document
-no-print Cannot print the document
-no-copy Cannot select or copy text or graphics
-no-annot Cannot add or change form fields or annotations
21

22 Chapter 4. Encryption and Decryption
In addition, 128-bit encryption (Acrobat 5 and above) and AES encryption supports these:
-no-forms Cannot edit form fields
-no-extract Cannot extract text or graphics
-no-assemble Cannot merge files etc.
-no-hq-print Cannot print high-quality
Add these options to the command line to prevent each operation.
Note: Adobe Acrobat and Adobe Reader may show slightly different permissions in info dialogues – this
is a result of policy changes and not a bug in cpdf. You may need to experiment.
4.2 Encrypting a Document
To encrypt a document, the owner and user passwords must be given (here,
fred
and
charles
respectively):
cpdf -encrypt 40bit fred charles -no-print in.pdf -o out.pdf
cpdf -encrypt 128bit fred charles -no-extract in.pdf -o out.pdf
cpdf -encrypt AES fred "" -no-edit -no-copy in.pdf -o out.pdf
A blank user password is common. In this event, PDF viewers will typically not prompt for a
password for when opening the file or for operations allowable with the user password.
cpdf -encrypt AES256ISO fred "" -no-forms in.pdf -o out.pdf
In addition, the usual method can be used to give the existing owner password, if the document
is already encrypted.
The optional
-pw=
preface may be given where a password might begin with a
-
and thus
be confused with a command line option.
When using AES encryption, the option is available to refrain from encrypting the metadata.
Add -no-encrypt-metadata to the command line.
4.3 Decrypting a Document
To decrypt a document, the owner password is provided.
cpdf -decrypt in.pdf owner=fred -o out.pdf
The user password cannot decrypt a file.
When appropriate passwords are not available, the option
-decrypt-force
may be added
to the command line to process the file regardless.

Chapter 5
Compression
cpdf -decompress in.pdf -o out.pdf
cpdf -compress in.pdf -o out.pdf
cpdf -squeeze in.pdf [-squeeze-log-to <filename>]
[-squeeze-no-recompress] [-squeeze-no-pagedata] -o out.pdf
cpdf
provides facilities for decompressing and compressing PDF streams, and for losslessly
reprocessing the whole file to ‘squeeze’ it. For lossy recompression of images within a PDF, see
Chapter 13.
5.1 Decompressing a Document
To decompress the streams in a PDF file, for instance to manually inspect the PDF, use:
cpdf -decompress in.pdf -o out.pdf
If
cpdf
finds a compression type it can’t cope with, the stream is left compressed. When using
-decompress
, object streams are not compressed. It may be easier for manual inspection to
also remove object streams, by adding the -no-preserve-objstm option to the command.
5.2 Compressing a Document
To compress the streams in a PDF file, use:
cpdf -compress in.pdf -o out.pdf
cpdf
compresses any streams which have no compression using the FlateDecode method, with
the exception of Metadata streams, which are left uncompressed.
23

24 Chapter 5. Compression
5.3 Squeezing a Document
To squeeze a PDF file, reducing its size by an average of about twenty percent (though sometimes
not at all), use:
cpdf -squeeze in.pdf -o out.pdf
Adding
-squeeze
to the command line when using another operation will squeeze the file or
files upon output.
The
-squeeze
operation writes some information about the squeezing process to standard
output. The squeezing process involves several processes which losslessly attempt to reduce
the file size. It is slow, so should not be used without thought.
$ ./cpdf -squeeze in.pdf -o out.pdf
Initial file size is 238169 bytes
Beginning squeeze: 123847 objects
Squeezing... Down to 114860 objects
Squeezing... Down to 114842 objects
Squeezing page data
Recompressing document
Final file size is 187200 bytes, 78.60% of original.
The
-squeeze-log-to <filename>
option writes the log to the given file instead of to
standard output. Log content is appended to the end of the log file, preserving existing contents.
The option
-squeeze-no-pagedata
avoids the reprocessing of page data, which avoids
problems in case of malformed files, and makes the process much faster at the cost of a little less
compression. The option
-squeeze-no-recompress
is deprecated as of version 2.6 and has
no effect.

Chapter 6
Bookmarks
cpdf -list-bookmarks [-utf8] in.pdf
cpdf -list-bookmarks-json in.pdf
cpdf -remove-bookmarks in.pdf -o out.pdf
cpdf -add-bookmarks <bookmark file> in.pdf -o out.pdf
cpdf -add-bookmarks-json <bookmark file> in.pdf -o out.pdf
cpdf -bookmarks-open-to-level <n> in.pdf -o out.pdf
cpdf -table-of-contents [-toc-title] [-toc-no-bookmark]
[-font <font>] [-font-size <size>] in.pdf -o out.pdf
PDF bookmarks (properly called the document outline) represent a tree of references to parts of
the file, typically displayed at the side of the screen. The user can click on one to move to the
specified place.
cpdf
provides facilities to list, add, and remove bookmarks. The format used
by the list and add operations is the same, so you can feed the output of one into the other, for
instance to copy bookmarks.
6.1 List Bookmarks
The
-list-bookmarks
operation prints (to standard output) the bookmarks in a file. The
first column gives the level of the tree at which a particular bookmark is. Then the text of the
bookmark in quotes. Then the page number which the bookmark points to. Then (optionally)
the word ”open” if the bookmark should have its children (at the level immediately below)
visible when the file is loaded. Then the destination (see below). For example, upon executing
cpdf -list-bookmarks doc.pdf
the result might be:
25

26 Chapter 6. Bookmarks
0 "Part 1" 1 open
1 "Part 1A" 2 "[2 /XYZ 200 400 null]"
1 "Part 1B" 3
0 "Part 2" 4
1 "Part 2a" 5
If the page number is 0, it indicates that clicking on that entry doesn’t move to a page.
By default,
cpdf
converts unicode to ASCII text, dropping characters outside the ASCII
range. To prevent this, and return unicode UTF8 output, add the
-utf8
option to the command.
To prevent any processing, use the
-raw
option. See Section 1.17 for more information. A
newline in a bookmark is represented as "\n".
By using
-list-bookmarks-json
instead, the bookmarks are formatted as a JSON array,
in order, of dictionaries formatted thus:
{ "level": 0,
"text": "1 Basic Usage",
"page": 17,
"open": false,
"target":
[ { "I": 17 },
{ "N": "/XYZ" },
{ "F": 85.039 },
{ "F": 609.307 },
null ]
}
See Chapter 15 for more details of cpdf’s JSON formatting. There are two differences here:
bookmark text is always UTF8, and the numbers for
level
and
page
are plain, rather than
begin surrounded with { "I": }.
6.1.1 Destinations
The destination is an extended description of where the bookmark should point to (i.e it can
be more detailed than just giving the page). For example, it may point to a section heading
halfway down a page. Here are the possibilities:

Chapter 6. Bookmarks 27
Format Description
[p /XYZ left top zoom]
Display page number p with (left, top) positioned
at upper-left of window and magnification of zoom.
Writing “null” for any of left, top or zoom specifies no
change. A zoom of 0 is the same as “null”.
[p /Fit]
Display page number p so as to fit fully within the
window.
[p /FitH top]
Display page number p with vertical coordinate top
at the top of the window and the page magnified
so its width fits the window. A null value for top
implies no change.
[p /FitV left]
Display page number p with horizontal coordinate
left at the left of the window, and the page magnified
so its height fits the window. A null value for left
implies no change.
[p /FitR left bottom right top]
Display page number p magnified so as to fit entirely
within the rectangle specified by the other parame-
ters.
[p /FitB]
As for /Fit but with the page’s bounding box (see
below).
[p /FitBH top]
As for /FitH but with the page’s bounding box (see
below).
[p /FitBV left]
As for /FitV but with the page’s bounding box (see
below).
The bounding box is the intersection of the page’s crop box and the bounding box of the page
contents. Some other kinds of destination may be produced by
-list-bookmarks
. They will
be preserved by -add-bookmarks and may be edited as your risk.
6.2 Remove Bookmarks
The -remove-bookmarks operations removes all bookmarks from the file.
cpdf -remove-bookmarks in.pdf -o out.pdf
6.3 Add Bookmarks
The
-add-bookmarks
file adds bookmarks as specified by a bookmarks file, a text file in ASCII or
UTF8 encoding and in the same format as that produced by the
-list-bookmarks
operation.
If there are any bookmarks in the input PDF already, they are discarded. For example, if the file
bookmarks.txt contains the output from -list-bookmarks above, then the command
cpdf -add-bookmarks bookmarks.txt in.pdf -o out.pdf
28 Chapter 6. Bookmarks
adds the bookmarks to the input file, writing to
out.pdf
. An error will be given if the
bookmarks file is not in the correct form (in particular, the numbers in the first column which
specify the level must form a proper tree with no entry being more than one greater than the
last).
Bookmarks in JSON format (see above) may be added with -add-bookmarks-json:
cpdf -add-bookmarks-json bookmarks.json in.pdf -o out.pdf
Remember that strings in JSON bookmark files are in UTF8.
6.4 Opening bookmarks
As an alternative to extracting a bookmark file and manipulating the open-status of bookmarks,
mass manipulation may be achieved by the following operation:
cpdf -bookmarks-open-to-level <level> in.pdf -o out.pdf
A level of 0 will close all bookmarks, level 1 will open just the top level, closing all others etc. To
open all of them, pick a sufficiently large level.
6.5 Making a Table of Contents
Cpdf can automatically generate a table of contents from existing bookmarks, adding it to the
beginning of the document.
cpdf -table-of-contents in.pdf -o out.pdf
The page(s) added will have the same dimensions, media and crop boxes as the first page of the
original file. The default title is “Table of Contents”, though this may be changed:
cpdf -table-of-contents -toc-title "Contents" in.pdf -o out.pdf
An empty title removes the title. The sequence
\n
may be used to split the title into lines. The
default font is 12pt Times Roman (and 24pt for the title). The base font and size may be changed
with -font and -font-size (see chapter 8 for full details):
cpdf -table-of-contents -font "Courier-Bold" -font-size 8
in.pdf -o out.pdf
By default, an entry for the new table of contents will be added to the document’s bookmarks.
To suppress this behaviour, add -toc-no-bookmark:

Chapter 6. Bookmarks 29
cpdf -table-of-contents -toc-no-bookmark in.pdf -o out.pdf

Chapter 7
Presentations
cpdf -presentation in.pdf [<range>] -o out.pdf
[-trans <transition-name>] [-duration <float>]
[-vertical] [-outward] [-direction <int>]
[-effect-duration <float>]
The PDF file format, starting at Version 1.1, provides for simple slide-show presentations in
the manner of Microsoft Powerpoint. These can be played in Acrobat and possibly other PDF
viewers, typically started by entering full-screen mode. The
-presentation
operation allows
such a presentation to be built from any PDF file.
The
-trans
option chooses the transition style. When a page range is used, it is the
transition from each page named which is altered. The following transition styles are available:
Split
Two lines sweep across the screen, revealing the new page. By default the lines are
horizontal. Vertical lines are selected by using the -vertical option.
Blinds
Multiple lines sweep across the screen, revealing the new page. By default the lines are
horizontal. Vertical lines are selected by using the -vertical option.
Box
A rectangular box sweeps inward from the edges of the page. Use
-outward
to make it
sweep from the center to the edges.
Wipe
A single line sweeps across the screen from one edge to the other in a direction specified
by the -direction option.
Dissolve The old page dissolves gradually to reveal the new one.
Glitter
The same as Dissolve but the effect sweeps across the page in the direction specified by
the -direction option.
31

32 Chapter 7. Presentations
To remove a transition style currently applied to the selected pages, omit the -trans option.
The
-effect-duration
option specifies the length of time in seconds for the transition
itself. The default value is one second.
The
-duration
option specifies the maximum time in seconds that the page is displayed
before the presentation automatically advances. The default, in the absence of the
-duration
option, is for no automatic advancement.
The
-direction
option (for Wipe and Glitter styles only) specifies the direction of the
effect. The following values are valid:
0 Left to right
90 Bottom to top (Wipe only)
180 Right to left (Wipe only)
270 Top to bottom
315 Top-left to bottom-right (Glitter only)
For example:
cpdf -presentation in.pdf 2-end -trans Split -duration 10 -o out.pdf
The Split style, with vertical lines, and each slide staying ten seconds unless manually advanced. The
first page (being a title) does not move on automatically, and has no transition effect.
To use different options on different page ranges, run
cpdf
multiple times on the file using a
different page range each time.

Chapter 8
Watermarks and Stamps
cpdf -stamp-on source.pdf
[-scale-stamp-to-fit] [<positioning command>] [-relative-to-cropbox]
in.pdf [<range>] [-fast] -o out.pdf
cpdf -stamp-under source.pdf
[-scale-stamp-to-fit] [<positioning command>] [-relative-to-cropbox]
in.pdf [<range>] [-fast] -o out.pdf
cpdf -combine-pages over.pdf under.pdf
[-fast] [-prerotate] [-no-warn-rotate] -o out.pdf
cpdf ([-add-text <text-format> | -add-rectangle <size>])
[-font <fontname>] [-font-size <size-in-points>]
[-load-ttf <name>=<file>] [-embed-std14]
[-color <color>] [-line-spacing <number>]
[-outline] [-linewidth <number>]
[-underneath] [-relative-to-cropbox]
[-prerotate] [-no-warn-rotate]
[-bates <number>] [-bates-at-range <number>]
[-bates-pad-to <number>] [-opacity <number>]
[-midline] [-topline]
[-fast]
in.pdf [<range>] -o out.pdf
See also positioning commands below.
cpdf -remove-text in.pdf [<range>] -o out.pdf
cpdf -prepend-content <content> in.pdf [<range>] -o out.pdf
cpdf -postpend-content <content> in.pdf [<range>] -o out.pdf
cpdf -stamp-as-xobject stamp.pdf in.pdf [<range>] -o out.pdf
NB: See discussion of -fast in Section 1.13.
33
34 Chapter 8. Watermarks and Stamps
8.1 Add a Watermark or Logo
The
-stamp-on
and
-stamp-under
operations stamp the first page of a source PDF onto or
under each page in the given range of the input file. For example,
cpdf -stamp-on logo.pdf in.pdf odd -o out.pdf
stamps the file
logo.pdf
onto the odd pages of
in.pdf
, writing to
out.pdf
. A watermark
should go underneath each page:
cpdf -stamp-under topsecret.pdf in.pdf -o out.pdf
The position commands in Section 8.2.4 can be used to locate the stamp more precisely (they are
calculated relative to the crop box of the stamp). Or, preprocess the stamp with -shift first.
The
-scale-stamp-to-fit
option can be added to scale the stamp to fit the page before
applying it. The use of positioning commands together with
-scale-stamp-to-fit
is not
recommended.
The
-combine-pages
operation takes two PDF files and stamps each page of one over
each page of the other. The length of the output is the same as the length of the “under” file.
For instance:
cpdf -combine-pages over.pdf under.pdf -o out.pdf
Page attributes (such as the display rotation) are taken from the “under” file. For best results, re-
move any rotation differences in the two files using
-upright
first, or by adding
-prerotate
to the command.
The
-relative-to-cropbox
option takes the positioning command to be relative to the
crop box of each page rather than the media box.
8.2 Stamp Text, Dates and Times.
The -add-text operation allows text, dates and times to be stamped over one or more pages
of the input at a given position and using a given font, font size and color.
cpdf -add-text "Copyright 2014 ACME Corp." in.pdf -o out.pdf
The default is black 12pt Times New Roman text in the top left of each page. The text can be
placed underneath rather than over the page by adding the -underneath option.
Text previously added by cpdf may be removed by the -remove-text operation.

Chapter 8. Watermarks and Stamps 35
cpdf -remove-text in.pdf -o out.pdf
8.2.1 Page Numbers and other Special Codes
There are various special codes to include the page number in the text:
%Page Page number in arabic notation (1, 2, 3. . . )
%PageDiv2 Page number in arabic notation divided by two
%roman Page number in lower-case roman notation (i, ii, iii. . . )
%Roman Page number in upper-case roman notation (I, II, III. . . )
%EndPage Last page of document in arabic notation
%Label The page label of the page
%EndLabel The page label of the last page
%filename The full file name of the input document
%URL[text|URL] Add text, which links to URL (does not work for diagonal text)
For example, the format "Page %Page of %EndPage" might become ”Page 5 of 17”.
NB: In some circumstances (e.g in batch files) on Microsoft Windows,
%
is a special character,
and must be escaped (written as %%). Consult your local documentation for details.
8.2.2 Date and Time Formats
%a Abbreviated weekday name (Sun, Mon etc.)
%A Full weekday name (Sunday, Monday etc.)
%b Abbreviated month name (Jan, Feb etc.)
%B Full month name (January, February etc.)
%d Day of the month (01–31)
%e Day of the month (1–31)
%H Hour in 24-hour clock (00–23)
%I Hour in 12-hour clock (01–12)
%j Day of the year (001–366)
%m Month of the year (01–12)
%M Minute of the hour (00–59)
%p ”a.m” or ”p.m”
%S Second of the minute (00–61)
%T Same as %H:%M:%S
%u Weekday (1–7, 1 = Sunday)
%w Weekday (0–6, 0 = Sunday)
%Y Year (0000–9999)
%% The % character.
8.2.3 Bates Numbers
Unique page identifiers can be specified by putting
%Bates
in the format. The starting point
can be set with the -bates option. For example:

36 Chapter 8. Watermarks and Stamps
cpdf -add-text "Page ID: %Bates" -bates 23745 in.pdf -o out.pdf
To specify that bates numbering begins at the first page of the range, use
-bates-at-range
instead. This option must be specified after the range is specified. To pad the bates number
up to a given number of leading zeros, use
-bates-pad-to
in addition to either
-bates
or
-bates-at-range.
8.2.4 Position
The position of the text may be specified in absolute terms:
-pos-center "200 200"
Position the center of the baseline text at (200pt, 200pt)
-pos-left "200 200"
Position the left of the baseline of the text at (200pt, 200pt)
-pos-right "200 200"
Position the right of the baseline of the text at (200pt, 200pt)
Position may be set relative to certain common points:
-top 10 Center of baseline 10 pts down from the top center
-topleft 10 Left of baseline 10 pts down and in from top left
-topleft "10 20" Left of baseline 10 pts down and 20 pts in from top left
-topright 10 Right of baseline 10 pts down and left from top right
-topright "10 20" Right of baseline 10 pts down and 20 pts left from top right
-left 10 Left of baseline 10 pts in from center left
-bottomleft 10 Left of baseline 10 pts in and up from bottom left
-bottomleft "10 20" Left of baseline 10 pts in and 20 pts up from bottom left
-bottom 10 Center of baseline 10 pts up from bottom center
-bottomright 10 Right of baseline 10 pts up and in from bottom right
-bottomright "10 20" Right of baseline 10 pts up and 20 pts in from bottom right
-right 10 Right of baseline 10 pts in from the center right
-diagonal Diagonal, bottom left to top right, centered on page
-reverse-diagonal Diagonal, top left to bottom right, centered on page
-center Centered on page
No attempt is made to take account of the page rotation when interpreting the position, so
-prerotate
may be added to the command line if the file contains pages with a non-zero
viewing rotation (to silence the rotation warning, add
-no-warn-rotate
instead) This is
equivalent to pre-processing the document with -upright (see chapter 3).
Chapter 8. Watermarks and Stamps 37
The
-relative-to-cropbox
modifier can be added to the command line to make these
measurements relative to the crop box instead of the media box. The
-midline
option may
be added to specify that the positioning commands above are to be considered relative to the
midline of the text, rather than its baseline. Similarly, the
-topline
option may be used to
specify that the position is taken relative to the top of the text.
8.2.5 Font and Size
The standard PDF fonts may be set with the -font option. They are:
Times-Roman
Times-Bold
Times-Italic
Times-BoldItalic
Helvetica
Helvetica-Bold
Helvetica-Oblique
Helvetica-BoldOblique
Courier
Courier-Bold
Courier-Oblique
Courier-BoldOblique
For example, page numbers in Times Italic can be achieved by:
cpdf -add-text "-%Page-" -font "Times-Italic" in.pdf -o out.pdf
The font size can be altered with the -font-size option, which specifies the size in points:
cpdf -add-text "-%Page-" -font-size 36 in.pdf -o out.pdf
Adding
-embed-std14 <directory>
, given a directory holding the GhostScript/URW free
fonts, will embed subsetted font files in the PDF for any of the Standard fonts used. These free
fonts may be downloaded from
https://github.com/ArtifexSoftware/urw-base35-
fonts
. This is important, for example, for PDF/A documents, which must have their fonts
embedded.
The standard fonts cover only the Latin characters, and are limiting. Other TrueType fonts
may be introduced with the
-load-ttf
option, giving a name for, and the file name of the
font. For example:
cpdf -load-ttf A=NotoSans-Black.ttf -font A -add-text "-%Page-" -o out.pdf
Here we have used the Noto Sans font from Google. This and other Google fonts contain
characters for a huge number of scripts, and are available free from
https://fonts.google.
com/noto/. But you may use any TrueType font.
See Section 14.3 for how to use an existing font from the source document.

38 Chapter 8. Watermarks and Stamps
8.2.6 Colors
The
-color
option takes an RGB (3 values), CYMK (4 values), or Grey (1 value) color. Com-
ponents range between 0 and 1. All the standard web colours
https://www.w3.org/wiki/
CSS/Properties/color/keywords
are provided as RGB components, and may be selected
by name.
cpdf -add-text "Hullo" -color darkgrey in.pdf -o out.pdf
cpdf -add-text "Hullo" -color "0.5 0.5 0.5" in.pdf -o out.pdf
cpdf -add-text "Hullo" -color "0.75" in.pdf -o out.pdf
cpdf -add-text "Hullo" -color "0.5 0.5 0.4 0.9" in.pdf -o out.pdf
Partly-transparent text may be specified using the
-opacity
option. Wholly opaque is 1 and
wholly transparent is 0. For example:
cpdf -add-text "DRAFT" -color "red" -opacity 0.3 -o out.pdf
8.2.7 Outline Text
The
-outline
option sets outline text. The line width (default 1pt) may be set with the
-linewidth option. For example, to stamp documents as drafts:
cpdf -add-text "DRAFT" -diagonal -outline in.pdf -o out.pdf
8.2.8 Multi-line Text
The code
\n
can be included in the text string to move to the next line. In this case, the vertical
position refers to the baseline of the first line of text (if the position is at the top, top left or top
right of the page) or the baseline of the last line of text (if the position is at the bottom, bottom
left or bottom right).
cpdf -add-text "Specification\n%Page of %EndPage"
-topright 10 in.pdf -o out.pdf
The
-midline
option may be used to make these vertical positions relative to the midline of a
line of text rather than the baseline, as usual.
The
-line-spacing
option can be used to increase or decrease the line spacing, where a
spacing of 1 is the standard.

Chapter 8. Watermarks and Stamps 39
cpdf -add-text "Specification\n%Page of %EndPage"
-topright 10 -line-spacing 1.5 in.pdf -o out.pdf
Justification of multiple lines is handled by the -justify-left, -justify-right and
-justify-center
options. The defaults are left justification for positions relative to the left
hand side of the page, right justification for those relative to the right, and center justification
for positions relative to the center of the page. For example:
cpdf -add-text "Long line\nShort" -justify-right in.pdf -o out.pdf
8.2.9 Special Characters
If your command line allows for the inclusion of unicode characters, the input text will be
considered as UTF8 by
cpdf
. Special characters which exist in the PDF WinAnsiEncoding Latin
1 code (such as many accented characters) will be reproduced in the PDF. This does not mean,
however, that every special character can be reproduced – it must exist in the font. When using a
custom font, cpdf will attempt to convert from UTF8 to the encoding of that font automatically.
(For compatibility with previous versions of cpdf, special characters may be introduced
manually with a backslash followed by the three-digit octal code of the character in the PDF
WinAnsiEncoding Latin 1 Code. The full table is included in Appendix D of the Adobe
PDF Reference Manual, which is available at
https://wwwimages2.adobe.com/content/
dam/acom/en/devnet/pdf/pdfs/PDF32000_2008.pdf
. For example, a German sharp s
(ß) may be introduced by \337. This functionality was withdrawn as of version 2.6)
8.3 Stamping Rectangles
A rectangle may be placed on one or more pages by using the
-add-rectangle <size>
command. Most of the options discussed above for text placement apply in the same way. For
example:
cpdf -add-rectangle "200 300" -pos-right 30 -color red -outline
in.pdf -o out.pdf
This can be used to blank out or highlight part of the document. The following positioning
options work as you would expect:
-topleft
,
-top
,
-topright
,
-right
,
-bottomright
,
-bottom
,
-bottomleft
,
-left
,
-center
. When using the option
-pos-left "x y"
, the
point (x, y) refers to the bottom-left of the rectangle. When using the option
-pos-right
"x y"
, the point (x, y) refers to the bottom-right of the rectangle. When using the option

40 Chapter 8. Watermarks and Stamps
-pos-center "x y"
, the point (x, y) refers to the center of the rectangle. The options
-diagonal and -reverse-diagonal have no meaning.
8.4 Low-level facilities
These two operations add content directly to the beginning or end of the page data for a page.
You must understand the PDF page description language to use these.
cpdf -prepend-content <content> in.pdf [<range>] -o out.pdf
cpdf -postpend-content <content> in.pdf [<range>] -o out.pdf
The
-fast
option may be added (see Chapter 1). The
-stamp-as-xobject
operation puts a
file in another as a Form XObject on the given pages. You can then use
-prepend-content
or
-postpend-content to use it.
cpdf -stamp-as-xobject stamp.pdf in.pdf [<range>] -o out.pdf

Chapter 9
Multipage Facilities
cpdf -pad-before in.pdf [<range>] [-pad-with pad.pdf] -o out.pdf
cpdf -pad-after in.pdf [<range>] [-pad-with pad.pdf] -o out.pdf
cpdf -pad-every [<integer>] in.pdf [-pad-with pad.pdf] -o out.pdf
cpdf -pad-multiple [<integer>] in.pdf -o out.pdf
cpdf -pad-multiple-before [<integer>] in.pdf -o out.pdf
cpdf [-impose <pagesize> | impose-xy "<x> <y>"]
[-impose-columns] [-impose-rtl] [-impose-btt]
[-impose-margin <margin>] [-impose-spacing <spacing>]
[-impose-linewidth <width>] [-fast]
in.pdf -o out.pdf
cpdf -twoup-stack [-fast] in.pdf -o out.pdf
cpdf -twoup [-fast] in.pdf -o out.pdf
cpdf -chop "<x> <y>" [-chop-columns] [-chop-rtl] [-chop-btt]
in.pdf [<range>] -o out.pdf
cpdf [-chop-h <y> | -chop-v <x>] [-chop-columns]
in.pdf [<range>] -o out.pdf
9.1 Inserting Blank Pages
Sometimes, for instance to get a printing arrangement right, it’s useful to be able to insert blank
pages into a PDF file.
cpdf
can add blank pages before a given page or pages, or after. The
pages in question are specified by a range in the usual way:
cpdf -pad-before in.pdf 1 -o out.pdf
Add a blank page before page 1 (i.e. at the beginning of the document.)
cpdf -pad-after in.pdf 2,16,38,84,121,147 -o out.pdf
41

42 Chapter 9. Multipage Facilities
Add a blank page after pages 2, 16, 38, 84, 121 and 147 (for instance, to add a clean page between
chapters of a document.)
The dimensions of the padded page are derived from the boxes (media box, crop box etc.) of
the page after or before which the padding is to be applied.
The
-pad-every n
operation places a blank page after every n pages, excluding any last
one. For example on a 9 page document this command adds a blank page after pages 3 and 6:
cpdf -pad-every 3 in.pdf -o out.pdf
Add a blank page after every three pages
In all three of these operations, one may specify
-pad-with
providing a (usually one-page) PDF
file to be used instead of a blank page. For example, a page saying “This page left intentionally
blank”.
The
-pad-multiple n
operation adds blank pages so the document has a multiple of
n
pages. For example:
cpdf -pad-multiple 8 in.pdf -o out.pdf
Add blank pages to in.pdf so it has a multiple of 8 pages.
The
-pad-multiple-before n
operation adds the padding pages at the beginning of the
file instead.
9.2 Imposition
Imposition is the act of putting two or more pages of an input document onto each page of the
output document. There are two operations provided by cpdf:
• the -impose operation which, given a page size fits multiple pages into it; and
• the -impose-xy operation which, given an x and y value, builds an output page which
fits x input pages horizontally and y input pages vertically.
cpdf -impose a0landscape in.pdf -o out.pdf
Impose as many pages as will fit on to new A0 landscape pages.
cpdf -impose-xy "3 4" in.pdf -o out.pdf
Impose 3 across and 4 down on to new pages of 3 times the width and 4 times the height of the input
ones.

Chapter 9. Multipage Facilities 43
The
x
value for
-impose-xy
may be set to zero to indicate an infinitely-wide page; the
y
value
to indicate an infinitely-long one. In both cases, the pages in the input file are assumed to be of
the same dimensions.
The following options may be used to modify the output:
• -impose-columns Lay the pages out in columns rather than rows.
• -impose-rtl Lay the pages out right-to-left.
• -impose-btt Lay the pages out bottom-to-top.
• -impose-margin <margin>
Add a margin around the edge of the page of the given
width. When using
-impose-xy
the page size increases; with
-impose
the pages are
scaled.
• -impose-spacing <spacing>
Add spacing between each row and column. When
using -impose-xy the page size increases; with -impose the pages are scaled.
• -impose-linewidth <width>
Add a border around each input page. With
-impose
the pages are scaled after the border is added, so you must account for this yourself.
To impose with rotated pages, for example to put two A4 portrait pages two-up on an A3
landscape page, rotate them prior to imposition.
Two other ways of putting multiple pages on a single page remain from earlier versions of
cpdf
which lacked a general imposition operation. The
-twoup-stack
operation puts two
logical pages on each physical page, rotating them 90 degrees to do so. The new mediabox is
thus larger. The
-twoup
operation does the same, but scales the new sides down so that the
media box is unchanged.
cpdf -twoup in.pdf -o out.pdf
Impose a document two-up, keeping the existing page size.
cpdf -twoup-stack in.pdf -o out.pdf
Impose a document two-up on a larger page by rotation.
NB: For all imposition options, see also discussion of -fast in Section 1.13.
9.3 Chopping up pages
The
-chop
operation cuts up a page into multiple pages, according to the chosen grid, and
those pages replace the originals in the PDF. It is a sort of de-imposition. For example:
cpdf -chop "2 3" in.pdf -o out.pdf
Chop each page into six.

44 Chapter 9. Multipage Facilities
The crop box is used if present; if not, the media box. By default, the pieces are arranged in the
output file row by row, and from left to right on each row. To alter this, add one or more of
-chop-columns, -chop-rtl (right to left), and -chop-btt (bottom to top).
As an alternative, pages can be chopped into two at a given position, horizontally with
-chop-h or vertically with -chop-v:
cpdf -chop-h 400 in.pdf -o out.pdf
Chop each page into two, top and bottom, at 400pt mark.
To reverse the order of pages in the output, specify -chop-columns in addition.

Chapter 10
Annotations
cpdf -list-annotations in.pdf [<range>]
cpdf -list-annotations-json in.pdf [<range>]
cpdf -set-annotations-json <filename> [-underneath]
in.pdf [<range>] -o out.pdf
cpdf -copy-annotations from.pdf to.pdf [<range>] -o out.pdf
cpdf -remove-annotations in.pdf [<range>] -o out.pdf
10.1 Listing Annotations
The
-list-annotations
operation prints the textual content of any annotations on the
selected pages to standard output. Each annotation is preceded by the page number and
followed by a newline. The output of this operation is always UTF8.
cpdf -list-annotations in.pdf > annots.txt
Print annotations from in.pdf, redirecting output to annots.txt.
More information can be obtained by listing annotations in JSON format:
cpdf -list-annotations-json in.pdf > annots.json
Print annotations from in.pdf in JSON format, redirecting output to annots.json.
This produces an array of (page number, object number, annotation) triples giving the PDF
structure of each annotation. Destination pages for page links will have page numbers in place
of internal PDF page links, but the content is otherwise unaltered. Here is an example entry for
an annotation with object number 102 on page 10:
45

46 Chapter 10. Annotations
[
10, 102
{ "/H": { "N": "/I" },
"/Border": [ { "I": 0 }, { "I": 0 }, { "I": 0 } ],
"/Rect": [
{ "F": 89.88023 }, { "F": 409.98401 }, { "F": 323.90561 }, {
"F": 423.32059 } ],
"/Subtype": { "N": "/Link" },
"/Type": { "N": "/Annot" },
"/A": {
"/S": { "N": "/URI" },
"/URI": { "U" : "http://www.google.com/" },
"/StructParent": { "I": 10 } }
]
Extra objects required for annotations, but which are not annotations themselves are also
extracted. They omit the page number, being just a pair of the object number and object. The
CPDFJSON format is described on page 71. There is an additional object, -1, which gives the
CPDF annotation format version, currently 1.
10.2 Setting annotations
We can also set annotations from a JSON file, either modified from the output of
-list-annotations-json
or produced manually:
cpdf -set-annotations annots.json in.pdf -o out.pdf
Add the annotations in
annots.json
on top of any already present in
in.pdf
, writing to
out.pdf
.
If replacing rather than adding annotations, use
-remove-annotations
first to clear the
existing ones.
10.3 Copying Annotations
The
-copy-annotations
operation copies the annotations in the given page range from one
file (the file specified immediately after the option) to another pre-existing PDF. The range is
specified after this pre-existing PDF. The result is then written an output file, specified in the
usual way.
cpdf -copy-annotations from.pdf to.pdf 1-10 -o result.pdf
Copy annotations from the first ten pages of
from.pdf
onto the PDF file
to.pdf
, writing the result
to results.pdf.
It exists for historical reasons, and is no different from listing and setting the annotations using
-list-annotations-json and -set-annotations.

Chapter 10. Annotations 47
10.4 Removing Annotations
The -remove-annotations operation removes all annotations from the given page range.
cpdf -remove-annotations in.pdf 1 -o out.pdf
Remove annotations from the first page of a file only.

Chapter 11
Document Information and
Metadata
cpdf -info[-json] [-utf8] in.pdf
cpdf -page-info[-json] in.pdf [<range>]
cpdf -pages in.pdf
cpdf -set-title <title of document>
[-also-set-xmp] [-just-set-xmp] in.pdf -o out.pdf
(Also -set-author etc. See Section 11.2.)
cpdf -set-page-layout <layout> in.pdf -o out.pdf
cpdf -set-page-mode <mode> in.pdf -o out.pdf
cpdf -set-non-full-screen-page-mode <mode> in.pdf -o out.pdf
cpdf -hide-toolbar <true | false> in.pdf -o out.pdf
-hide-menubar
-hide-window-ui
-fit-window
-center-window
-display-doc-title
cpdf -open-at-page <page number> in.pdf -o out.pdf
cpdf -open-at-page-fit <page number> in.pdf -o out.pdf
cpdf -open-at-page-custom <destination> in.pdf -o out.pdf
cpdf -set-metadata <metadata-file> in.pdf -o out.pdf
cpdf -remove-metadata in.pdf -o out.pdf
cpdf -print-metadata in.pdf
cpdf -create-metadata in.pdf -o out.pdf
cpdf -set-metadata-date <date> in.pdf -o out.pdf
cpdf -add-page-labels in.pdf -o out.pdf
[-label-style <style>] [-label-prefix <string>]
49

50 Chapter 11. Document Information and Metadata
[-label-startval <integer>] [-labels-progress]
cpdf -remove-page-labels in.pdf -o out.pdf
cpdf -print-page-labels[-json] in.pdf
cpdf -composition[-json] in.pdf
11.1 Reading Document Information
The
-info
operation prints entries from the document information dictionary, and from any
XMP metadata to standard output.
$cpdf -info pdf_reference.pdf
Encryption: Not encrypted
Permissions:
Linearized: true
Object streams: true
ID: <0b1f990718e2a92c0c112fbf08b233fb> <b2f1dbee369e11d9b951000393c97fd8>
Version: 1.5
Pages: 1236
Title: PDF Reference, version 1.6
Author: Adobe Systems Incorporated
Subject: Adobe Portable Document Format (PDF)
Keywords:
Creator: FrameMaker 7.0
Producer: Acrobat Distiller 6.0.1 for Macintosh
Created: D:20041114084116Z
Modified: D:20041114163850-08'00'
Trapped: False
PageMode: UseOutlines
PageLayout:
HideToolbar:
HideMenubar:
HideWindowUI:
FitWindow:
CenterWindow:
DisplayDocTitle: true
NonFullScreenPageMode:
AcroForm: False
MediaBox: 0.000000 0.000000 612.000000 792.000000
CropBox: 41.000000 63.000000 572.000000 729.000000
BleedBox:
TrimBox: various
ArtBox: various
Subformats:
XMP dc:title: PDF Reference, version 1.6

Chapter 11. Document Information and Metadata 51
XMP dc:creator: Adobe Systems Incorporated
XMP dc:description: Adobe Portable Document Format (PDF)
The details of the format for creation and modification dates can be found in Appendix A. If
page boxes vary among pages, the entry will read various.
By default, cpdf strips to ASCII, discarding character codes in excess of 127. In order to
preserve the original unicode, add the
-utf8
option. To disable all post-processing of the string,
add -raw. See Section 1.17 for more information.
The -info-json operation prints the information in JSON format instead. For example:
{
"Encryption": "Not encrypted",
"Permissions": [],
"Linearized": true,
"Object streams": true,
"ID": [
"0b1f990718e2a92c0c112fbf08b233fb", "b2f1dbee369e11d9b951000393c97fd8"
],
"Version": [ 1, 5 ],
"Pages": 1236,
"Title": "PDF Reference, version 1.6",
"Author": "Adobe Systems Incorporated",
"Subject": "Adobe Portable Document Format (PDF)",
"Keywords": null,
"Creator": "FrameMaker 7.0",
"Producer": "Acrobat Distiller 6.0.1 for Macintosh",
"Created": "D:20041114084116Z",
"Modified": "D:20041114163850-08'00'",
"Trapped": false,
"PageMode": "UseOutlines",
"PageLayout": null,
"HideToolbar": null,
"HideMenubar": null,
"HideWindowUI": null,
"FitWindow": null,
"CenterWindow": null,
"DisplayDocTitle": true,
"NonFullPageScreenMode": null,
"AcroForm": false,
"MediaBox": [ 0.0, 0.0, 612.0, 792.0 ],
"CropBox": [ 41.0, 63.0, 572.0, 729.0 ],
"BleedBox": null,
"TrimBox": "various",
"ArtBox": "various",
"Subformats": [],
"XMP dc:title": "PDF Reference, version 1.6",

52 Chapter 11. Document Information and Metadata
"XMP dc:creator": "Adobe Systems Incorporated",
"XMP dc:description": "Adobe Portable Document Format (PDF)"
}
The
-page-info
operation prints the page label, media box and other boxes, and number of
annotations page-by-page to standard output, for all pages in the current range.
$cpdf -page-info 14psfonts.pdf
Page 1:
Label: i
MediaBox: 0.000000 0.000000 600.000000 450.000000
CropBox: 200.000000 200.000000 500.000000 500.000000
BleedBox:
TrimBox:
ArtBox:
Rotation: 0
Annotations: 0
Note that the format for boxes is minimum x, minimum y, maximum x, maximum y. Using
-page-info-json we can get the information in JSON format. For example:
[
{
"Page": 1,
"Label": "i",
"MediaBox": [ 0.0, 0.0, 600.0, 450.0 ],
"CropBox": [ 200.0, 200.0, 500.0, 500.0 ],
"BleedBox": null,
"TrimBox": null,
"ArtBox": null,
"Rotation": 0,
"Annotations": 0
}
]
The -pages operation prints the number of pages in the file.
cpdf -pages Archos.pdf
8

Chapter 11. Document Information and Metadata 53
11.2 Setting Document Information
The document information dictionary in a PDF file specifies various pieces of information about a
PDF. These can be consulted in a PDF viewer (for instance, Acrobat).
Here is a summary of the commands for setting entries in the document information dictio-
nary:
Information Example command-line fragment
Title cpdf -set-title "Discourses"
Author cpdf -set-author "Joe Smith"
Subject cpdf -set-subject "Behavior"
Keywords cpdf -set-keywords "Ape Primate"
Creator cpdf -set-creator "Original Program"
Producer cpdf -set-producer "Distilling Program"
Creation Date cpdf -set-create "D:19970915110347-08’00’"
Modification Date cpdf -set-modify "D:19970915110347-08’00’"
Mark as Trapped cpdf -set-trapped
Mark as Untrapped cpdf -set-untrapped
(The details of the format for creation and modification dates can be found in Appendix A.
Using the date
"now"
uses the time and date at which the command is executed. Note also that
-producer
and
-creator
may be used to set the producer and/or the creator when writing
any file, separate from the operations described in this chapter.)
For example, to set the title, the full command line would be
cpdf -set-title "A Night in London" in.pdf -o out.pdf
The text string is considered to be in UTF8 format, unless the
-raw
option is added—in which
case, it is unprocessed, save for the replacement of any octal escape sequence such as
\017
,
which is replaced by a character of its value (here, 15).
To set also any field in the XMP metadata, add
-also-set-xmp
. The field must exist
already. To set only the field (not the document information dictionary), add
-just-set-xmp
instead.
To delete existing non-XMP metadata in line with PDF 2.0, use
-remove-dict-entry
"/Info" as described in chapter 19.
11.3 XMP Metadata
PDF files can contain a piece of arbitrary metadata, often in XMP format. This is typically stored
in an uncompressed stream, so that other applications can read it without having to decode the
whole PDF. To set the metadata:
cpdf -set-metadata data.xml in.pdf -o out.pdf
54 Chapter 11. Document Information and Metadata
To remove any metadata:
cpdf -remove-metadata in.pdf -o out.pdf
To print the current metadata to standard output:
cpdf -print-metadata in.pdf
To create XMP metadata from scratch, using any information in the Document Information
Dictionary (old-style metadata):
cpdf -create-metadata in.pdf -o out.pdf
To set the XMP metadata date field, use:
cpdf -set-metadata-date <date> in.pdf -o out.pdf
The date format is defined in Appendix A.2. Using the date
"now"
uses the time and date at
which the command is executed.
11.4 Upon Opening a Document
When considering the following commands, also NB: If the file has a valid
/OpenAction
setting, which tells the PDF reader to open at a certain page or position on a page, this can
override the page layout or display options. To prevent this, preprocess the file with the
-remove-dict-entry functionality from Section 19.9:
cpdf -remove-dict-entry /OpenAction in.pdf -o out.pdf
11.4.1 Page Layout
The
-set-page-layout
operation specifies the page layout to be used when a document is
opened in, for instance, Acrobat. The possible (case-sensitive) values are:
Chapter 11. Document Information and Metadata 55
SinglePage
Display one page at a time
OneColumn
Display the pages in one column
TwoColumnLeft
Display the pages in two columns, odd numbered pages
on the left
TwoColumnRight
Display the pages in two columns, even numbered pages
on the left
TwoPageLeft
(PDF 1.5 and above) Display the pages two at a time, odd
numbered pages on the left
TwoPageRight
(PDF 1.5 and above) Display the pages two at a time, even
numbered pages on the left
For instance:
cpdf -set-page-layout TwoColumnRight in.pdf -o out.pdf
11.4.2 Page Mode
The page mode in a PDF file defines how a viewer should display the document when first
opened. The possible (case-sensitive) values are:
UseNone
Neither document outline nor thumbnail images visible
UseOutlines
Document outline (bookmarks) visible
UseThumbs
Thumbnail images visible
FullScreen
Full-screen mode (no menu bar, window controls, or any-
thing but the document visible)
UseOC
(PDF 1.5 and above) Optional content group panel visible
UseAttachments
(PDF 1.5 and above) Attachments panel visible
For instance:
cpdf -set-page-mode FullScreen in.pdf -o out.pdf
If full screen mode is selected for document opening, we can also set a mode to be used when
the user exits from full-screen mode:
cpdf -set-non-full-screen-page-mode UseAttachments in.pdf -o out.pdf
As would be expected, FullScreen is not allowed here.
11.4.3 Display Options
The appearance of the PDF viewer upon opening a document may be set with these options.
Each is boolean - supply true or false:
56 Chapter 11. Document Information and Metadata
-hide-toolbar
Hide the viewer’s toolbar
-hide-menubar
Document outline (bookmarks) visible
-hide-window-ui
Hide the viewer’s scroll bars
-fit-window
Resize the document’s windows to fit size of first page
-center-window
Position the document window in the center of the screen
-display-doc-title
Display the document title instead of the file name in the
title bar
For instance:
cpdf -hide-toolbar true in.pdf -o out.pdf
The page a PDF file opens at can be set using -open-at-page:
cpdf -open-at-page 15 in.pdf -o out.pdf
To have that page scaled to fit the window in the viewer, use -open-at-page-fit instead:
cpdf -open-at-page-fit end in.pdf -o out.pdf
(Here, we used
end
to open at the last page. Any page specification describing a single page is
ok here.)
Alternatively, we may specify a full destination, of the kind described on page 26:
cpdf -open-at-page-custom "[3 /FitR 100 100 300 300]" in.pdf -o out.pdf
11.5 Page Labels
It is possible to add page labels to a document. These are not the printed on the page, but
may be displayed alongside thumbnails or in print dialogue boxes by PDF readers. We use
-add-page-labels
to do this, by default with decimal arabic numbers (1,2,3. . . ). We can add
-label-style to choose what type of labels to add from these kinds:
DecimalArabic 1, 2, 3, 4, 5. . .
LowercaseRoman i, ii, iii, iv, v. . .
UppercaseRoman I, II, III, IV, V. . .
LowercaseLetters a, b, c, . . . , z, aa, bb. . .
UppercaseLetters A, B, C, . . . , Z, AA, BB. . .
NoLabelPrefixOnly No number, but a prefix will be used if defined.
We can use
-label-prefix
to add a textual prefix to each label. Consider a file with twenty
pages and no current page labels (a PDF reader will assume 1,2,3. . . if there are none). We will
add the following page labels:

Chapter 11. Document Information and Metadata 57
i, ii, iii, iv, 1, 2, 3, 4, 5, 6, 7, 8, 9, 10, A-0, A-1, A-2, A-3, A-4, A-5
Here are the commands, in order:
cpdf -add-page-labels in.pdf 1-4 -label-style LowercaseRoman
-o out.pdf
cpdf -add-page-labels out.pdf 5-14 -o out2.pdf
cpdf -add-page-labels out2.pdf 15-20 -label-prefix "A-"
-label-startval 0 -o out3.pdf
By default the labels begin at page number 1 for each range. To override this, we can use
-label-startval
(we used
0
in the final command), where we want the numbers to begin
at zero rather than one. The option
-labels-progress
can be added to make sure the
start value progresses between sub-ranges when the page range specified is disjoint, e.g
1-9,
30-40 or odd.
Page labels may be removed altogether by using
-remove-page-labels
command. To
print the page labels from an existing file, use -print-page-labels. For example:
$ cpdf -print-page-labels in.pdf
labelstyle: LowercaseRoman
labelprefix: None
startpage: 1
startvalue: 1
labelstyle: DecimalArabic
labelprefix: A
startpage: 9
startvalue: 1
Or, in JSON format with -print-page-labels-json:
[
{
"labelstyle": "LowercaseRoman",
"labelprefix": null,
"startpage": 1,
"startvalue": 1
},
{
"labelstyle": "DecimalArabic",
"labelprefix": "A",
"startpage": 9,

58 Chapter 11. Document Information and Metadata
"startvalue": 1
}
]
11.6 Composition of a PDF
The
-composition
and
-composition-json
operations show how much space in a PDF is
used by each kind of data. Here is the output of -composition for this manual:
$ cpdf -composition cpdfmanual.pdf
Images: 0 bytes (0.00%)
Fonts: 144731 bytes (46.72%)
Content streams: 132767 bytes (42.85%)
Structure Info: 0 bytes (0.00%)
Attached Files: 0 bytes (0.00%)
XRef Table: 21082 bytes (6.80%)
Unclassified: 11229 bytes (3.62%)
And here it is in JSON format:
$ cpdf -composition-json cpdfmanual.pdf
[
("Images", 0, 0.0),
("Fonts", 144731, 46.71620256351494),
("Content streams", 132767, 42.854468398271194),
("Structure Info", 0, 0.0),
("Attached Files", 0, 0.0),
("XRef Table", 21082, 6.8048378194306816),
("Unclassified", 11229, 3.6244912187831857)
]
Note that, due to small inaccuracies in the method, it is possible for the
Unclassified
number
to be negative.

Chapter 12
File Attachments
cpdf -attach-file <filename> [-to-page <page number>] in.pdf -o out.pdf
cpdf -list-attached-files in.pdf
cpdf -remove-files in.pdf -o out.pdf
cpdf -dump-attachments in.pdf -o <directory>
PDF supports adding attachments (files of any kind, including other PDFs) to an existing file.
The
cpdf
tool supports adding and removing document-level attachments — that is, ones which
are associated with the document as a whole rather than with an individual page, and also
page-level attachments, associated with a particular page.
12.1 Adding Attachments
To add an attachment, use the -attach-file operation. For instance,
cpdf -attach-file sheet.xls in.pdf -o out.pdf
attaches the Excel spreadsheet
sheet.xls
to the input file. If the file already has attachments,
the new file is added to their number. You can specify multiple files to be attached by using
-attach-file multiple times. They will be attached in the given order.
The
-to-page
option can be used to specify that the files will be attached to the given page,
rather than at the document level. The -to-page option may be specified at most once.
12.2 Listing Attachments
To list all document- and page-level attachments, use the
-list-attached-files
operation.
The page number and filename of each attachment is given, page 0 representing a document-
level attachment.
59
60 Chapter 12. File Attachments
$cpdf -list-attached-files 14psfonts.pdf
0 utility.ml
0 utility.mli
4 notes.xls
12.3 Removing Attachments
To remove all document-level and page-level attachments from a file, use the
-remove-files
operation:
cpdf -remove-files in.pdf -o out.pdf
12.4 Dumping Attachments to File
The
-dump-attachments
operation, when given a PDF file and a directory path as the output,
will write each attachment under its filename (as displayed by
-list-attached-files
to
that directory. The directory must exist prior to the call.
cpdf -dump-attachments in.pdf -o /home/fred/attachments
Unless either the
-raw
or
-utf8
option is given, the filenames are stripped of dubious special
characters before writing. It is converted from unicode to 7 bit ASCII, and the following
characters are removed, in addition to any character with ASCII code less than 32:
/ ? < > \ :
*
| " ˆ + =

Chapter 13
Working with Images
cpdf -extract-images in.pdf [<range>] [-im <path>] [-p2p <path>]
[-dedup | -dedup-perpage] [-raw] -o <path>
cpdf -list-images[-json] in.pdf [<range>]
cpdf -image-resolution[-json] <minimum resolution> in.pdf [<range>]
cpdf -list-images-used[-json] in.pdf [<range>]
cpdf -process-images [-process-images-info] in.pdf [<range>]
[-im <filename>] [-jbig2enc <filename>]
[-lossless-resample[-dpi] <n> | -lossless-to-jpeg <n>]
[-jpeg-to-jpeg <n>] [-1bpp-method <method>]
[-jbig2-lossy-threshold <n>]
[-pixel-threshold <n>] [-length-threshold <n>]
[-percentage-threshold <n>] [-dpi-threshold <n>]
[-resample-interpolate]
-o out.pdf
13.1 Extracting images
Cpdf can extract the raster images to a given location. JPEG and JPEG2000 and lossless JBIG2
images are extracted directly.
Lossy JBIG2 images are extracted likewise, but an extra
<n>
is added, giving the number
of the JBIG2Global stream for this image, which is extracted as
<n>.jbig2global
. You may
reconstruct the individual images with, for example, jbig2dec.
Other images are written as PNGs, processed with either ImageMagick’s “magick” com-
mand, or NetPBM’s “pnmtopng” program, whichever is installed.
cpdf -extract-images in.pdf [<range>] [-im <path>] [-p2p <path]
[-dedup | -dedup-perpage] -o <path>
61

62 Chapter 13. Working with Images
The
-im
or
-p2p
option is used to give the path to the external tool, one of which must be
installed (unless -raw is added, which outputs instead just JPEG or plain .pnm files).
The output specifier, e.g
-o output/%%%
gives the number format for numbering the im-
ages. Output files are named serially from 0, and include the page number too. For example, out-
put files might be called
output/000-p1.jpg
,
output/001-p1.png
,
output/002-p3.jpg
etc. Here is an example invocation:
cpdf -extract-images in.pdf -im magick -o output/%%%
The
output
directory must already exist. The
-dedup
option deduplicates images entirely; the
-dedup-perpage option only per page.
13.2 Listing images
The -list-images operation lists all images in the file:
6, 1, /Z_Im0, 3300, 2550, 13432, 1, /DeviceGray, /CCITTFaxDecode
9, 2 13 14 15, /Z_Im0, 3376, 2649, 37972, 1, /DeviceGray, /CCITTFaxDecode
The fields are object number, page numbers, image name, width, height, size in bytes, bits per pixel,
colour space, filter (compression method). With
-list-images-json
, the same information is
available in JSON format:
[
{
"Object": 6,
"Pages": [ 1 ],
"Name": "/Z_Im0",
"Width": 3300,
"Height": 2550,
"Bytes": 13432,
"BitsPerComponent": 1,
"Colourspace": "/DeviceGray",
"Filter": "/CCITTFaxDecode"
},
{
"Object": 9,
"Pages": [ 2, 13, 14, 15 ],
"Name": "/Z_Im0",
"Width": 3376,
"Height": 2649,
"Bytes": 37972,

Chapter 13. Working with Images 63
"BitsPerComponent": 1,
"Colourspace": "/DeviceGray",
"Filter": "/CCITTFaxDecode"
}
]
13.3 Listing images at point of use
To list all images in the given range of pages which fall below a given resolution (in dots-per-
inch), use the -image-resolution function:
cpdf -image-resolution 300 in.pdf [<range>]
2, /Im5, 531, 684, 149.935297, 150.138267, 31
2, /Im6, 184, 164, 149.999988, 150.458710, 39
2, /Im7, 171, 156, 149.999996, 150.579145, 40
2, /Im9, 65, 91, 149.999986, 151.071856, 57
2, /Im10, 94, 60, 149.999990, 152.284285, 59
2, /Im15, 184, 139, 149.960011, 150.672060, 91
4, /Im29, 53, 48, 149.970749, 151.616446, 93
The format is page number, image name, x pixels, y pixels, x resolution, y resolution, object number.
The resolutions refer to the image’s effective resolution at point of use (taking account of scaling,
rotation etc).
The information is also available in JSON format:
[
{
"Object": 240,
"Page": 79,
"XObject": "/Z_Im0",
"W": 3326,
"H": 2584,
"Xdpi": 300.0,
"Ydpi": 300.0
},
{
"Object": 243,
"Page": 80,

64 Chapter 13. Working with Images
"XObject": "/Z_Im0",
"W": 3300,
"H": 2550,
"Xdpi": 300.0,
"Ydpi": 300.0
}
]
To list all images regardless of resolution, use
-list-images-used
or
-list-images-used-json
instead.
13.4 Removing an Image
To remove a particular image, find its name using
-list-images
then apply the
-draft
and
-draft-remove-only operations from Section 19.1.
13.5 Processing Images
Cpdf can process images within a PDF, replacing the original with the processed version. It
does this by saving out the image data, putting it through an external process, and then reading
it back in and re-inserting it. This is typically used to reduce the size of image data, and thus
the size of the PDF.
There are a number of option to deal with lossy (e.g JPEG) and lossless images, one or more
of which is specified. For example, the
-jpeg-to-jpeg
option processes existing JPEG images
to a given JPEG quality level:
cpdf -process-images -im magick -jpeg-to-jpeg 65 in.pdf -o out.pdf
ImageMagick is required. Use
-im
to supply it. If we specify
-process-images-info
too,
we can see the work being done:
cpdf -process-images -process-images-info -jpeg-to-jpeg 65
-im magick in.pdf -o out.pdf
Here is sample output:
(20/344) Object 265 (JPEG)... JPEG to JPEG 40798 -> 33463 (82%)
(38/344) Object 278 (JPEG)... JPEG to JPEG 4382 -> 3482 (79%)
(87/344) Object 266 (JPEG)... JPEG to JPEG 37227 -> 30199 (81%)
(243/344) Object 209 (JPEG)... no size reduction
Chapter 13. Working with Images 65
(246/344) Object 270 (JPEG)... JPEG to JPEG 202568 -> 191175 (94%)
(281/344) Object 280 (JPEG)... JPEG to JPEG 12255 -> 9825 (80%)
(312/344) Object 279 (JPEG)... JPEG to JPEG 4117 -> 3157 (76%)
Similar output appears for the other methods, when they are specified. You can see the counter
of work being done, and the result for each image chosen for processing.
The
-lossless-to-jpeg
option converts lossless images within PDFs to JPEG too, at the
given quality level. It may be specified in addition to -jpeg-to-jpeg:
cpdf -process-images -jpeg-to-jpeg 65 -lossless-to-jpeg 80
-im magick in.pdf -o out.pdf
Images are only processed if they meet certain thresholds. Changes to the default thresholds
may be specified:
Option Effect Default value
-pixel-threshold
Images below this number of pixels not
processed
25
-length-threshold
Images with less than this number of
bytes of data not processed
100
-percentage-threshold
Results not below this percentage of
original size discarded
99
-dpi-threshold
Only images above this threshold at all
use points processed
(no dpi check)
Instead of compressing lossless images with lossy JPEG compression, we can resample losslessly:
cpdf -process-images -im magick -lossless-resample 80 in.pdf -o out.pdf
This will resample losslessly-compressed images to contain 80 percent of the original pixels. By
default, there will be no interpolation. To use interpolation, which may result in slightly larger
data, add
-resample-interpolate
. To use a DPI target instead, use
-lossless-resample-dpi
instead:
cpdf -process-images -im magick -lossless-resample-dpi 300
in.pdf -o out.pdf
The methods so far introduced do not operate on 1 bit per pixel data. Different compression
mechanisms are typically in use, and we need a different approach. The
-1bpp-method
option
specifies what to do with losslessly compressed 1 bit-per-pixel images.
Method Effect
JBIG2 Lossless JBIG2
JBIG2Lossy Lossy JBIG2, sharing JBIG2Globals data amongst all images.

66 Chapter 13. Working with Images
These options require the
jbig2enc
program, whose location may be specified with
-jbig2enc
.
For lossy JBIG2, the threshold for similarity of data may be set with
-jbig2-lossy-threshold
.
For example:
cpdf -process-images -jbig2enc jbig2enc -1bpp-method JBIG2Lossy
-jbig2-lossy-threshold 75 in.pdf -o out.pdf
It is not currently possible to reprocess lossless JBIG2 into lossy JBIG2, nor is it possible to
recompress into CCITT.
NB: CYMK images will be converted to RGB or untouched by some of these processes. A
future version of cpdf will remove this limitation.

Chapter 14
Fonts
cpdf -list-fonts[-json] in.pdf
cpdf -print-font-table <font name> -print-font-table-page <n> in.pdf
cpdf -copy-font fromfile.pdf -copy-font-page <int>
-copy-font-name <name> in.pdf [<range>] -o out.pdf
cpdf -remove-fonts in.pdf -o out.pdf
cpdf -missing-fonts in.pdf
cpdf -embed-missing-fonts -gs <path to gs> in.pdf -o out.pdf
cpdf -extract-font <page number>,<pdf font name> in.pdf -o out.font
14.1 Listing Fonts
The
-list-fonts
operation prints the fonts in the document, one-per-line to standard output.
For example:
1 /F245 /Type0 /Cleargothic-Bold /Identity-H
1 /F247 /Type0 /ClearGothicSerialLight /Identity-H
1 /F248 /Type1 /Times-Roman /WinAnsiEncoding
1 /F250 /Type0 /Cleargothic-RegularItalic /Identity-H
2 /F13 /Type0 /Cleargothic-Bold /Identity-H
2 /F16 /Type0 /Arial-ItalicMT /Identity-H
2 /F21 /Type0 /ArialMT /Identity-H
2 /F58 /Type1 /Times-Roman /WinAnsiEncoding
2 /F59 /Type0 /ClearGothicSerialLight /Identity-H
2 /F61 /Type0 /Cleargothic-BoldItalic /Identity-H
2 /F68 /Type0 /Cleargothic-RegularItalic /Identity-H
3 /F47 /Type0 /Cleargothic-Bold /Identity-H
3 /F49 /Type0 /ClearGothicSerialLight /Identity-H
67

68 Chapter 14. Fonts
3 /F50 /Type1 /Times-Roman /WinAnsiEncoding
3 /F52 /Type0 /Cleargothic-BoldItalic /Identity-H
3 /F54 /Type0 /TimesNewRomanPS-BoldItalicMT /Identity-H
3 /F57 /Type0 /Cleargothic-RegularItalic /Identity-H
4 /F449 /Type0 /Cleargothic-Bold /Identity-H
4 /F451 /Type0 /ClearGothicSerialLight /Identity-H
4 /F452 /Type1 /Times-Roman /WinAnsiEncoding
The first column gives the page number, the second the internal unique font name, the third
the type of font (Type1, TrueType etc), the fourth the PDF font name, the fifth the PDF font
encoding.
The information is also available in JSON format with -list-fonts-json:
[
{
"page": 1,
"name": "/F47",
"subtype": "/Type1",
"basefont": "/XYPLPB+NimbusSanL-Bold",
"encoding": null
},
{
"page": 1,
"name": "/F50",
"subtype": "/Type0",
"basefont": "/MCBERL+URWPalladioL-Roma",
"encoding": "/Identity-H"
}
]
14.2 Listing characters in a font
We can use
cpdf
to find out which characters are available in a given font, and to print the
map between character codes, unicode codepoints, and Adobe glyph names. This is presently a
best-effort service, and does not cover all font/encoding types.
We find the name of the font by using -list-fonts:
$ ./cpdf -list-fonts cpdfmanual.pdf 1
1 /F46 /Type1 /XYPLPB+NimbusSanL-Bold
1 /F49 /Type1 /MCBERL+URWPalladioL-Roma
We may then print the table, giving either the font’s name (e.g
/F46
) or basename (e.g
/XYPLPB+NimbusSanL-Bold):

Chapter 14. Fonts 69
$ ./cpdf -print-font-table /XYPLPB+NimbusSanL-Bold
-print-font-table-page 1 cpdfmanual.pdf
67 = U+0043 (C - LATIN CAPITAL LETTER C) = /C
68 = U+0044 (D - LATIN CAPITAL LETTER D) = /D
70 = U+0046 (F - LATIN CAPITAL LETTER F) = /F
71 = U+0047 (G - LATIN CAPITAL LETTER G) = /G
76 = U+004C (L - LATIN CAPITAL LETTER L) = /L
80 = U+0050 (P - LATIN CAPITAL LETTER P) = /P
84 = U+0054 (T - LATIN CAPITAL LETTER T) = /T
97 = U+0061 (a - LATIN SMALL LETTER A) = /a
99 = U+0063 (c - LATIN SMALL LETTER C) = /c
100 = U+0064 (d - LATIN SMALL LETTER D) = /d
101 = U+0065 (e - LATIN SMALL LETTER E) = /e
104 = U+0068 (h - LATIN SMALL LETTER H) = /h
105 = U+0069 (i - LATIN SMALL LETTER I) = /i
108 = U+006C (l - LATIN SMALL LETTER L) = /l
109 = U+006D (m - LATIN SMALL LETTER M) = /m
110 = U+006E (n - LATIN SMALL LETTER N) = /n
111 = U+006F (o - LATIN SMALL LETTER O) = /o
112 = U+0070 (p - LATIN SMALL LETTER P) = /p
114 = U+0072 (r - LATIN SMALL LETTER R) = /r
115 = U+0073 (s - LATIN SMALL LETTER S) = /s
116 = U+0074 (t - LATIN SMALL LETTER T) = /t
The first column is the character code, the second the Unicode codepoint, the character itself
and its Unicode name, and the third the Adobe glyph name.
14.3 Copying Fonts
In order to use a font other than the standard 14 with
-add-text
, it must be added to the file.
The font source PDF is given, together with the font’s resource name on a given page, and that
font is copied to all the pages in the input file’s range, and then written to the output file.
The font is named in the output file with its basefont name, so it can be easily used with
-add-text.
For example, if the file
fromfile.pdf
has a font
/GHLIGA+c128
with the name
/F10
on
page 1 (this information can be found with
-list-fonts
), the following would copy the font
to the file in.pdf on all pages, writing the output to out.pdf:
cpdf -copy-font fromfile.pdf -copy-font-name /F10
-copy-font-page 1 in.pdf -o out.pdf
Text in this font can then be added by giving
-font /GHLIGA+c128
. Be aware that due to the
vagaries of PDF font handling concerning which characters are present in the source font, not all
characters may be available, or cpdf may not be able to work out the conversion from UTF8 to
the font’s own encoding. You may add
-raw
to the command line to avoid any conversion, but
the encoding (mapping from input codes to glyphs) may be non-obvious and require knowledge
of the PDF format to divine.
70 Chapter 14. Fonts
14.4 Removing Fonts
To remove embedded fonts from a document, use
-remove-fonts
. PDF readers will substitute
local fonts for the missing fonts. The use of this function is only recommended when file size is
the sole consideration.
cpdf -remove-fonts in.pdf -o out.pdf
14.5 Missing Fonts
The -missing-fonts operation lists any unembedded fonts in the document, one per line.
cpdf -missing-fonts in.pdf
The format is
Page number, Name, Subtype, Basefont, Encoding
The operation
-embed-missing-fonts
will process the file with
gs
(which must be installed)
to embed missing fonts (where found):
cpdf -embed-missing-fonts -gs gs in.pdf -o out.pdf
Note: putting a PDF file through
gs
in this manner may not be lossless: some metadata may not be
preserved.
14.6 Extracting Fonts
We may extract a font file by giving the page number and the PDF font resource name, as
printed by
-list-fonts
or
-list-fonts-json
. For example, for the TrueType font
/F50
on page 5:
cpdf -extract-font 5,/F50 in.pdf -o out.ttf

Chapter 15
PDF and JSON
cpdf in.pdf -output-json -o out.json
[-output-json-parse-content-streams]
[-output-json-no-stream-data]
[-output-json-decompress-streams]
[-output-json-clean-strings]
[-utf8]
cpdf -j in.json -o out.pdf
In addition to reading and writing PDF files in the original Adobe format,
cpdf
can read
and write them in its own CPDFJSON format, for somewhat easier extraction of information,
modification of PDF files, and so on.
15.1 Converting PDF to JSON
We convert a PDF file to JSON format like this:
cpdf -output-json in.pdf -o out.json
The resultant JSON file is an array of arrays containing an object number followed by an object,
one for each object in the file and two special ones:
•
Object -1: CPDF’s own data with the PDF version number, CPDF JSON format number,
and flags used when writing (which may be required when reading):
– /CPDFJSONformatversion (CPDFJSON integer (see below), currently 3)
– /CPDFJSONcontentparsed (boolean, true if content streams have been parsed)
– /CPDFJSONstreamdataincluded
(boolean, true if stream data included. Cannot
round-trip if false).
71
72 Chapter 15. PDF and JSON
– /CPDFJSONmajorpdfversion (CPDFJSON integer)
– /CPDFJSONminorpdfversion (CPDFJSON integer)
• Object 0: The PDF’s trailer dictionary
• Objects 1..n: The PDF’s objects.
Objects are formatted thus:
• PDF arrays, dictionaries, booleans, and strings are the same as in JSON.
• Integers are written as {"I": 0}
• Floats are written as {"F": 0.0}
• Names are written as {"N": "/Pages"}
• Indirect references are integers
• Streams are {"S": [dict, data]}
•
Strings are converted to JSON string format in a way which, when reversed, results in
the original string. For best results when editing files, use the
-utf8
option. The string
representation is again reversible, but easier to edit. Unicode strings are written as
{"U":
"the text"}.
Here is an example of the output for a small PDF:
[
[
-1,
{ "/CPDFJSONformatversion": { "I": 2 },
"/CPDFJSONcontentparsed": false,
"/CPDFJSONstreamdataincluded": true,
"/CPDFJSONmajorpdfversion": { "I": 1 },
"/CPDFJSONminorpdfversion": { "I": 1 } }
],
[
0,
{ "/Size": { "I": 4 }, "/Root": 4,
"/ID" : [ <elided>, <elided>] } ],
[
1, { "/Type": { "N": "/Pages" }, "/Kids": [ 3 ], "/Count": { "I": 1 } }
],
[
2,
{"S": [{ "/Length": { "I": 49 } },
"1 0 0 1 50 770 cm BT/F0 36 Tf(Hello, World!)Tj ET"] }
],
[
3, { "/Type": { "N": "/Page" }, "/Parent": 1,
"/Resources": {

Chapter 15. PDF and JSON 73
"/Font": {
"/F0": {
"/Type": { "N": "/Font" },
"/Subtype": { "N": "/Type1" },
"/BaseFont": { "N": "/Times-Italic" }
}
}
},
"/MediaBox":
[{ "I": 0 }, { "I": 0 },
{ "F": 595.2755905510001 }, { "F": 841.88976378 }],
"/Rotate": { "I": 0 },
"/Contents": [ 2 ] } ],
[
4, { "/Type": { "N": "/Catalog" }, "/Pages": 1 } ]
]
The option
-output-json-parse-content-streams
will also convert content streams to
JSON, so our example content stream will be expanded:
2, {
"S": [
{}, [
[
{ "F": 1.0 }, { "F": 0.0 }, { "F": 0.0 }, { "F": 1.0 }, { "F": 50.0 }, {
"F": 770.0 }, "cm" ], [ "BT" ], [ "/F0", { "F": 36.0 }, "Tf" ], [
"Hello, World!", "Tj" ], [ "ET" ] ]
] } ], [
The option
-output-json-no-stream-data
simply elides the stream data instead, leading
to much smaller JSON files. But these may not be round-tripped back into PDF, of course.
The option
-output-json-decompress-streams
keeps the streams intact, and decom-
presses them.
The option
-output-json-clean-strings
converts any UTF16BE strings with no high
bytes to PDFDocEncoding prior to output, so that editing them is easier. Note: this is deprecated
as of version 2.6 in favour of -utf8.
15.2 Converting JSON to PDF
We can load a JSON PDF file with the
-j
option in place of a PDF file anywhere in a normal
cpdf command. A range may be applied, just like any other file.
cpdf -j in.json -o out.pdf
It is not required that
/Length
entries in CPDFJSON stream dictionaries be correctly updated
when the JSON file is edited: cpdf will fix them when loading.
Chapter 16
Optional Content Groups
cpdf -ocg-list in.pdf
cpdf -ocg-rename -ocg-rename-from <a> -ocg-rename-to <b> in.pdf -o out.pdf
cpdf -ocg-order-all in.pdf -o out.pdf
cpdf -ocg-coalesce-on-name in.pdf -o out.pdf
In a PDF file, optional content groups are used to group graphical elements together, so they
may appear or not, depending on the preference of the user. They are similar in some ways to
layers in graphics illustration programs.
cpdf -ocg-list in.pdf
List the optional content groups in the PDF, one per line, to standard output. UTF8.
cpdf -ocg-rename -ocg-rename-from <a> -ocg-rename-to <b> in.pdf -o out.pdf
Rename an optional content group.
cpdf -ocg-coalesce-on-name in.pdf -o out.pdf
Coalesce optional content groups. For example, if we merge or stamp two files both with
an OCG called ”Layer 1”, we will have two different optional content groups. Running
-ocg-coalesce-on-name will merge the two into a single optional content group.
cpdf -ocg-order-all in.pdf -o out.pdf
Ensure that every optional content group appears in the order list.
75

Chapter 17
Creating New PDFs
cpdf -create-pdf [-create-pdf-pages <n>]
[-create-pdf-papersize <paper size>] -o out.pdf
cpdf -typeset <text file> [-create-pdf-papersize <size>]
[-font <font>] [-font-size <size>] -o out.pdf
cpdf -jpeg <filename> -o out.pdf]
cpdf -png <filename> -o out.pdf
cpdf [-jbig2-global <filename>] -jbig2 <filename>
[-jbig2-global | -jbig2-global-clear]
[-jbig2 <filename>] ... -o out.pdf
17.1 A new blank PDF
We can build a new PDF file, given a number of pages and a paper size. The default is one page,
A4 portrait.
cpdf -create-pdf -create-pdf-pages 20
-create-pdf-papersize usletterportrait -o out.pdf
The standard paper sizes are listed in Section 3.1, or you may specify the width and height
directly, as described in the same chapter.
17.2 Convert a text file to PDF
A basic text to PDF convertor is included in
cpdf
. It takes a UTF8 text file (ASCII is a subset
of UTF8) and typesets it ragged-right, splitting on whitespace. Both Windows and Unix line
endings are allowed.
77

78 Chapter 17. Creating New PDFs
cpdf -typeset file.txt -create-pdf-papersize a3portrait
-font Courier -font-size 10 -o out.pdf
The standard paper sizes are listed in Section 3.1, or you may specify the width and height
directly, as described in the same chapter. The standard fonts are listed in chapter 8. The default
font is Times-Roman and the default size is 12.
17.3 Make a PDF from a PNG or JPEG image
Simple facilities for making PDFs from PNG and JPEG images are included in
cpdf
. The
resulting file can be written out, or used for further operations.
For PNG files, the file must have no transparency and no interlacing, and must not be
palletised:
cpdf -png image.png -o out.pdf
cpdf image.png AND -add-text "My Image" -o out.pdf
Notice that the
-png
can be omitted if your file has a standard file extension. Almost any JPEG
file may be used with -jpeg or again, with a standard extension:
cpdf -jpeg image.jpg -o out.pdf
The output file will have one point of width or height for each pixel in the input.
17.4 Make a PDF from one or more JBIG2 images
Cpdf can build multi-pages files from one or more PDF-appropriate JBIG2 fragments, prepared
by the jbig2enc program. In lossless mode, there is one JBIG2 fragment for each page:
cpdf -jbig2 1.jbig2 -jbig2 2.jbig2 -jbig2 3.jbig2 -o out.pdf
This produces a PDF of three pages. In lossy mode, a JBIG2Globals stream can be added, which
contains shared data for several pages:
cpdf -jbig2-global 0.jbig2globals
-jbig2 1.jbig2 -jbig2 2.jbig2 -jbig2 3.jbig2 -o out.pdf
The
-jbig2-global
option may be used to change the JBIG2Globals stream in use. The
-jbig2-global-clear
option may be used to cease use of a globals stream and return to
lossless mode.

Chapter 18
Drawing on PDFs
cpdf in.pdf [<range>] -draw <draw operations> [-underneath] -o out.pdf
cpdf -text-width <text> [-font <font>] [-fontsize <fontsize>]
BUILDING AND SHOWING PATHS
-rect Draw rectangle
-to Move to
-line Add line to path
-bez Add Bezier curve to path
-bez23 Add Bezier curve to path
-bez13 Add Bezier curve to path
-circle Add circle to path
-stroke Stroke path
-fill Fill path
-filleo Fill path, even odd
-strokefill Stroke and fill path
-strokefilleo Stroke and fill path, even odd
-close Close path
CLIPPING WITH PATHS
-clip Clip
-clipeo Clip, even odd
PATH PARAMETERS
-strokecol Set stroke colour
-fillcol Set fill colour
-thick Set stroke thickness
-cap Set cap
-join Set join
-miter Set miter limit
-dash Set dash pattern
79

80 Chapter 18. Drawing on PDFs
THE GRAPHICS STACK AND MATRICES
-push Push graphics stack
-pop Pop graphics stack
-matrix Append to graphics matrix
-mtrans Translate the graphics matrix
-mrot Rotate the graphics matrix
-mscale Scale the graphics matrix
-mshearx Shear the graphics matrix in X
-msheary Shear the graphics matrix in Y
RE-USE WITH XOBJECTS
-xobj-bbox Specify the bounding box for xobjects
-xobj Begin saving a sequence of graphics operators
-end-xobj End saving a sequence of graphics operators
-use Use a saved sequence of graphics operators
IMAGES
-draw-jpeg Load a JPEG from file and name it
-draw-png Load a PNG from file and name it
-image Draw an image which has already been loaded
TRANSPARENCY
-fill-opacity Set opacity
-stroke-opacity Set stroke opacity
TEXT
-bt Begin text
-et End text
-text Draw text
-stext Draw text with %specials
-leading Set leading
-charspace Set character spacing
-wordspace Set word space
-textscale Set text scale
-rendermode Set text rendering mode
-rise Set text rise
-nl New line
THE NEXT PAGE
-newpage Move to a fresh page
18.1 Basics
We can draw on an existing PDF (or a new one created with
-create-pdf
from the previous
chapter) using the
-draw
operation. This provides commands for drawing vector graphics,
simple text and adding images. For example:

Chapter 18. Drawing on PDFs 81
cpdf -create-pdf AND -draw -bt -text Hello -et -o out.pdf
cpdf in.pdf -draw -bt -text Hello -et -o out.pdf
The first example builds a new A4 portrait PDF with one page, and writes Hello in the default
12pt Times Roman font at the bottom left. The second does the same, but for every page of an
existing PDF.
18.2 Building and showing paths
-rect "x y w h" Draw rectangle
-to "x y" Move to
-line "x y" Add line to path
-bez "x1 y1 x2 y2 x3 y3" Add Bezier curve to path
-bez23 "x2 y2 x3 y3" Add Bezier curve to path
-bez13 "x1 y1 x3 y3" Add Bezier curve to path
-circle "x y r" Add circle to path
-stroke Stroke path
-fill Fill path
-filleo Fill path, even odd
-strokefill Stroke and fill path
-strokefilleo Stroke and fill path, even odd
-close Close path
To draw line art, we build paths and then stroke or fill them. For example:
cpdf -create-pdf AND -draw -to "100 100" -line "400 400" -stroke
-line "400 100" -line "100 100" -stroke
-o out.pdf
We use
-to
to start the path at a given coordinate,
-line
to extend the path with each line,
and then
-stroke
to stroke the path. Coordinates in a PDF file have the origin
(0, 0)
at the
bottom-left of the page. All units are in points (1/72 inch). This creates the following PDF:
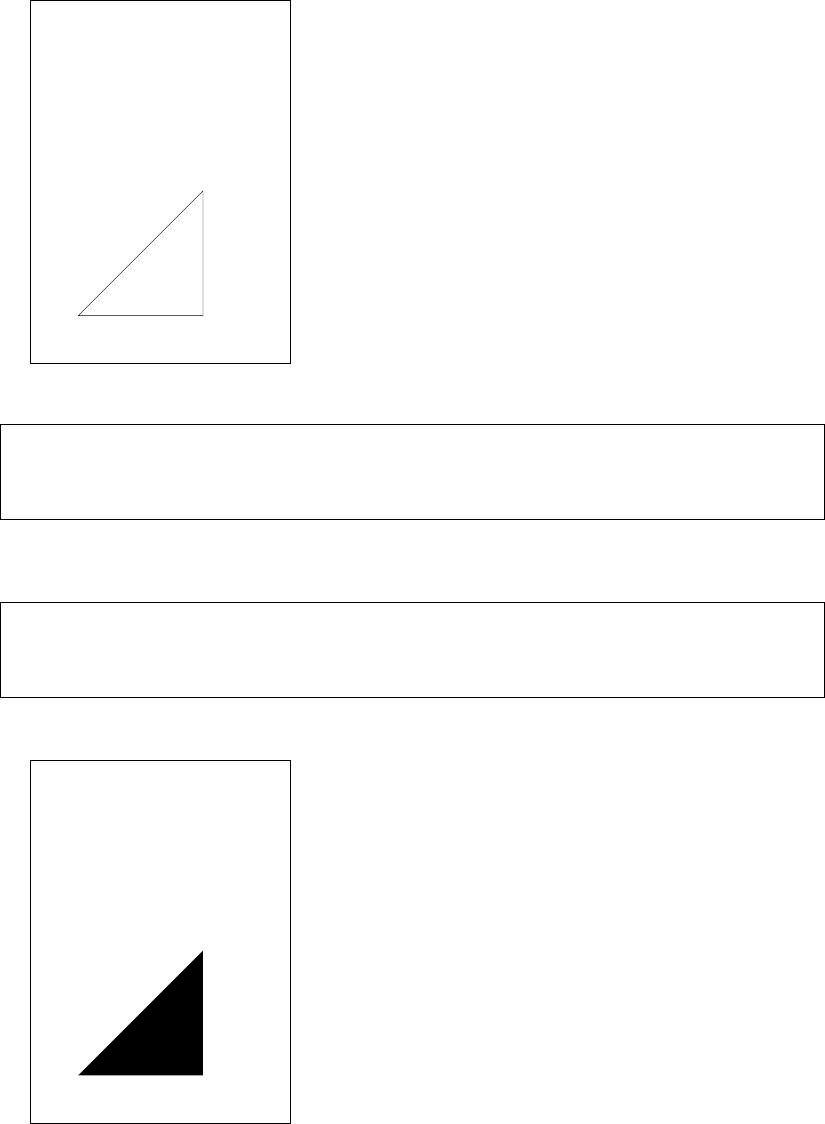
82 Chapter 18. Drawing on PDFs
Alternatively, we may use -close to draw the final line back to the starting point:
cpdf -create-pdf AND -draw -to "100 100" -line "400 400"
-line "400 100" -close -stroke
-o out.pdf
We can have multiple such subpaths in a path, by closing and carrying on. We can fill our path
with -fill:
cpdf -create-pdf AND -draw -to "100 100" -line "400 400"
-line "400 100" -close -fill
-o out.pdf
Now we have a filled triangle:

Chapter 18. Drawing on PDFs 83
The operations
-filleo
,
-strokefill
and
-strokefilleo
provide alternative combina-
tions of stroke, fill, and winding rule.
We can save time when drawing rectangles by using the
-rect
operation, which takes the
lower left coordinate, width and height. There is no need to explicitly close the rectangle.
cpdf -create-pdf AND -draw -rect "200 300 200 300" -stroke
-o out.pdf
We can build bezier curves using
-bez
,
-bez23
and
-bez13
. The first adds a bezier path using
six coordinates - for the control points first, and then for the end point (the start point is the
current coordinate):
cpdf -create-pdf AND -draw -to "100 100" -bez "400 600 600 400 300 300"
-stroke -o out.pdf
Here is the result:
The operation
-bez23
is a shorthand used when the first control point is equal to the current
point. The operation
-bez13
is a shorthand used when the second control point is equal to the
final point.
To avoid calculating the Bezier curves for a circle manually,
cpdf
can generate them auto-
matically when given the centre and radius:
cpdf -create-pdf AND -draw -circle "200 200 100"
-stroke -o out.pdf
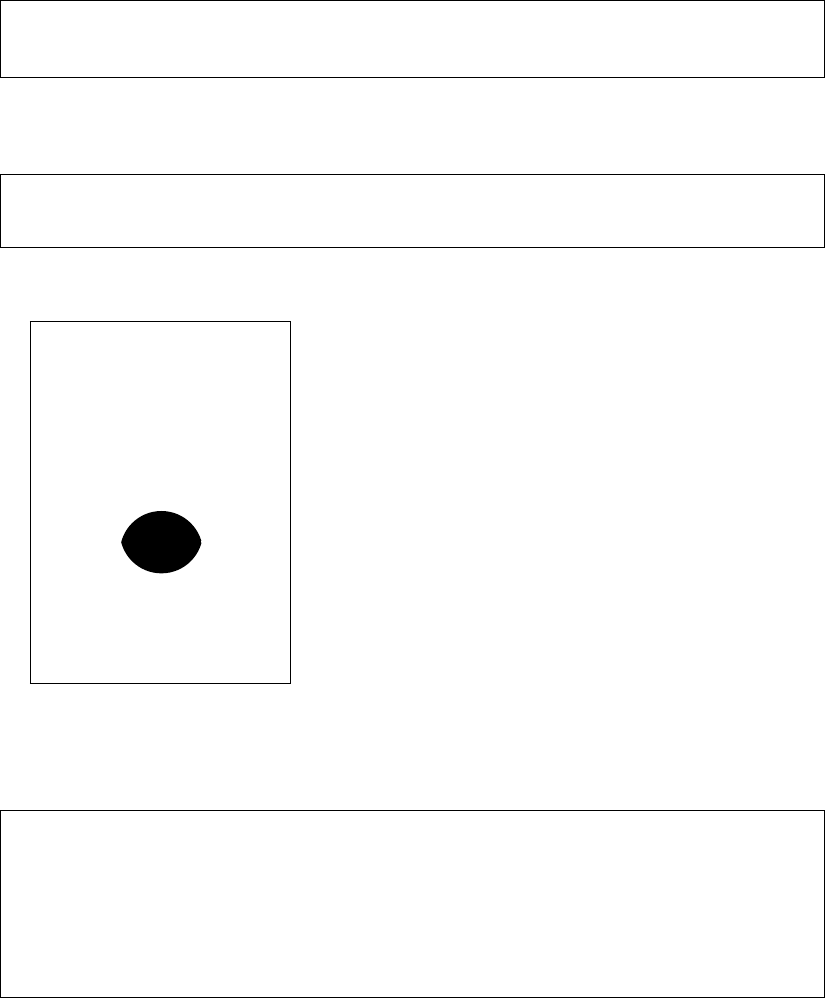
84 Chapter 18. Drawing on PDFs
18.3 Clipping with paths
-clip Clip
-clipeo Clip, even odd
We can use a path to form a clipping region for subsequent content using
-clip
or
-clipeo
.
For example:
cpdf -create-pdf AND -draw -circle "300 300 100" -clip
-circle "300 350 100" -fill -o out.pdf
Here is the result:
18.4 Path parameters
-strokecol "g" | "r g b" | "c y m k" | <namedcolour> Set stroke colour
-fillcol "g" | "r g b" | "c y m k" | <namedcolour> Set fill colour
-thick <n> Set stroke thickness
-cap butt | round | square Set cap
-join miter | round | bevel Set join
-miter <n> Set miter limit
-dash <pattern> Set dash pattern
We can set stroke and fill colours for our paths, either as greyscale (one component), RGB (three
components) or CYMK (four components), or by naming a colour as described in Chapter 8:

Chapter 18. Drawing on PDFs 85
cpdf -create-pdf AND -draw -circle "200 200 100" -thick 20
-strokecol 0.5 -fillcol "0.2 0.7 0.2" -strokefill -o out.pdf
Here is the result:
We can set line caps and joins with -cap, -join:
cpdf -create-pdf AND -draw -to "100 100"
-join round -cap round -thick 40
-line "200 200" -line "220 100" -stroke
-o out.pdf
Then we see:
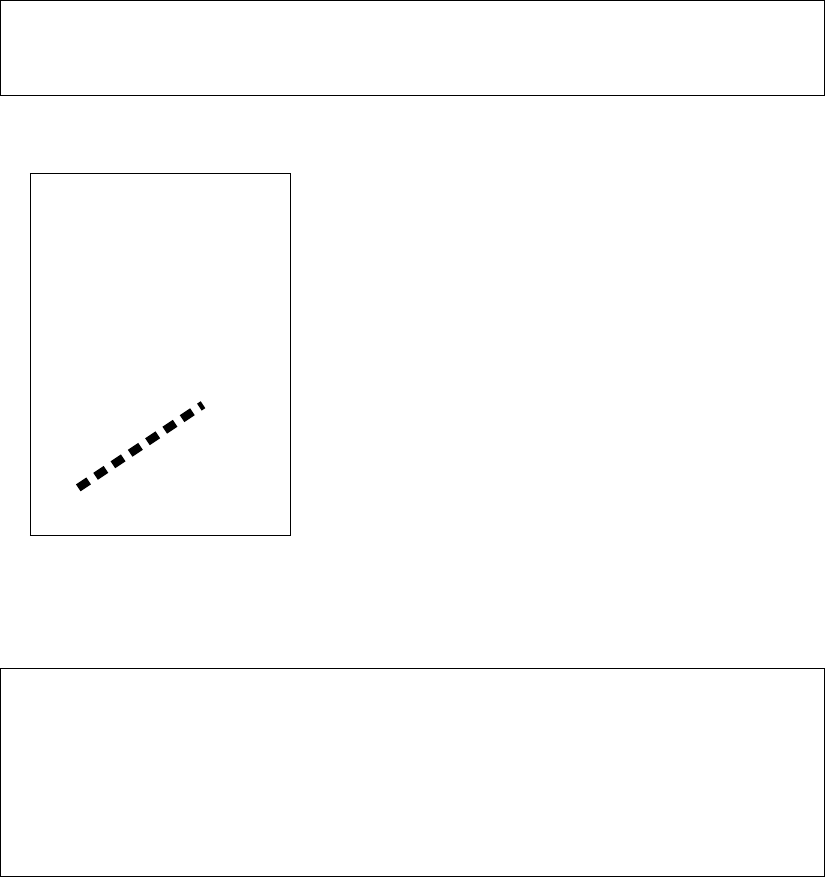
86 Chapter 18. Drawing on PDFs
The miter limit (see PDF reference for details) may be set with -miter.
Lines may have dash patterns. A dash pattern consists of one or more numbers. All save the
last form the list of dash lengths and gap lengths. The last is the phase, which defines how far
along the pattern we start. For example, using a dash pattern of ”30 20 0” i.e black 30, white 20,
phase 0:
cpdf -create-pdf AND -draw -to "100 100"
-dash "30 20 0" -thick 20 -line "400 300" -stroke
-o out.pdf
Here is the result:
18.5 The graphics stack and matrices
-push Push graphics stack
-pop Pop graphics stack
-matrix "a b c d e f" Append to graphics matrix
-mtrans "tx ty" Translate the graphics matrix
-mrot "x y a"
Rotate the graphics matrix counterclockwise around
(x, y)
by angle
a
in radians
-mscale "x y sx sy" Scale the graphics matrix around (x, y)
-mshearx "x y a" Shear the graphics matrix in X around (x, y) by angle a
-msheary "x y a" Shear the graphics matrix in Y around (x, y) by angle a
PDF maintains a stack of graphics state, which we can manipulate with
-push
which stores
the current state, then modify the state for our own purposes, and then use
-pop
to restore the
previous state. Such invocations may be nested. Here is a simple example:
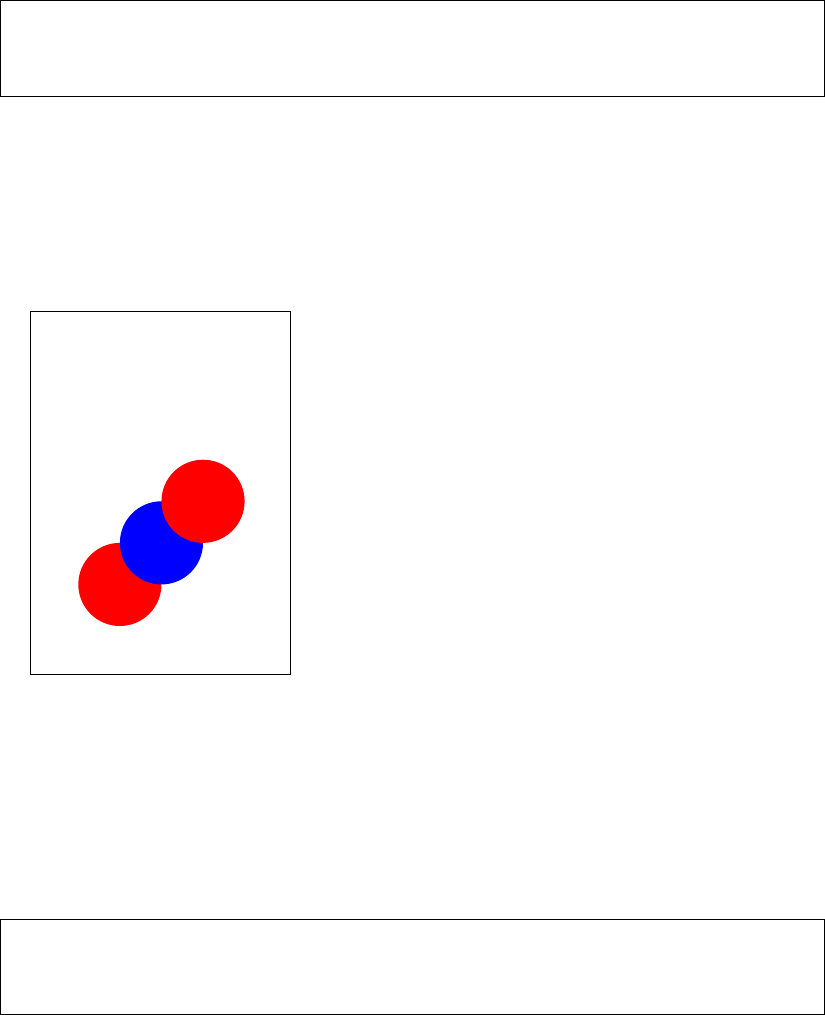
Chapter 18. Drawing on PDFs 87
cpdf -create-pdf AND -draw -circle "200 200 100" -fillcol red -fill
-push -fillcol blue -circle "300 300 100" -fill
-pop -circle "400 400 100" -fill -o out.pdf
When we use -pop the colour returns to the saved one:
One very common use for a
-push
/
-pop
pair is to isolate the effects of an operation which
modifies the current transformation matrix. These operations are used to translate, rotate, scale
and so on. For example:
cpdf -create-pdf AND -draw -circle "200 200 100" -stroke -push
-mrot "0 0 -0.3" -mscale "0 0 1.5 2" -circle "200 200 100" -stroke
-pop -circle "200 200 50" -fill -o out.pdf
This is the result. See how the graphics transformation is undone when -push is invoked:
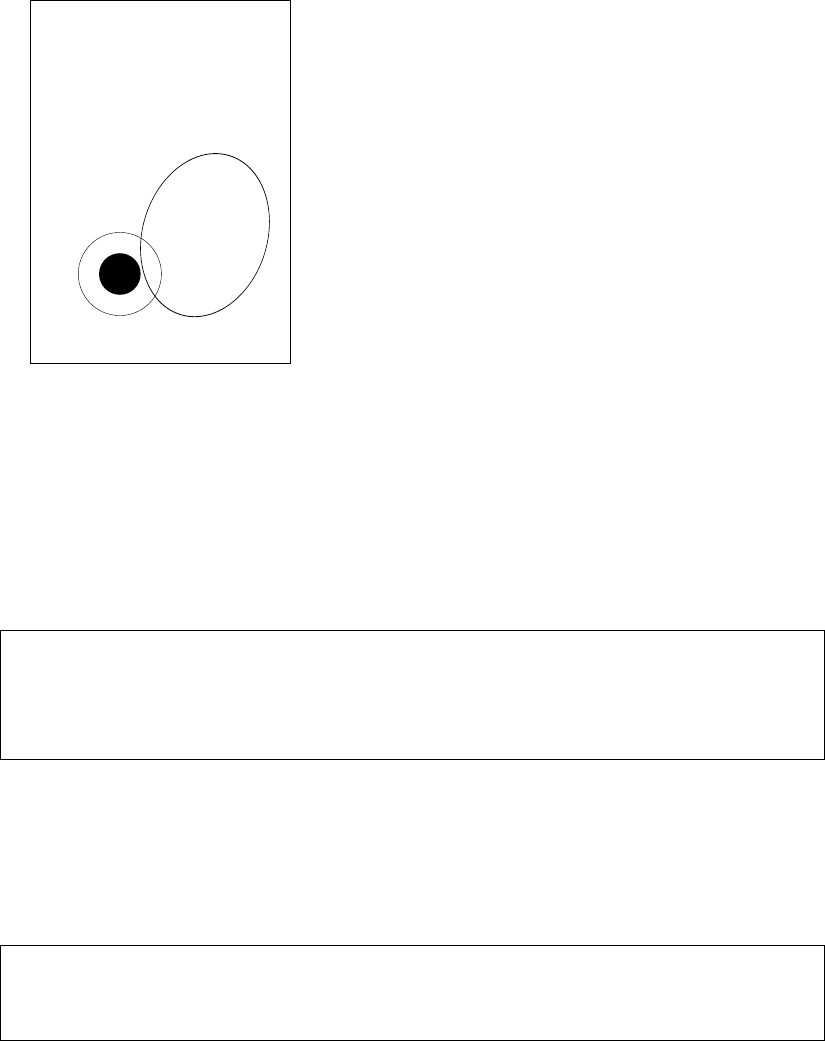
88 Chapter 18. Drawing on PDFs
This is important because, in the absence of
-push
and
-pop
there would be no way to reverse
the effect of a graphics matrix modification except to manually calculate its inverse and apply it.
NB: When writing text (see below) the
-font
option is not subject to
-push
and
-pop
. Text
is set the the font most recently chosen on the command line.
18.6 Re-use with XObjects
-xobj-bbox "x y w h" Specify the bounding box for xobjects
-xobj <name> Begin saving a sequence of graphics operators
-end-xobj End saving a sequence of graphics operators
-use <name> Use a saved sequence of graphics operators
In our examples, we have sometimes had to write the same operations multiple times. To avoid
this, PDF has a mechanism called an XObject. This allows us to save a set of operations for
re-use in different contexts, or on different pages. For example, here we store an XObject which
just strokes a circle. We then
-use
it once, and alter the colour and transformation matrix and
-use it again.
cpdf -create-pdf AND -draw -xobj-bbox "0 0 200 200" -xobj A
-circle "100 100 50" -stroke -end-xobj
-use A -strokecol red -mtrans "20 20" -use A -o out.pdf
Note that we must specify a bounding box for the XObject with
-xobj-bbox
. Here is the
result:
Chapter 18. Drawing on PDFs 89
XObjects may be nested.
18.7 Images
-draw-jpeg <name>=<filename> Load a JPEG from file and name it
-draw-png <name>=<filename> Load a PNG from file and name it
-image <name> Draw an image which has already been loaded
We can include a 24bit non-transparent and non-interlaced PNG, or any JPEG by using
-draw-jpeg
or
-draw-png
to load it and assign it a name. We can then use
-image
to
use it at any point:
cpdf -create-pdf AND -draw -draw-png A=sheet.png
-mscale "0 0 400 294" -image A -o out.pdf
Here is the result:
90 Chapter 18. Drawing on PDFs
You can see we had to scale by the width and height of the image to draw it at the size we
expect.
18.8 Transparency
-fill-opacity <n> Set opacity
-stroke-opacity <n> Set stroke opacity
We can set fill and stroke transparencies, between 0 (fully transparent) and 1 (fully opaque):
cpdf -create-pdf AND -draw -fill-opacity 0.5
-circle "250 300 150" -fill -circle "350 300 150" -fill
-o out.pdf
Here is the result:
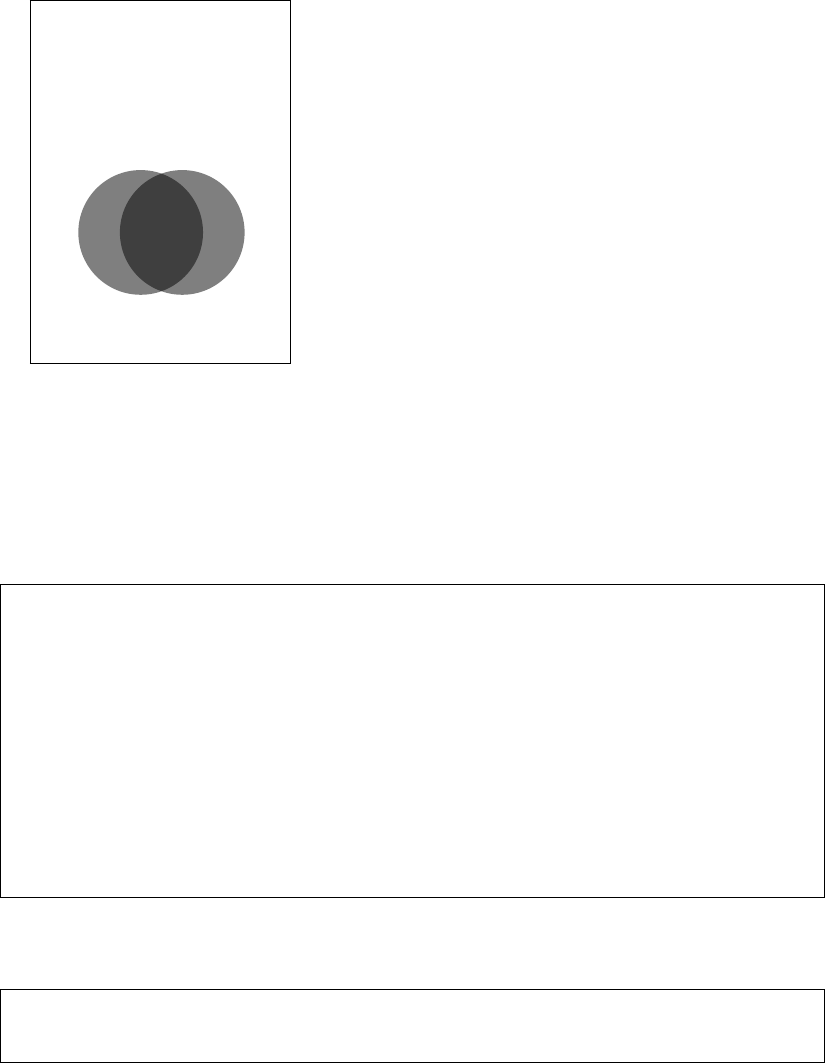
Chapter 18. Drawing on PDFs 91
Notice that we used
-fill
twice, to ensure each circle was in a different path. If they had been
part of the same path, the effect would be different.
18.9 Text
-bt Begin text
-et End text
-text <text> Draw text
-stext <text> Draw text with %specials
-font <fontname> Set font
-font-size <n> Set font size
-leading <n> Set leading
-charspace <n> Set character spacing
-wordspace <n> Set word space
-textscale <n> Set text scale
-rendermode <n> Set text rendering mode
-rise <n> Set text rise
-nl New line
We can draw text in a text section, which must start with -bt and end with -et. For example:
cpdf -create-pdf AND -draw -mtrans "50 50" -font Helvetica -font-size 144
-bt -text "Hello" -et -o out.pdf
Here is the result:
92 Chapter 18. Drawing on PDFs
Hello
If we use
-stext
instead of
-text
the usual special values from Chapter 8 (with the exception
of URL links) may be used:
cpdf -create-pdf AND -draw -mtrans "50 50" -font-size 144
-bt -stext "Page %Page" -et -o out.pdf
Now we see:
Page 1
We can use
-text
multiple times, interspersing operators which change the text state, such as
font and font size:
cpdf -create-pdf AND -draw -mtrans "10 20" -font-size 72
-bt -text "Different " -font Times-BoldItalic -text "fonts"
-font-size 36 -text " and sizes" -et -o out.pdf
Chapter 18. Drawing on PDFs 93
Here is the result:
Different fonts and sizes
We can alter the character space, word space, horizontal scaling (100 = no scaling, less than 100
shrink, more than 100 stretch), and text rise:
cpdf -create-pdf AND -draw -mtrans "10 20" -font-size 72
-bt -textscale 75 -charspace 5 -wordspace 20 -text "Different "
-font Times-BoldItalic -text "fonts" -font-size 36 -rise 40
-text " and sizes" -et -o out.pdf
Now we see:
Different fonts
and sizes
Text may appear on multiple lines. We set up the line spacing with
-leading
then make new
lines with -nl:

94 Chapter 18. Drawing on PDFs
cpdf -create-pdf AND -draw -mtrans "100 200" -font-size 50
-leading 55 -bt -text "This is" -nl -text "on multiple"
-nl -text "lines" -et -o out.pdf
Now we have:
This is
on multiple
lines
When composing text, we may need to find the width of a piece of text to see where to break it,
or for right alignment. We can use -text-width for this:
cpdf -font Times-Roman -font-size 20 -text-width "Hello"
The result is in points.
We can change the text rendering mode to show outline text or, in this example, to use text
as a clipping region:
cpdf -create-pdf AND -draw -rendermode 7 -mtrans "100 200" -font-size 50
-leading 55 -bt -text "This is" -nl -text "on multiple"
-nl -text "lines" -et -circle "100 0 100" -fill -o out.pdf
Chapter 18. Drawing on PDFs 95
This is
on multiple
lines
Here are the text rendering modes:
0 Fill text (default)
1 Stroke text
2 Fill, then stroke text
3 Neither fill nor stroke (invisible)
4 Fill text and add to path for clipping
5 Stroke text and add to path for clipping
6 Fill, then stroke text and add to path for clipping
7 Add text to path for clipping
NB: When writing text the
-font
option is not subject to
-push
and
-pop
. Text is set the
the font most recently chosen on the command line.
NB: To use a TrueType font with -draw, the -load-ttf must appear after the -draw.
NB: To use -embed-std14, put it before -draw.
18.10 The next page
-newpage Move to a fresh page
If the drawing range is a single page, and the next page already exists, the drawing operation
-newpage
operation moves to the next page. Otherwise, it creates a fresh page of the same
dimensions as the last page of the document, and sets the drawing range to just that page. For
example:
cpdf -create-pdf AND -draw -bt -text "Page 1" -et
-newpage -bt -text "Page 2" -et
-o out.pdf
96 Chapter 18. Drawing on PDFs
This will create a two page PDF with ”Page 1” written on page one and ”Page 2” written on
page two.

Chapter 19
Miscellaneous
cpdf -draft [-boxes] [-draft-remove-only <n>] in.pdf [<range>] -o out.pdf
cpdf -remove-all-text in.pdf [<range>] -o out.pdf
cpdf -blacktext in.pdf [<range>] -o out.pdf
cpdf -blacklines in.pdf [<range>] -o out.pdf
cpdf -blackfills in.pdf [<range>] -o out.pdf
cpdf -thinlines <minimum thickness> in.pdf [<range>] -o out.pdf
cpdf -clean in.pdf -o out.pdf
cpdf -set-version <version number> in.pdf -o out.pdf
cpdf -copy-id-from source.pdf in.pdf -o out.pdf
cpdf -remove-id in.pdf -o out.pdf
cpdf -list-spot-colors in.pdf
cpdf -print-dict-entry <key> in.pdf
cpdf -remove-dict-entry <key> [-dict-entry-search <term>]
in.pdf -o out.pdf
cpdf -replace-dict-entry <key> -replace-dict-entry-value <value>
[-dict-entry-search <term>] in.pdf -o out.pdf
cpdf -remove-clipping [<range>] in.pdf -o out.pdf
cpdf -obj <obj num> in.pdf
cpdf -extract-stream[-decompress] <obj num> in.pdf [-o out.dat | -stdout]
19.1 Draft Documents
The
-draft
operation removes bitmap (photographic) images from a file, so that it can be
printed with less ink. Optionally, the
-boxes
option can be added, filling the spaces left blank
with a crossed box denoting where the image was. This is not guaranteed to be fully visible
97
98 Chapter 19. Miscellaneous
in all cases (the bitmap may be have been partially covered by vector objects or clipped in the
original). For example:
cpdf -draft -boxes in.pdf -o out.pdf
To remove a single image only, specify
-draft-remove-only
, giving the name of the im-
age obtained by a call to
-image-resolution
as described in Section 13.3 and giving the
appropriate page. For example:
cpdf -draft -boxes -draft-remove-only "/Im1" in.pdf 7 -o out.pdf
To remove text instead of images, use the -remove-all-text operation:
cpdf -remove-all-text in.pdf -o out.pdf
19.2 Blackening Text, Lines and Fills
Sometimes PDF output from an application (for instance, a web browser) has text in colors
which would not print well on a grayscale printer. The
-blacktext
operation blackens all text
on the given pages so it will be readable when printed.
This will not work on text which has been converted to outlines, nor on text which is part of
a form.
cpdf -blacktext in.pdf -o out.pdf
The -blacklines operation blackens all lines on the given pages.
cpdf -blacklines in.pdf -o out.pdf
The -blackfills operation blackens all fills on the given pages.
cpdf -blackfills in.pdf -o out.pdf
Contrary to their names, all these operations can use another color, if specified with -color.
19.3 Hairline Removal
Quite often, applications will use very thin lines, or even the value of 0, which in PDF means
”The thinnest possible line on the output device”. This might be fine for on-screen work, but
Chapter 19. Miscellaneous 99
when printed on a high resolution device, such as by a commercial printer, they may be too
faint, or disappear altogether. The
-thinlines
operation prevents this by changing all lines
thinner than <minimal thickness> to the given thickness. For example:
cpdf -thinlines 0.2mm in.pdf [<range>] -o out.pdf
Thicken all lines less than 0.2mm to that value.
19.4 Garbage Collection
Sometimes incremental updates to a file by an application, or bad applications can leave data in
a PDF file which is no longer used. This function removes that unneeded data.
cpdf -clean in.pdf -o out.pdf
NB: This operation is deprecated. This work is now done by default upon writing any file.
19.5 Change PDF Version Number
To change the pdf version number, use the
-set-version
operation, giving the part of the
version number after the decimal point. For example:
cpdf -set-version 4 in.pdf -o out.pdf
Change file to PDF 1.4.
This does not alter any of the actual data in the file — just the supposed version number. For
PDF versions starting with 2 add ten to the number. For example, for PDF version 2.0, use
-set-version 10.
19.6 Copy ID
The
-copy-id-from
operation copies the ID from the given file to the input, writing to the
output.
cpdf -copy-id-from source.pdf in.pdf -o out.pdf
Copy the id from source.pdf to the contents of in.pdf, writing to out.pdf.
If there is no ID in the source file, the existing ID is retained. You cannot use
-recrypt
with
-copy-id-from.

100 Chapter 19. Miscellaneous
19.7 Remove ID
The -remove-id operation removes the ID from a document.
cpdf -remove-id in.pdf -o out.pdf
Remove the ID from in.pdf, writing to out.pdf.
You cannot use -recrypt with -remove-id.
19.8 List Spot Colours
This operation lists the name of any “separation” color space in the given PDF file.
cpdf -list-spot-colors in.pdf
List the spot colors, one per line in in.pdf, writing to stdout.
19.9 PDF Dictionary Entries
This is for editing data within the PDF’s internal representation. Use with caution. To print a
dictionary entry:
cpdf -print-dict-entry /URI in.pdf
Print all URLs in annotation hyperlinks in.pdf.
To remove a dictionary entry:
cpdf -remove-dict-entry /One in.pdf -o out.pdf
Remove the entry for /One in every dictionary in.pdf, writing to out.pdf.
cpdf -remove-dict-entry /One -dict-entry-search "\{I : 1\}"
in.pdf -o out.pdf
Replace the entry for
/One
in every dictionary
in.pdf
if the key’s value is the given CPDFJSON
value, writing to out.pdf.
To replace a dictionary entry, give the replacement value in CPDFJSON format:

Chapter 19. Miscellaneous 101
cpdf -replace-dict-entry /One -replace-dict-entry-value "\{I : 2\}"
in.pdf -o out.pdf
Remove the entry for /One in every dictionary in.pdf, writing to out.pdf.
cpdf -replace-dict-entry /One -dict-entry-search "\{I : 1\}"
-replace-dict-entry-value "\{I : 2\}" in.pdf -o out.pdf
Remove the entry for
/One
in every dictionary
in.pdf
if the key’s value is the given value, writing
to out.pdf.
19.10 Removing Clipping
The -remove-clipping operation removes any clipping paths on given pages from the file.
cpdf -remove-clipping in.pdf -o out.pdf
Remove clipping paths in in.pdf, writing to out.pdf.
19.11 Exploring PDFs
The
-obj
operation prints an object to standard output, given the object number. Number 0 is
the trailer dictionary, so we begin there:
$ cpdf -obj 0 in.pdf
"<</Root 1256 0 R/Length 588/ID[('\029\\t>\249\157\182F_\153V\175z[\234\196)
('\029\\t>\249\157\182F_\153V\175z[\234\196)]/Info 1351 0 R/Size 1406>>"
$ cpdf -obj 1256 in.pdf
"<</OpenAction 1238 0 R/PageLabels<</Nums[0<</S/r>>16<</S/D>>]>>/PageMode
/UseOutlines/Names 924 0 R/Outlines 838 0 R/Pages 851 0 R/Type/Catalog>>"
$ cpdf -obj 1238 out.pdf
"<</D[1225 0 R/Fit]/S/GoTo>>"
A stream may be extracted with
-extract-stream
or
-extract-stream-decompress
,
which decompresses it first where possible:
$ cpdf -obj 0 hello.pdf
"<</Size 4/Root 4 0 R/ID[(\232\20625\030\179/\176q:O\202\135\176u\137)
(\232\20625\030\179/\176q:O\202\135\176u\137)]>>"
$ cpdf -obj 4 hello.pdf
"<</Type/Catalog/Pages 1 0 R>>"
$ cpdf -obj 1 hello.pdf
102 Chapter 19. Miscellaneous
"<</Type/Pages/Kids[3 0 R]/Count 1>>"
$ cpdf -obj 3 hello.pdf
"<</Type/Page/Parent 1 0 R/Resources<</Font<</F0<</Type/Font/Subtype/Type1/BaseFont
/Times-Italic>>>>>>/MediaBox[0 0 595.275590551 841.88976378]/Rotate 0/Contents
[2 0 R]>>"
$ cpdf -extract-stream-decompress 2 hello.pdf -stdout
1 0 0 1 50 770 cm BT/F0 36 Tf(Hello, World!)Tj ET
By these mechanisms, ad-hoc exploration of PDF files is possible.

Appendix A
Dates
A.1 PDF Date Format
Dates in PDF are specified according to the following format:
D:YYYYMMDDHHmmSSOHH'mm'
where:
• YYYY is the year;
• MM is the month;
• DD is the day (01-31);
• HH is the hour (00-23);
• mm is the minute (00-59);
• SS is the second (00-59);
• O is the relationship of local time to Universal Time (UT), denoted by ’+’, ’-’ or ’Z’;
• HH is the absolute value of the offset from UT in hours (00-23);
• mm is the absolute value of the offset from UT in minutes (00-59).
A contiguous prefix of the parts above can be used instead, for lower accuracy dates. For
example:
D:2014 (2014)
D:20140103 (3rd January 2014)
103

104 Appendix A. Dates
D:201401031854-08'00' (3rd January 2014, 6:54PM, US Pacific Standard Time)
A.2 XMP Metadata Date Format
These are the possible data formats for -set-metadata-date:
YYYY
YYYY-MM
YYYY-MM-DD
YYYY-MM-DDThh:mmTZD
YYYY-MM-DDThh:mm:ssTZD
where:
YYYY year
MM month (01 = Jan)
DD day of month (01 to 31)
hh hour (00 to 23)
mm minute (00 to 59)
ss second (00 to 59)
TZD time zone designator (Z or +hh:mm or -hh::mm)
Appendix B
Change logs
B.1 CPDF Change Log
2.7 (February 2024)
New features:
o Split files to max size with -split-max
o Spray splits a file to multiple outputs by alternating pages
o List document and page info in JSON format
o List page labels in JSON format
o List fonts in JSON format
o Identify PDF/A, PDF/X, PDF/E, PDF/VT, PDF/UA in -info
o Identify AcroForm in -info
o Extract font files from a document
o List images on a page with -list-images[-json]
o Chop pages up into sections with -chop
o Build PDF files from JBIG2 streams, including globals
o Reprocess images within PDFs to further compress them
o Extract streams to disk
o Explore PDFs by printing objects
o Shift page boxes with -shift-boxes
Extended features:
o -list-images-used[-json] extends -image-resolution
o Use -raw with -extract-images to get PNMs
o -extract-images can extract JBIG2 images and their globals
o More PNGs - greyscale 1, 2, 4, 8, 16bpp and RGB 16bpp
o Report number of annotations in -page-info
o Specify image based only on file extension
o -squeeze updates old compression methods
o Show page size summary in -info
o Add -no-process-struct-trees to prevent merging of structure trees
Fixes:
o Added opam file in-source
o Fixed -set-annotations with page links
o Allow Exif JPEGs as well as JFIF ones in -jpeg and -draw-jpeg
105
o Only compress a stream if it actually makes it smaller
2.6.1 (September 2023)
o Fixed regression in UTF8 text with -add-text
2.6 (July 2023)
New features:
o Create new PDF documents or draw on existing ones with -draw
o Embed TrueType fonts with -load-ttf
o Embed the 14 standard fonts if requested
o Add links to parts of text with -add-text as %URL[|]
o Convert JPEGs and PNGs to PDFs with -jpeg and -png
o Export, import, and thereby round-trip annotations via JSON
o Show composition of PDF with -composition[-json]
o Use page labels like <iii> and <A-2> in page specifications
Extended features:
o Allow -utf8 with -split-bookmarks -o @B.pdf to produce UTF8 filenames
o -merge-add-bookmarks now works with unicode filenames
o Better transformation of some annotation types
o -list-annotations[-json] now respects page range
o Merge now merges structure trees (tagged PDF)
o Merge now rewrites clashing name tree entries
o Preserve /GoTo actions in bookmarks when merging
o UTF8 option for JSON output
o -info now shows object stream, /ID data, page mode and layout
o More options for viewer preference control
o More default colours, by using the CSS colour list
Fixes:
o Updated Yojson to remove dependency on Stream, ready for OCaml 5
o -typeset was opening files in text mode, instead of binary
o Fixed behaviour of -squeeze-no-pagedata / -squeeze-no-recompress
o Significant improvements to malformed file reading
o Allow DUP page specifications to use larger numbers
o Reworked functions transforming pages to better preserve patterns
2.5.1 (January 2022)
o Fix a regression where standard fonts could not be chosen
2.5 (January 2022)
New features:
o Can read as well as write PDFs in JSON format with -j
o New operation -typeset typesets a text file as a PDF
o New operation -table-of-contents makes table of contents from bookmarks
o New operations -impose and -impose-xy for document imposition
o New operation -print-font-table gives (charcode, unicode, glyph name) triples
o New -print-dict-entry operation prints values for a given key
o New -replace-dict-entry function to search & replace e.g URLs
o Prepend e.g 2DUP to a page range to make 1,2,3 --> 1,1,2,2,3,3 etc.
o Prepend NOT to a page range to invert it
o Output annotations in JSON form with -list-annotations-json
o Output bookmarks in JSON format with -list-bookmarks-json
o Load bookmarks in JSON format with -add-bookmarks-json
o New option -collate to collate pages when merging
o Text added in existing fonts is now encoding-aware (plus new raw mode)
Extended features:
o Extend -remove-dict-entry to allow search
o Annotation /QuadPoints processed in addition to /Rect when transforming pages
o When adding text or graphics, may choose CYMK or Grey instead of RGB
o The -list-fonts operation now obeys the range
o Can now search for a font by real name with -font
o Basic merging of AcroForms when merging documents
o Add -idir-only-pdfs to restrict -idir to just files ending in .pdf
o Option -debug-force now properly documented as -decrypt-force
Internal changes:
o Switch to Yojson for faster/better JSON input/output
o Environment variable CPDF_REPRODUCIBLE_DATES for testing
o Environment variable CPDF_DEBUG for -debug
o Effectively make stderr unbuffered
o Split cpdf.ml into separate modules
2.4 (June 2021)
o New operation -extract-images
o New operation -output-json et al. to export PDF files in JSON format
o New operations to manipulate Optional Content Groups
o New operation -stamp-as-xobject to add one PDF as an xobject in another
o Optional Content Groups now preserved when merging / stamping pages
o Listing, coalescing and modfiying Optional Content Groups.
o New -labels-progress option to improve page labels interface
o Appearance streams transformed when transforming annotations
o Bookmark destination positions transformed when transforming pages
o No longer depends on Bigarray or Unix modules
2.3 (patchlevel 1, December 2019)
o Fixed bug which prevented -info working on encrypted files
o Allow -shift with -add-text for additional adjustment
o Prepend and postpend directly to page content streams
2.3 (October 2019)
o Directly set and remove Trim, Art, and Bleed boxes
o Dump attachments to file
o Extended bookmark format, preserving all bookmark information
o New -pad-with, -pad-mutiple-before options
o Set or create XMP metadata
o Remove graphics clipping
o Extended support for reading malformed files
o Embed missing fonts by calling out to gs
o Set bookmarks open to a given level
o Create PDF files from scatch
o Remove single images by name
o Add trim marks
2.2 (patchlevel 1)
o Fix for inability to read null objects in streams
o Workaround for Adobe "Error 21" on re-saving encrypted files
o More efficient bookmark operations on files with many pages
o New operation -hard-box to clip contents to a given box
2.2 (March 2017)
o Perform arithmetic on dimensions when specifying size or position
o Add simple rectangles to PDF to blank things out
o Stamping operations now preserve annotations
o Decryption fully on-demand for speed.
o -keep-l keeps existing linearization status
o -remove-dict-entry to remove the contents of a dictionary entry
o -topline in addition to -midline
o -producer and -creator may be used to alter producer and creator
in conjunction with any other operation
o -topline and -midline now apply to stamps
o -list-spot-colours
o -bates-at-range and -bates-pad-to
o -print-page-labels
o -squeeze replaces smpdf
o Preserve more sharing of data when doing merges and page alterations
2.1 (December 2014)
o Encryption now much, much faster
o Faster parsing of delayed object streams on large files
o -decompress now leaves object streams decompressed
o Select pages by landscape-ness or portrait-ness in a page range
o New -open-at-page and -open-at-page-fit option to set the open action
o New -recrypt option to re-encrypt output
o Reads XMP metadata and outputs it on -info
o New -center position for text
o -stamp can now use positions, just like stamping text
o Better handling of permissions for files with user passwords
o Linearization excised
o Can encrypt or recrypt output of -split and -split-bookmarks now
o -args replaces -control with better behaviour
o Can scale a stamp to fit before stamping with -scale-stamp-to-fit
B.2 CamlPDF Change Log
(CamlPDF is the library CPDF is based upon)
2.7 (February 2024)
o Add opam file in-source
o Cope with more malformed bookmarks
o Remember and reapply inline image decode parameters
o Pdfimage extracts and stores JBIG2Globals
o Option to compress a stream only if it is made smaller
o Encode predictor for PNG Sub (bpc = 8, 3 components)
o Fix for LZWDecode streams which overfill the table
o New endpage_fast
o Remove some very old unused Pdfimage code
o Reconstruct tree in Pdfpage.pdf_of_pages for better bookmarks
o Cope with predictor dictionary not being end of inline image dictionary
2.6 (July 2023)
Merging improvements:
o Keep major PDF version number
o Merge /StructTreeRoot entries (Structure hierarchy / Tagged PDF)
o Disambiguate destination name trees when merging
o Preserve named destinations in bookmarks when merging
o Remove /OpenAction on merge
o Preserve first metadata seen on merge
Other:
o Cope with files with no /MediaBox at all
o Write IDs as Hexadecimal strings
o Replace Stream/Genlex and other deprecations for OCaml 5
o Allows malformed numbers --1, --2.5 etc.
o Support for alternative stubs for js_of_ocaml
o Push mk_id down to pdf_to_output so it works when writing to
non-file destinations
o Fix Pdf.getnum and Pdf.parse_rectangle to cope with indirects
o Ignore data check errors in flate decoding
o Now reads many more files from Stressful PDF Corpus
o Revert 'build byte code top level camlpdf.top by default'
o Pdfpage.add_prefix now detects and fixes non-ISO PDFs
o Loosen EI check on inline image lexing
o Compress inline images upon writing if uncompressed
o Retired old unused modules to old/
o Cope with /Crypt identity filters
o Ability to redirect error output
o Harden ASCII85Decode against whitespace
2.5 (January 2022)
o Build byte code top level camlpdf.top by default
o Replace deprecated C interface functions for OCaml 5.0
o Document most undocumented functions
o Pdfpage.change_pages now preserves object streams
o Width calculation in Pdfstandard14 now more efficient
o Charcode and text extractors have font not fontdict counterparts
o Pdftext.charcode_extractor_of_font copes with more encodings
o Add Pdftext.simplify_utf16be
o Merge now merges AcroForms
o Fix Pdfio.setinit and friends to deal with 0-length data
o Harden Pdfmarks against erroneous empty /Title in doc outline
o AFM and glyphlists loaded from compressed sources
o Environment variable CAMLPDF_REPRODUCIBLE_IDS for testing
o Effectively make stderr unbuffered for all output
o A dictionary entry with null for its value now does not exist
o A missing mediabox now not fatal - we use the most-recently-seen
2.4 (June 2021)
o Prefixed all C stubs to avoid clashes with zlib / cryptokit
o Fix for zero-sized Pdfio.input_outputs
o Bad interaction between deferred decryption and object streams fixed
o Optional content groups merged when merging
o Pdfpage.change_pages can now alter bookmark destinations for transformed pages
o Preserves zero bytes in malformed names
o Merged files get fresh /ID
o Pdfpagelabels.write now removes labels when given an empty list
2.3 (patchlevel 2, 2020)
o Bad interaction between deferred decryption and object streams worked around
2.3 (patchlevel 1, December 2019)
o Updated Makefile to build on bytecode-only architectures
(thanks Ralf Treinen)
2.3 (October 2019)
o Malformed file reading for files with content before the header now works
o Switches to disable malformed file reading or always read as if malformed
o Fix to preserve integers > 2ˆ30 or < -2ˆ30 on 32 bit systems
o Allow [/DCT] as well as /DCT in inline image filter specifications
o Improvements to text width calculation (thanks Alain Frisch)
2.2 (patchlevel 1, September 2017)
o Code for adding annotations (thanks @waclena)
o Indirect encryption dictionaries
o Workaround for Adobe "Error 21" on re-saving encrypted files
o Fix reading of null objects in streams
2.2 (2017)
o Keeps was_linearized flag with every loaded PDF
2.1 (November 2014)
o Excised linearization. We recommend qpdflib / qpdf for this task now.
o Encryption now performed by fast C routines, replacing the OCaml ones
o Faster parsing of delayed object streams on large files
o New implementation of Pdf.page_reference_numbers. More robust
o Faster parsing by using better primitive operations for I/O
o Tighter spacing of output in Pdfwrite leading to smaller files
o Fixed pdf_of_pages not to produce duplicate page objects when multiple parts
of the output pdf come from the same input pdf
o Pdfpagelabels bug fixes, especially to alphabetic labels
o Read StemV etc. values from the AFM header directly
o Object streams may be written uncompressed for manual inspection
o Recrypting overhauled. Now a first class citizen.
1.7 (30th August 2013)
o Support for writing with object streams
o AES256ISO encryption support
o More compact writing of files
o Support for reading many malformed files
o Now under a standard LGPL license
o Has no dependencies
o First import into git for use with GitHub for open development
o Support for ocamlfind
